4. The editor
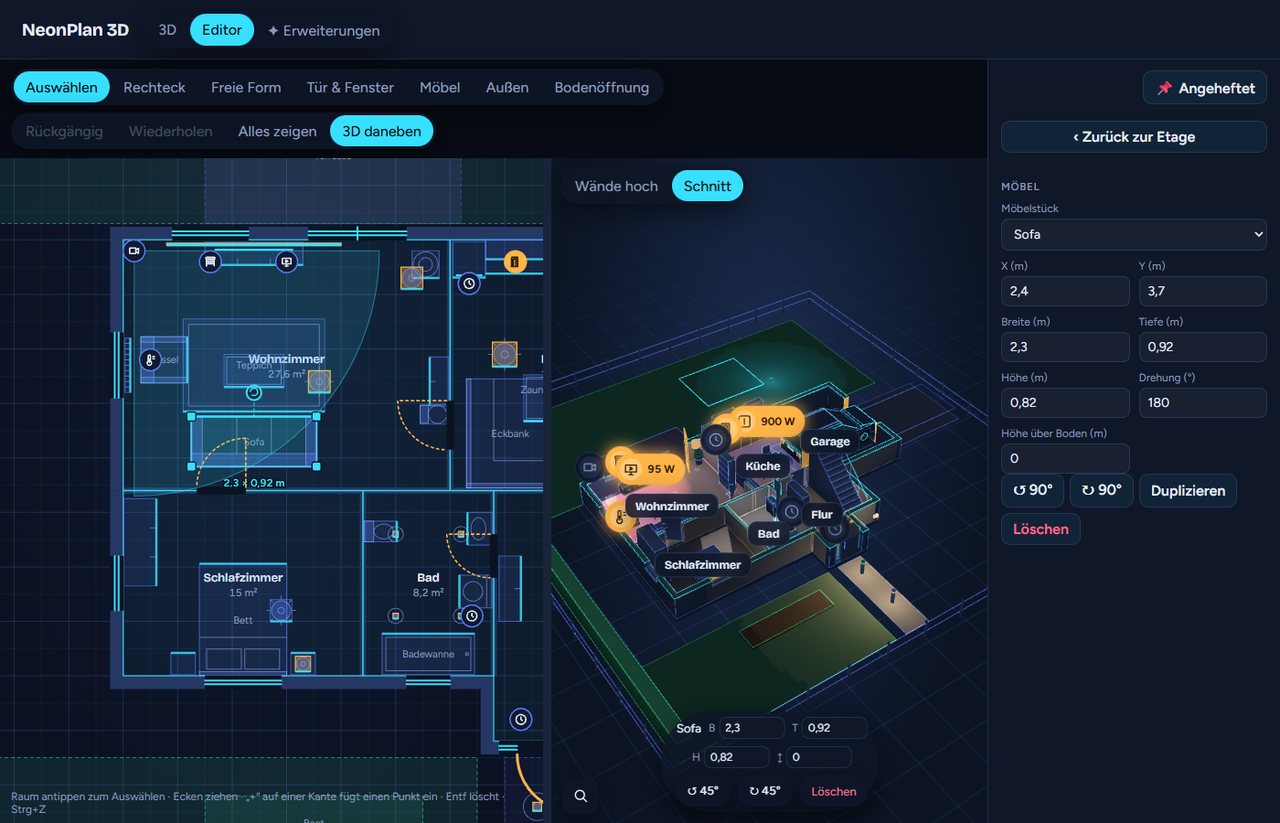
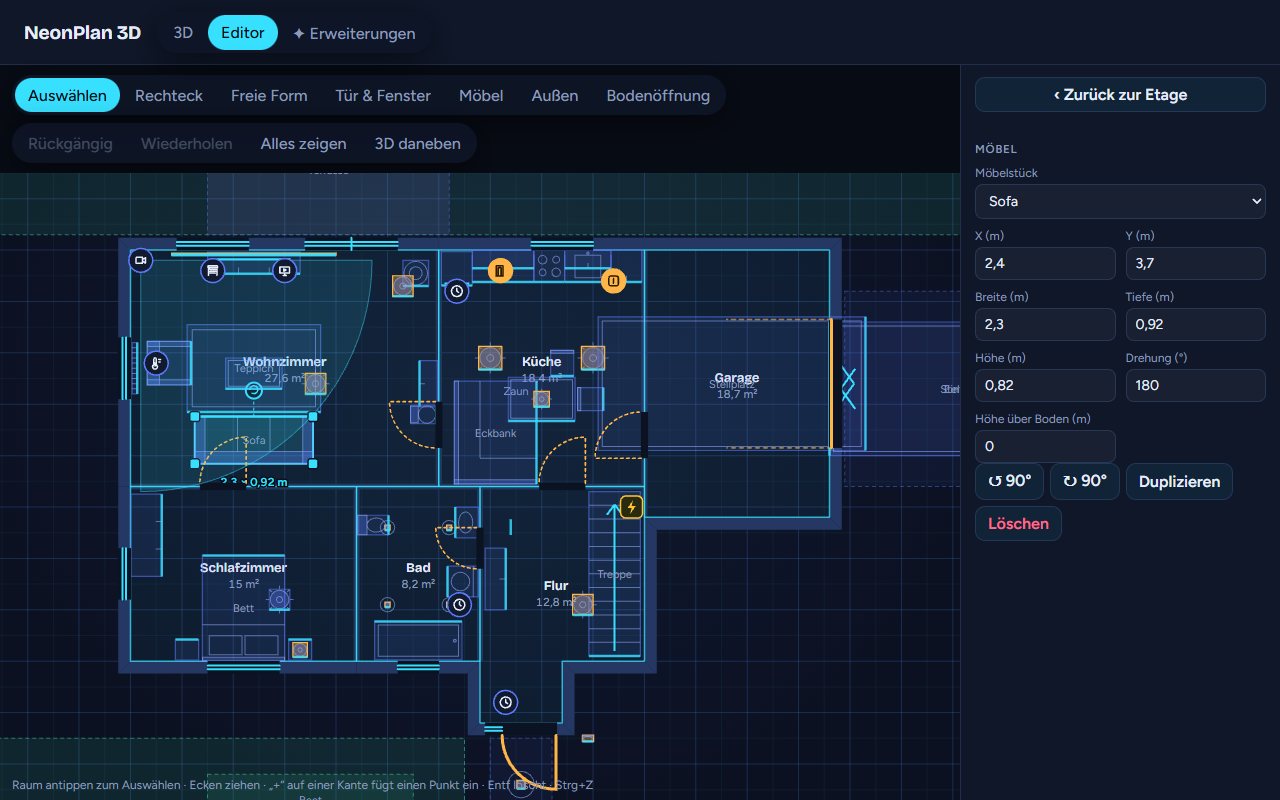
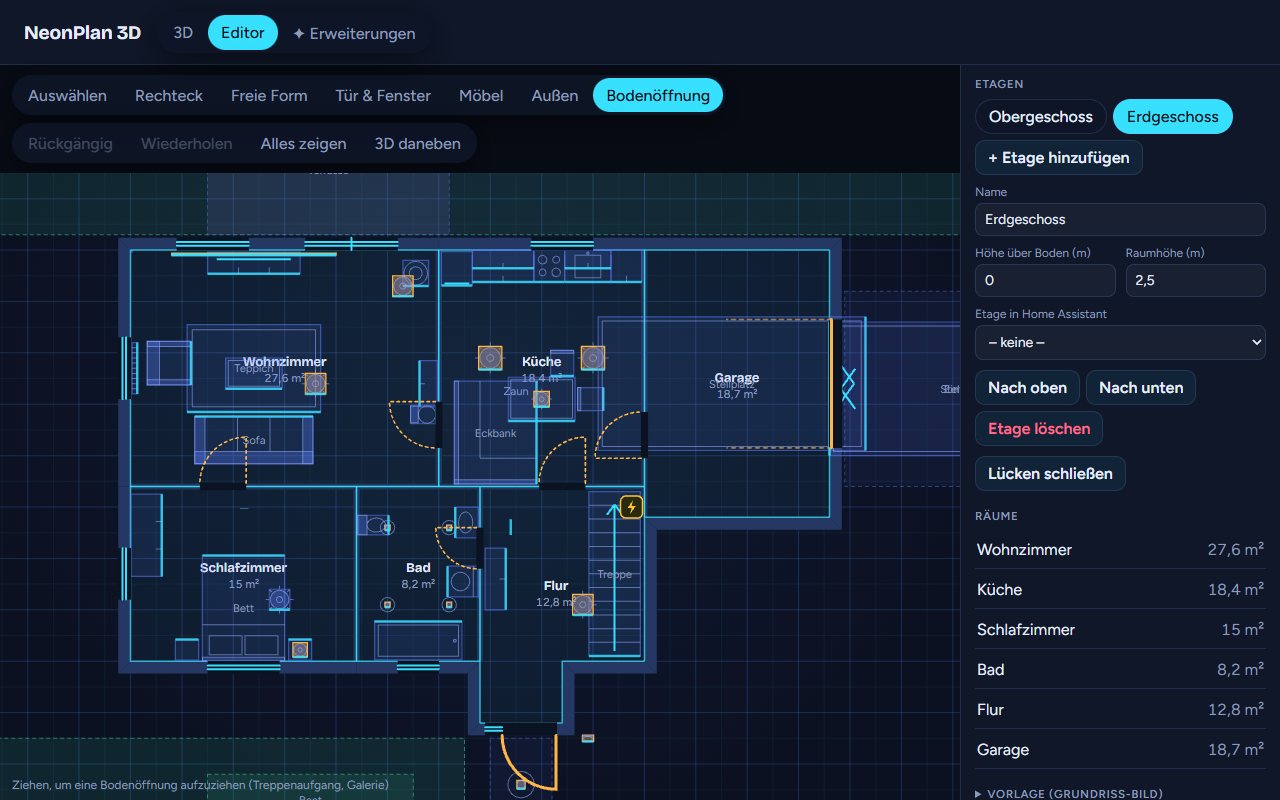
The editor has the floor plan in the middle, the toolbar at the top and the sidebar on the right. The sidebar always shows what is selected: the floor, a room, an item, a door or a device.
Drawing works best on a PC or tablet. On a phone you can look around and control your home; the editor says so there once (✕ hides the hint).
4.1 Tools
The toolbar at the top is grouped. On its far left is always the floor you are working on, see 4.2.
| Button | What it does |
|---|---|
| Select | Tap rooms, furniture, doors, windows and devices, move them, drag corners |
| Build ▾ | A menu with Room (drag a Rectangle, a Free shape corner by corner or By measure with typed wall lengths), Wall (a free-standing wall, e.g. a partition), Doors & windows (tap a wall), Floor opening (a hole in the floor, e.g. above the staircase) and Roof (see 4.19) |
| Outside ▾ | Outdoor (its type such as lawn, path or terrace and its shape, rectangle or free form, right in the menu) and Pool (Rectangular, Round, Oval or Free), see 4.17 |
| Furniture | Open the furniture library |
| Energy | Solar fields on the roof and in the garden, strings and energy devices, see 4.20 |
| ↶ / ↷ | Undo and redo (Ctrl+Z / Ctrl+Y) |
| 3D beside | The 3D view next to the plan, see 4.18 |
| Wall view | See a wall from the front, see 4.8 |
| Whole plan | Brings the floor's whole plan into view; with the garden while drawing outdoor areas or a pool |
A group's button names the tool in use, e.g. "Room: Free shape" or "Outdoor: Lawn". A tool stays in use after you placed something, so you can set several doors, windows, rooms or areas in a row. Esc or Select ends it. A short hint for the active tool is always shown at the bottom of the plan.
Dragging the sidebar wider: at its left edge the sidebar can be dragged wider or narrower with the mouse or a finger (280 to 640 pixels); the browser remembers the width.
Collapsing the sidebar: Collapse › at the top of the sidebar folds it to a narrow strip – the plan gets all the room, e.g. for moving furniture. ‹ unfolds it, a glowing ⚙ in the strip opens the settings of the selection. Choosing another tool unfolds it again by itself. The browser remembers the choice.
Mouse and touch: Two fingers pan and zoom. With a mouse, the wheel zooms; drag an empty spot or anywhere with the right or middle mouse button to pan (a right click without dragging still opens the menu). With the space bar held, dragging with the left button always pans, also over rooms and furniture (since 3.5.0). Ctrl+Z undoes, Ctrl+Y or Ctrl+Shift+Z redoes, Del deletes the selection, Esc cancels. The arrow keys nudge the selection (room, corner, furniture, device, wall, outdoor area) by one grid step, with Shift by 10 cm, with Alt by 1 cm; doors and windows slide along their wall.
Locking the floor plan and fixing: Lock floor plan in the floor settings (see 4.2) or by right-clicking a room locks all rooms, walls, doors, windows and outdoor areas, newly drawn ones too; a selected room then shows "🔒 Floor plan locked", a click on it unlocks. Furniture and devices are fixed one by one once they are in place: with the lock 🔓 Fix at the top of the form, with the key L or by right-click (long press on a tablet). The right-click menu also offers Duplicate, Turn 90° and Delete. Locked items can be selected and edited in their form, but not dragged, not nudged with the arrow keys and only deleted after asking; dragging then moves the view. Fixed furniture and devices also stay put in the 3D half.
4.2 Floors
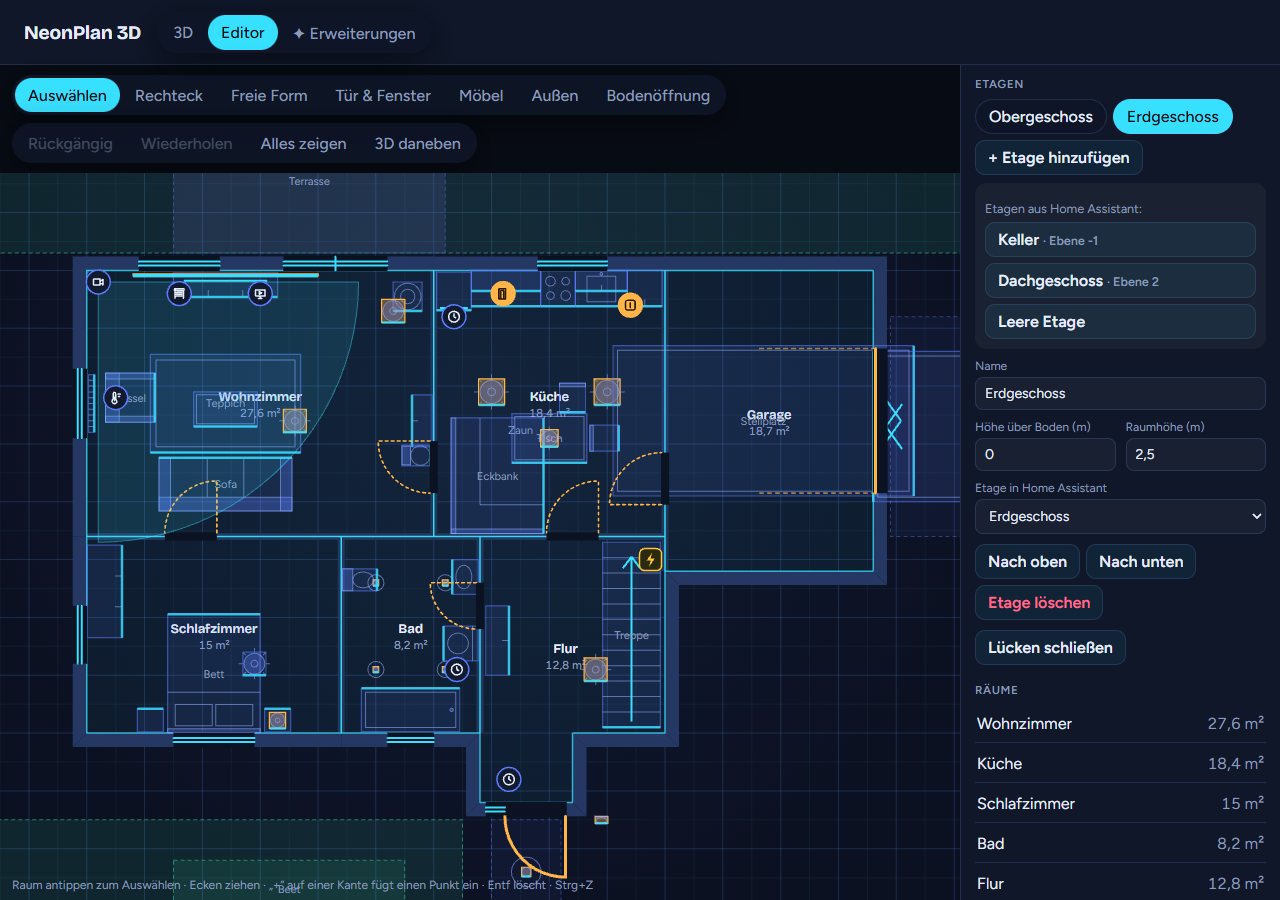
On the far left of the toolbar is Floor: Ground floor ▾ – the floor you are working on. The menu is there in every tool: it lists all floors (the top one first, the current one with ✓), below them Add floor and Floor settings. If Home Assistant has floors that are still missing, Add floor unfolds them to choose from, plus Empty floor. Floor settings opens the current floor's settings on the right; the sidebar shows the same when nothing is selected:
-
Lock floor plan locks all rooms, walls, doors, windows and outdoor areas, see 4.1.
-
Add floor creates a floor. Home Assistant floors that are still missing are offered.
-
Name, height above the ground and ceiling height set where the floor sits in the 3D house and how tall its walls are. Turn 90° turns everything on the floor about the middle of its rooms when a floor was drawn the wrong way round. Shift the floor moves everything on the floor (rooms, furniture, devices, outdoor areas, free walls, background image) by X and Z when a floor sits offset against the others; roof sections and cables stay. With Take every floor along ticked, shift and turn act on the whole house: every floor with the roof sections, outdoor areas, cables, meter and hologram. View as this floor's start remembers how the 3D pane beside stands right now – this floor then opens from that side, with that zoom and framing, e.g. the ground floor from the front and the upper floor from the back; ↺ removes it.
-
Background picture: in the Background section you load a photo or scan of your floor plan as a template under the plan (opacity adjustable). Move, scale and turn gives the picture handles in the plan like a piece of furniture: drag moves it, the lower right corner scales it, the round handle on top turns it (Shift for 15° steps). Done fixes it again, so you can draw over it undisturbed. Rotation (°) turns it to a tenth of a degree. The easiest way to the scale is 📏 Scale with a ruler: tap the start and end of a stretch of known length in the picture (a dimensioned wall), enter the real length – the picture is scaled to fit and the first point stays put. A skewed scan is put straight with 📐 Straighten: tap two points on a wall in the picture that should run horizontally or vertically – the picture turns to fit. Order: straighten first, then the scale, then draw the rooms over it. With the surroundings from the map loaded (4.26), 🗺 Align to the map does it all at once: tap two outer corners of the house in the picture, then the same two corners on the map's yellow outline – the picture is turned, scaled and moved to lie exactly on your house.
-
Floor in Home Assistant links the floor to an HA floor. Then "Add … rooms from HA areas" offers the areas of that floor as rooms.
-
Move up and Move down change the order, Delete floor removes it with its rooms.
-
Duplicate floor (since 3.0.1) puts the floor once more on top of the house: rooms, walls, windows, doors and furniture – for houses whose floors are laid out alike. The copy has no links to Home Assistant (the devices up there are other ones): choose areas, lights and sensors there anew.
-
Close gaps joins rooms that are up to 60 cm apart. This helps when you measured inside dimensions. The gap becomes the interior wall thickness.
-
Straighten slanted edges finds room edges that are only a few centimetres off straight (a corner 1 cm out makes slanted walls in 3D) and straightens them in every room that shares the corner. Walls drawn slanted on purpose stay.
4.3 Drawing rooms
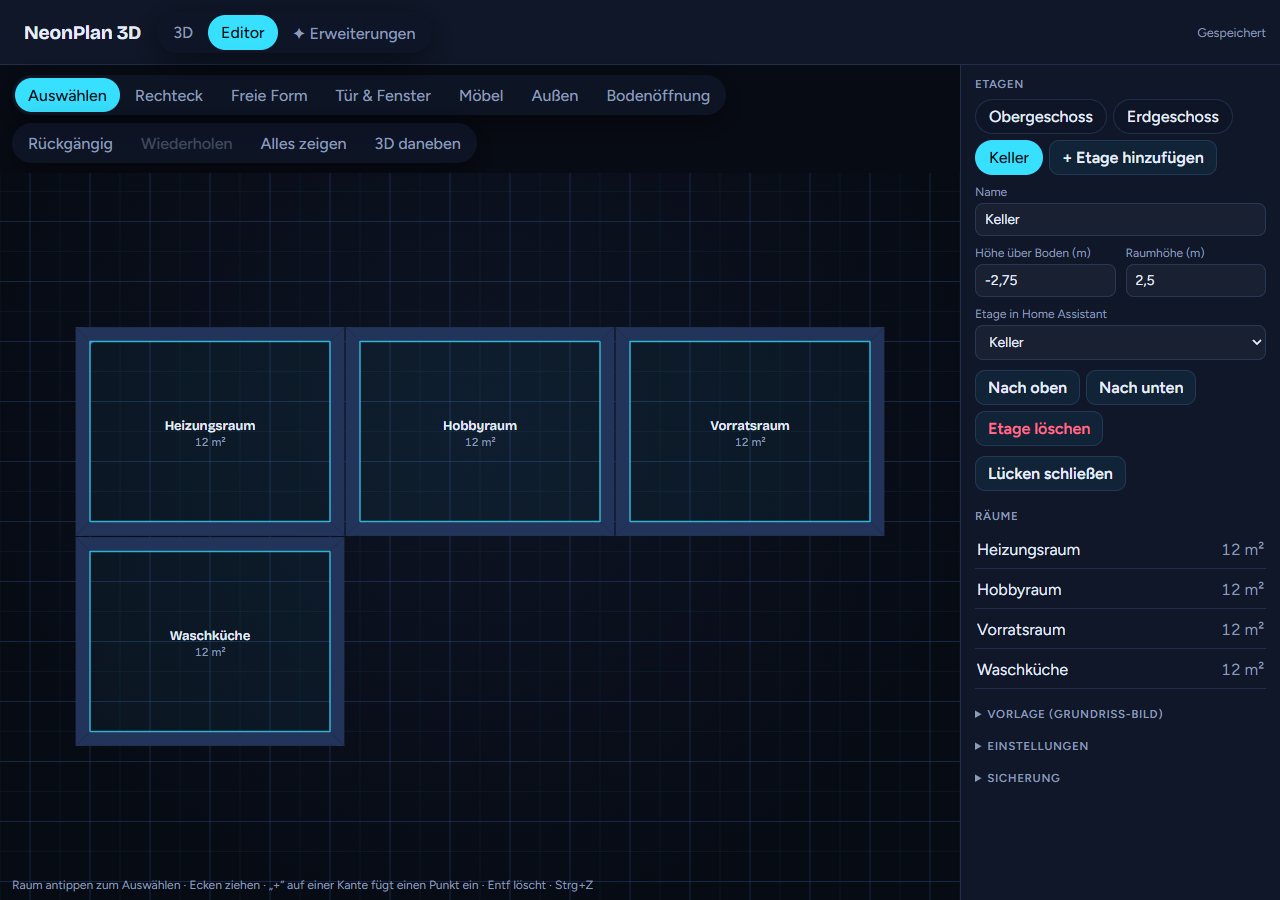
- Rectangle: Tap the plan and drag.
- Free shape: Set corner after corner. A tap on the first corner or Enter closes the room, Esc cancels. While you draw, every edge shows its length, the one you are pulling too.
- Moving corners: Tap a room with Select and drag its corners. The + on an edge inserts a corner.
- Snapping: Corners snap to the grid, to corners and edges of other rooms and to alignments. Hold Alt to move freely.
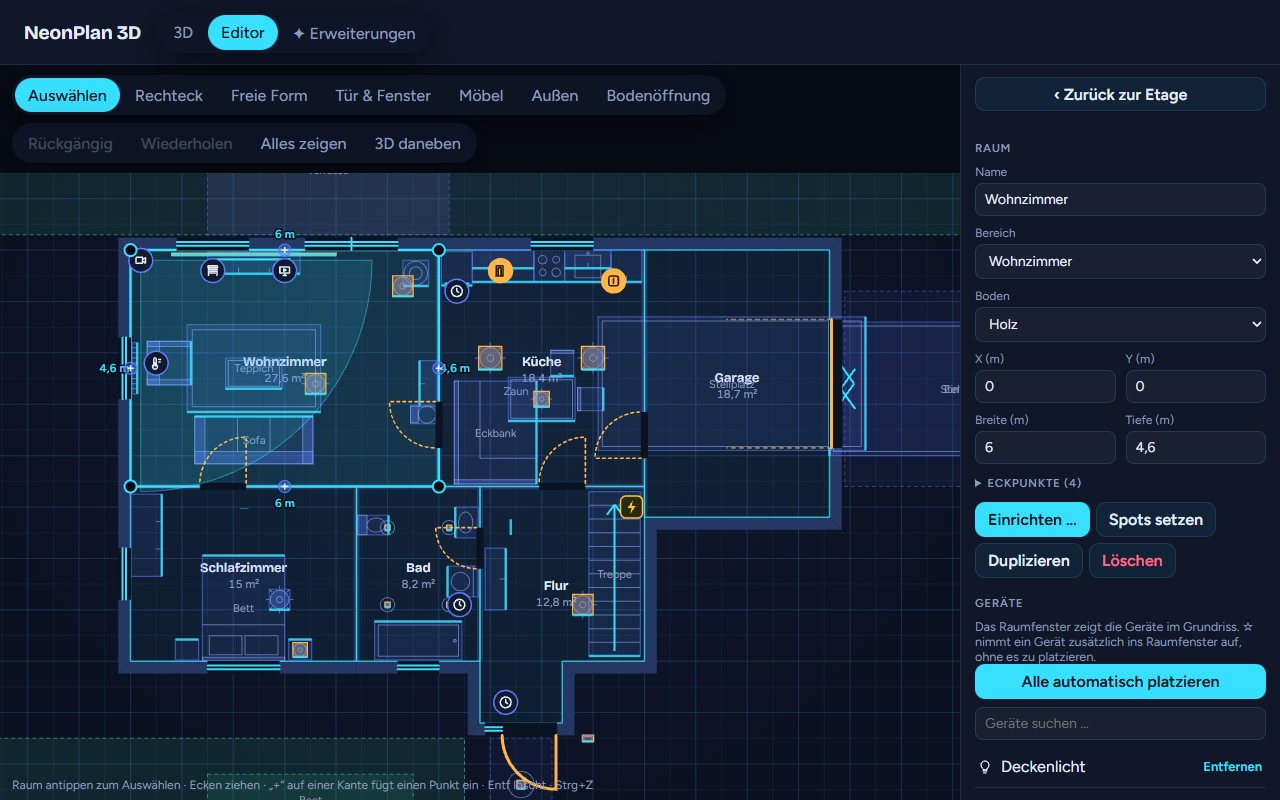
A selected room shows on the right:
- Name and Area: The link to a Home Assistant area matters most. Through it NeonPlan 3D finds the room's lights, covers, sensors and scenes.
- Move the name (since 3.2): a small handle ✥ stands left of the selected room's name in the plan. Drag it and the name stands elsewhere – in the plan and in 3D, e.g. where the names of many small rooms cover each other. It moves along when you move the room. A double tap on the handle or Name back to the middle of the room puts it back. How big the names are in 3D is set under ⚙ Settings → House → Size of the room names in 3D (50–200 %).
- Floor: wood, oak, tiles, carpet, stone or concrete show as a subtle pattern in 3D.
- View as this room's start: turn on 3D beside, turn and zoom the room the way it should show, then tap the button. When you tap the room in 3D later, the camera flies right there – angle, zoom and framing. ↺ removes it, and the room is shown from above again.
- The room's ID for the card option
room:(a tap copies it). - Ceiling height: empty = the floor's room height. With a height of its own the room's walls end there (unless a neighbouring room is taller), and ceiling lamps hang from that ceiling – e.g. 2.5 m in a living room beside a 5 m garage on the same floor.
- Area and net area: the area counts the drawn corners. Net takes off what walls occupy in the room: shared interior walls stand half in the room, outer walls grow outwards; free walls in the room and the gap behind a wall built in front of another (an installation wall) do not count.
- The room's Doors and windows as a list: a tap selects the opening – handy when a door is hard to hit in the plan.
- The Devices of the area, see 4.10.
- Furnish … for ready-made furniture sets, see 4.9.
- Duplicate and Delete.
4.4 Walls
Walls are created automatically: every shared edge of two rooms becomes an interior wall, every outer edge an exterior wall. Corners and T-junctions are mitred. You set the thicknesses under Settings.
Single walls: The Wall tool draws a free-standing wall, e.g. a partition that runs through half a room. Shift keeps it straight, Alt draws without snapping. Where it meets a room wall, the corner is mitred. When selected, drag the handles to move its ends or the line to move the whole wall. On the right you set X and Y (the middle of the wall, as with furniture; so you place it to the centimetre, off the grid), Length, Wall thickness and Height. In 3D it behaves like any interior wall. With rooms on one side only (a single wall drawn as an outer wall), the other side counts as outside: blinds and sills sit there whichever way the wall was drawn, and it turns to glass like the other outer walls when it faces the camera. You can put doors and windows into single walls too, with Doors & windows (see 4.7). Deleting the wall removes its doors and windows as well. Since 2.2 a single wall can slope too: ◢ Sloping in its form gives it a height at corner 1 and at corner 2 (the plan numbers its ends while it is selected), like a room wall (see Sloping wall below). Since 3.3.1 a single wall has its own colour for both sides under 🎨 Colour (shown in the homely styles) – a half-height installation wall in the bathroom or a carport's walls; ↺ goes back to the room wall's colour or the facade.
Wall height: Any wall can be lower than the room, e.g. a parapet or a counter. For a single wall you set its Height in the form. For rooms (rectangle and free shape) select the room; the form shows the Wall settings box with every wall of the room, named by its corners (e.g. "Wall 2–3", the numbers are shown at the corners in the plan) and with its length. Hovering a row or tapping its field lights the wall up in the plan. ↥ resets it to full room height. If two rooms share the wall, the lower setting applies. Windows and doors in a low wall end at the wall height. Low walls look lighter in the plan. If one wall in line should have two heights (2.5 m next to 1.7 m), split it with ✂: the part gets a row and a height of its own, the split point can be moved in Split point from corner (marked by a tick in the plan), ⨉ joins the parts again.
Thickness per wall: in the same box every wall has a Thickness (m) field. By default it is the house's thickness (exterior or interior wall, chapter 4.4); a setting of its own makes the 36.5 cm outer wall next to a 24 cm one, or the 11.5 cm partition. If two rooms share the wall, the thicker setting applies and the wall stays centred on the room border. ↺ goes back to the house's thickness. Windows and doors follow the thickness.
Sloping wall: ◢ Sloping in a row of the wall heights gives the wall a height of its own at each of its two corners; the top runs straight between them – for a lean-to, a garage on a slope or clerestory windows on the tall side. The tall side may reach above the floor height. Windows and doors stay under the top, so a window at the low end gets lower. Splitting the edge with a new corner, both halves meet at the height in between. ◢ Sloping again makes the wall straight.
No wall: In open floor plans the hall, kitchen and living room are one space, yet separate areas in Home Assistant. For that, every row in the Wall settings box has a No wall button: the wall is left out in the plan and in 3D, even when the neighbouring room shares it. ↥ brings it back. The light follows: a lamp shines through the left-out wall into the neighbouring room as if it were one room.
Split walls: When a neighbouring room splits a wall into several parts (say two small rooms along one long wall), every part gets a row of its own, "Wall 2–3 · part 1", "… part 2", with its length, and every part can have its own height or be left out.
Wall colours (new in 3.1): The Wall settings box starts with Wall colours: All walls colours every wall of the room at once, the swatches beside it are quick picks. After that each wall has its own colour well in its row; a colour of its own has a blue frame, Reset takes it away again. The side of the wall inside the room is coloured – the side in the neighbouring room belongs to that room. The outside of the outer walls is set under ⚙ Settings → 🎨 Styles → Facade. Only the homely styles show wall colours (see 5.12); in the neon look the walls stay neon. So you see the colours right away, 3D beside switches to Homely while you colour.
4.5 The ⚙ settings menu
Everything that belongs to the whole plan rather than to a floor, a room or an item sits in one menu: ⚙ Settings ▾ on the right of the toolbar (only the gear on narrow screens). Each entry opens a dialog over the plan, also while something is selected; ✕ or Esc closes it. The side bar without a selection only keeps the floor's rooms, the floor-plan picture and the help.
| Entry | Content |
|---|---|
| 🏠 House | wall thicknesses, grid, lengths, north (the rows below) |
| 🌦 Weather & warnings | weather entity and effects, rain warning, warning names, outage sensor, sun patches |
| 🎬 Live director | see 6.1 |
| 🎙 Voice control | see 5.10 |
| ⭐ Favourites | the central menu of the 3D view (below) |
| 🎨 Styles | styles, own styles, times of day and facade, see 5.12 |
| 🖼 Background | what lies behind the 3D house (below) |
| ⛰ Ground | see 4.21 |
| 🗺 Surroundings | the neighbourhood from the map, see 4.26 |
| 💾 Backup | export, import, restore, see chapter 9 |
| 🧩 Modules | the modules installed (code from the shop, e.g. "The house answers") and Import a module … for the .fp3dpack file |
| 🖥 Card templates | ready-made dashboard cards for the wall tablets, see 8.1 |
The roof shape (none, flat, gable, ridge, pitch, overhang) sits with the roof tool, see 4.19. The start view is remembered in the 3D view: turn and zoom the house, then tap 📌 in the view settings (gear at the top right); 📌✕ resets it. The 3D view, the card and the kiosk then open the house like that, and an opened floor is shown from the same side.
| Setting | Meaning |
|---|---|
| Exterior wall (m), Interior wall (m) | Wall thicknesses |
| Grid (m) | Drawing step |
| Lengths | Automatic follows Home Assistant's unit system, otherwise Metres or Feet and inches. With feet and inches the editor shows every length, dimension and area (ft²) that way and understands input like 8' 2", 98in, 8.2ft or even 2.5m. The plan always stores metres, so you can switch at any time |
| North | Degrees clockwise from up. Needed for sunlight |
| Weather entity | Which weather entity drives the weather outside, see 6.2 |
| Weather effects in 3D | Which effects are shown |
| Favourites | Scenes, scripts, automations, buttons and switches for the central menu (star) of the 3D view: party, presence simulation, shading, watering. Pick them with the search, order them with ↑ ↓, ✕ removes one. Below them Own buttons with a label, an icon and an action: Open a path (e.g. /lovelace/blinds), Entity details, Call a service (domain.service with data as JSON) or fire-dom-event – with it a button opens a browser_mod popup with your own card, e.g. {"browser_mod": {"service": "browser_mod.popup", "data": {"title": "Blinds", "content": {"type": "custom:my-blind-card"}}}} |
| 🖼 Background | What lies behind the 3D house: the look's sky (default), one colour, a gradient or a picture. Put the picture into config/www in Home Assistant and enter /local/filename.jpg; Darken lays a dark veil over it so the neon lines stay readable. Applies to the panel and cards and costs no performance |
4.6 Floor plan image as a template
Under Template (floor plan image) you load a photo or scan of your floor plan under the drawing. Width in plan (m) brings it to scale, Opacity makes it subtler. Then simply trace the rooms.
4.7 Doors, windows and garage doors
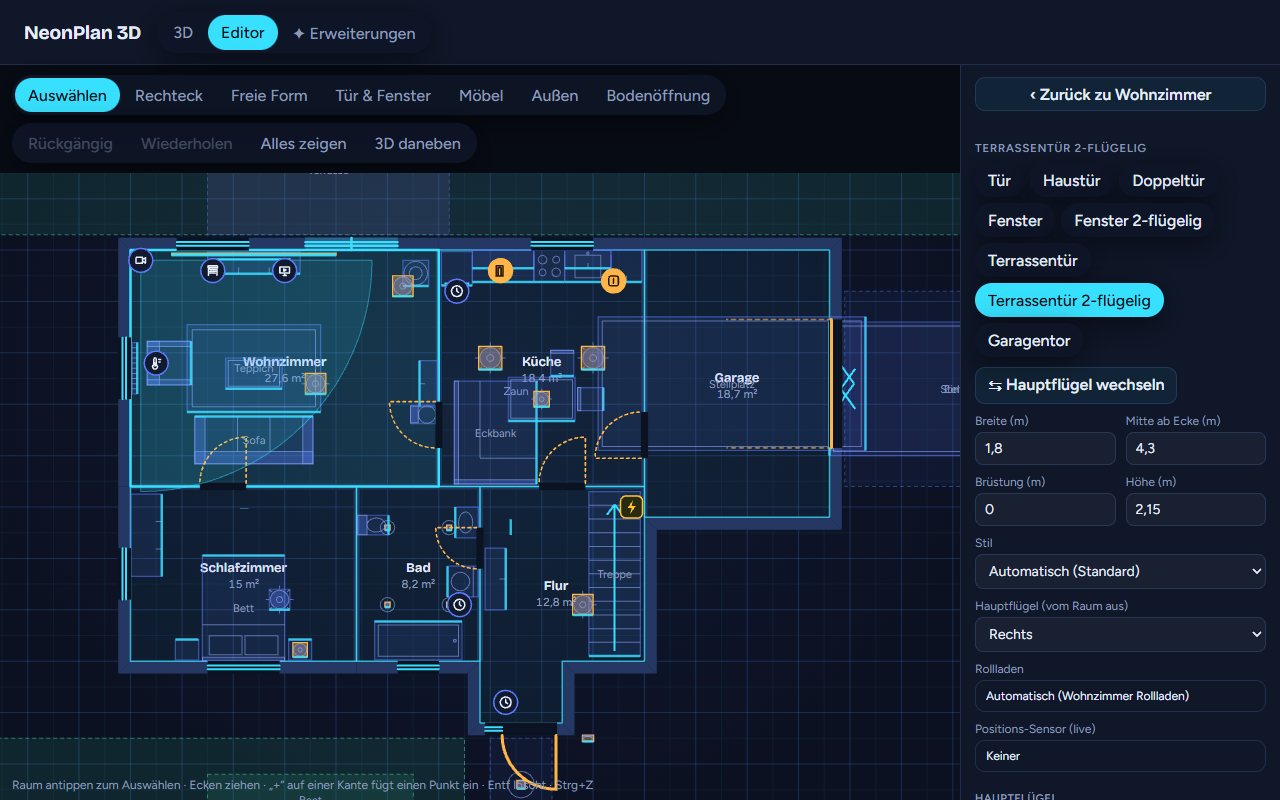
With Doors & windows you tap a wall, a room wall or a single wall. Then you choose the Type on the right: door, window or garage door. A window with a sill of 0 is a terrace door; like a door, ⇅ Reverse opening direction turns it outwards (in 3D its sashes then swing outside; tilting stays inwards). The preset Glass wall sets fixed floor-to-ceiling glazing with slim mullions and no sashes – for an indoor glass wall or partition; width and height are free, and any window can take it under Style. The presets Lift-and-slide door and Sliding window (since 3.0.1, style Sliding) have a fixed pane on the hinge side and one that runs in front of it on the inner track – as far as the contact reports open; ⇆ swaps the side. Top-hung in the window's form hangs the window at the top: its bottom opens outwards, open and tilted look alike – common in Scandinavia.
Where two rooms meet without a wall (an open transition) and the outer wall carries on in a straight line, a window or door may reach across the transition into the neighbouring room's wall. The middle of the opening stays on its own room's wall.
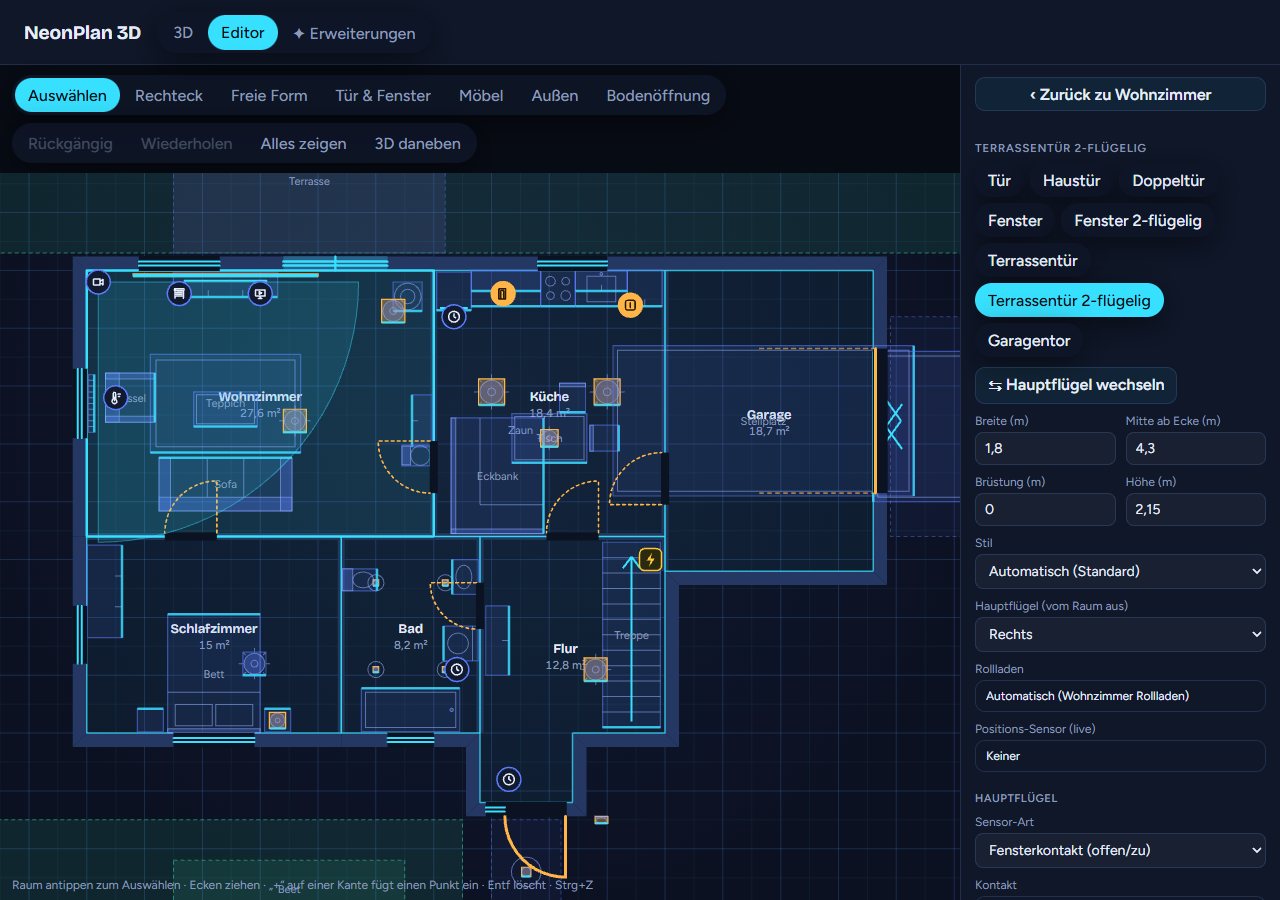
Every opening has:
- Width, sill and height, plus the hinge side. With Select you slide it along the wall.
- Sill (windows only): automatic (default) draws a window board inside and a sill outside from a sill height of 30 cm – except for a window that sits directly on another window or a door of the same wall (transom light, fixed upper part, a glass front split in two): that one gets none of its own. None, inside only or outside only fix it, e.g. for a glass front without a board or a window above a kitchen worktop. Chosen by hand it also shows on a window down to the floor or a terrace door (lying at the floor) and on a glass wall, which has none by itself.
- Style: room door, front door, front door with glass, with one or two sidelights, glass door, sliding door or Opening (no door). With sidelights you set their width below (empty = automatic), with two the left and the right one separately; a single sidelight sits opposite the hinge, or next to the hinges with Sidelight on the hinge side. An opening is just a gap in the wall, without frame and leaf; light always passes through. Windows come as standard or with glazing bars. "Automatic" picks a front door for exterior doors.
- Leaves: single or double, with an own contact for the second leaf.
- Highlight in 3D: When open (default) makes open windows and doors glow warm. When closed turns this round, e.g. for the WC or a child's room door: it glows while it is shut. This needs a contact; without a sensor nothing is highlighted.
- Show closed without a sensor: a door without a contact stands half open in 3D, so it is seen as a door. The checkbox draws it closed, e.g. for a front door or a carport without a sensor.
- Opening angle (since 2.0.6): how far the leaf stands open: Default, 15°, 30°, 45°, 60° or 90°. Without a sensor the door always stands that far open, with one it opens that far as soon as the sensor reports "open". Default stays as before: half open without a sensor, fully open with one.
- Smart lock: the door's lock (Nuki, Aqara,
lock.*). A pin stands at the door in 3D: 🔒 locked, glowing red while it is unlocked; a tap locks or unlocks. A tap on the door itself (without a drive) also opens its menu with Lock or Unlock, always asking first; while the lock is unlocked, the leaf's free edge glows softly in the accent colour – whatever the door contact says. On a double door or terrace door the pin sits on the main leaf (on the hinge side). The voice asks it ("Is the front door locked?"). - Invert contact: for sensors that report open and closed the other way round. NeonPlan then shows open when the sensor reports closed, and vice versa (default: off).
Doors and windows can also be tapped in a wide band around the opening in the plan; a selected room lists its doors and windows in its form.
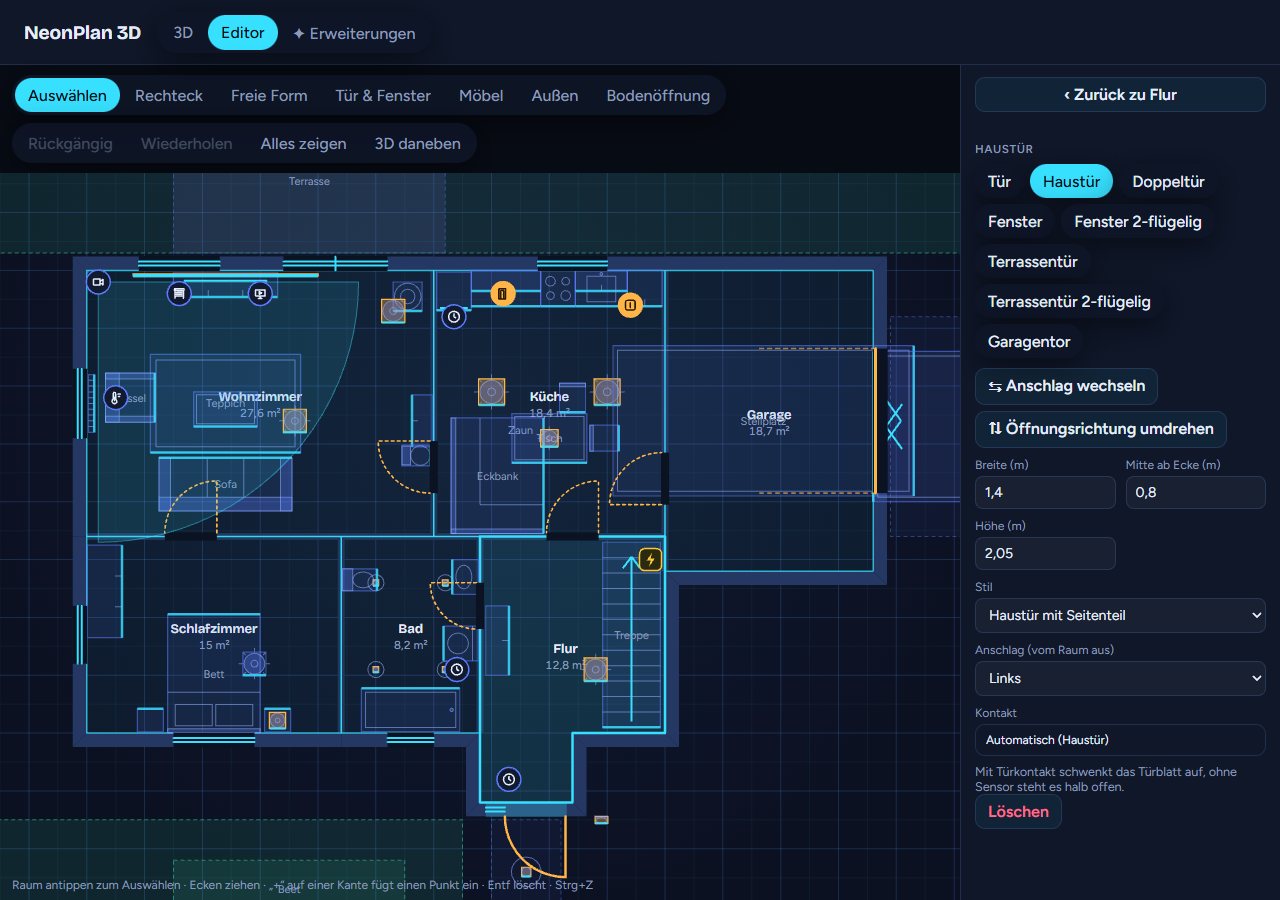
Sensors:
| Field | Effect in 3D |
|---|---|
| Cover | The blind moves in front of the window – or of a door (front door, French window, sliding door) – with the cover's position |
| Position sensor | For blinds whose position comes from a separate sensor, e.g. Homematic. Can be inverted |
| Blind sits (since 3.1.1) | outside (roller shutter) as before, or inside (roller shade): the cassette then sits inside above the window and the cloth runs down in the room. Sun patches and the window light follow the shade just the same |
| Slats (since 3.1.1) | When the cover reports a slat tilt (a Raffstore, a venetian blind), NeonPlan draws single slats that turn with it: level at 100, shut at 0. The sunlight in the room follows them – a lowered blind with open slats lets light through. Invert slats (0 = open) then shows in the form, for integrations that report the value the other way round: it is turned in 3D, in the quick menu and in the room panel, the one sent too |
| Ask before switching | Open, close and positions ask first in the quick menu and the room panel, and a swipe on the marker no longer moves the blind (it turns the view instead). Stop never asks. Good for tablets where blinds or the garage door would otherwise move by accident |
| Contact | The door swings open, the window opens. Offered are binary sensors of the door, window or opening class and ones without a class (KNX, enOcean, template sensors often have none) |
| Tilt contact | A second sensor that reports "tilted" |
| Tilt angle sensor | Optional: a sensor reporting the tilt angle in degrees (e.g. the "Rotation" of a Shelly BLU Door/Window). The sash tilts exactly that far in 3D; Angle that counts as fully tilted (15° by default), an Offset for the value while closed and counts the other way round adapt it to the mounting. Above a small angle the window counts as tilted, also for the rain warning |
| Contact second leaf | For double windows and doors |
| Garage door | A garage door follows a cover entity or a contact (on = open; sensors reporting “open”/“closed” work too). A switch or input_boolean that drives the door works as the contact too: on = open, a tap in 3D switches it. If your opener only takes a short pulse, choose the switch, button or input_button under Drive and the real door contact under Contact: a tap on the door switches the switch on or presses the button (asking first with Ask before switching), and open or closed comes from the contact. Its open part lies under the ceiling. Kind of door (since 3.2): Sectional door (as before: runs in sections under the ceiling) or Up-and-over door – one leaf whose bottom edge swings out and up; open, it lies under the ceiling with a part sticking out like a canopy. A gate or garage-door cover on a door (e.g. a sliding gate) moves the door leaf instead of a roller shutter |
NeonPlan 3D matches covers and contacts through the area automatically. You can change them by hand at any time.
4.8 Furniture

The Furniture tool opens the library: the 80 built-in models and everything from your installed furniture packs, sorted together by what it is – Sofas, Seating, Tables, Cabinets & shelves, Beds, Kitchen, Appliances, Bathroom, Lights, TV & audio, Office, Tech & smart home, Heating & climate, Energy, Household, Decoration, Plants, Garden & outdoors, Kids, Fitness, Pets, Vehicles, Stairs & railings, Architecture. Every card shows a picture, the size (width × depth) and where the item comes from ("Basic" or the pack's name). NeonPlan draws the pictures the first time a section opens and keeps them in the browser; on very weak devices the cards stay without pictures, the hover preview still works.
- Room chips at the top: when you open a room, its room kind is preselected (a "Living room" shows Living, a "Kitchen" Kitchen) – the library then shows only what fits that room, plus everything that fits anywhere (lights, tech). All rooms lifts the filter, any other chip switches it.
- Filter chips: ⚡ Linkable (takes an entity), 💡 Lights up (links a light), 🌳 Outdoors.
- Families: an item that comes in several sizes (dining table 120 / 160 / 200, bed 90 to 200, base unit 30 to 120) stands as one card with chips for the sizes; the chip places exactly that size. That keeps the list short even with many packs. An item that comes for one side only ("Corner sofa (left)", "Sofa with chaise (left)") gets a chip for the other side by itself – it places the item mirrored.
- ★ Favourites and 🕘 Recently used stand at the top as soon as there are any – the star on every card marks them, both stay in the browser.
- The search field finds English and German names, the pack name and everyday words ("lamp" finds all lights, "cabinet" all cabinets), several words in any order ("corner sofa"); Escape clears it. While searching, every section is open.
- Long sections show 24 cards first and "Show … more" below.
- 🔒 From packs (new in 3.4): after your own furniture come the items of packs you don't have yet, with a lock – the search finds them too. A tap shows the picture large with the pack, its price and See in the shop. It is only a picture; the item comes with the pack and is then placed like any other. NeonPlan loads the list from the shop at most once a day when you open the library; nothing about you is sent. The 🔒 From packs chip hides them (remembered in this browser).
The Worktop (Kitchen) is a free top without a base, for gaps in the kitchen or a self-built desk; its height is the top edge, 91 cm by default. Under Sofas, next to the sofa, there are a Corner sofa (L-shaped) and a U-shaped sofa; Mirror puts the corner sofa's side section on the other side. On devices that show the cards without pictures, hovering shows the bigger 3D preview as before.
Symbols on the entries:
- 💡 A lamp: it links to a light and switches in 3D.
- ⚡ An electric item: it takes an entity and a power sensor, e.g. a TV, a washing machine or a thermostat.
- ✨ Live (new in 3.4): parts move with Home Assistant – doors, drawers, levels, status lights, fans. The ✨ Live chip shows only these items.
Placing and editing:
- Tap a room, then pick an entry. The item appears in the room.
- Drag to move it. Near a wall it turns its back to the wall and sits flush. Alt moves freely.
- The handle in front of the item turns it in 15° steps, the corners resize it. Pack furniture from the October 2026 packs onwards keeps what is fixed while you resize: legs, arms, plates and handles stay as thick as they are, the seat and the body grow – a sofa stretched to 3 m still has 20 cm arms, a taller one a taller back.
- On the right you set width, depth, height, rotation and Height above the floor. Mirror swaps left and right – the L-sofa the other way round, the cabinet with its door on the other side; the item is in the right-click menu and in the furnish bar of the 3D view as well. That is how a network cabinet or a shelf hangs on the wall, or a dryer stands on the washing machine. It always counts from the floor: a wall cabinet sits at 1.45 m by default, a wall TV is centred at 1.3 m; you can set both higher or lower. Automatic height resets it. Outside the rooms the height may go below 0 (down to −5 m): outdoor steps down to a sunken terrace or a light well.
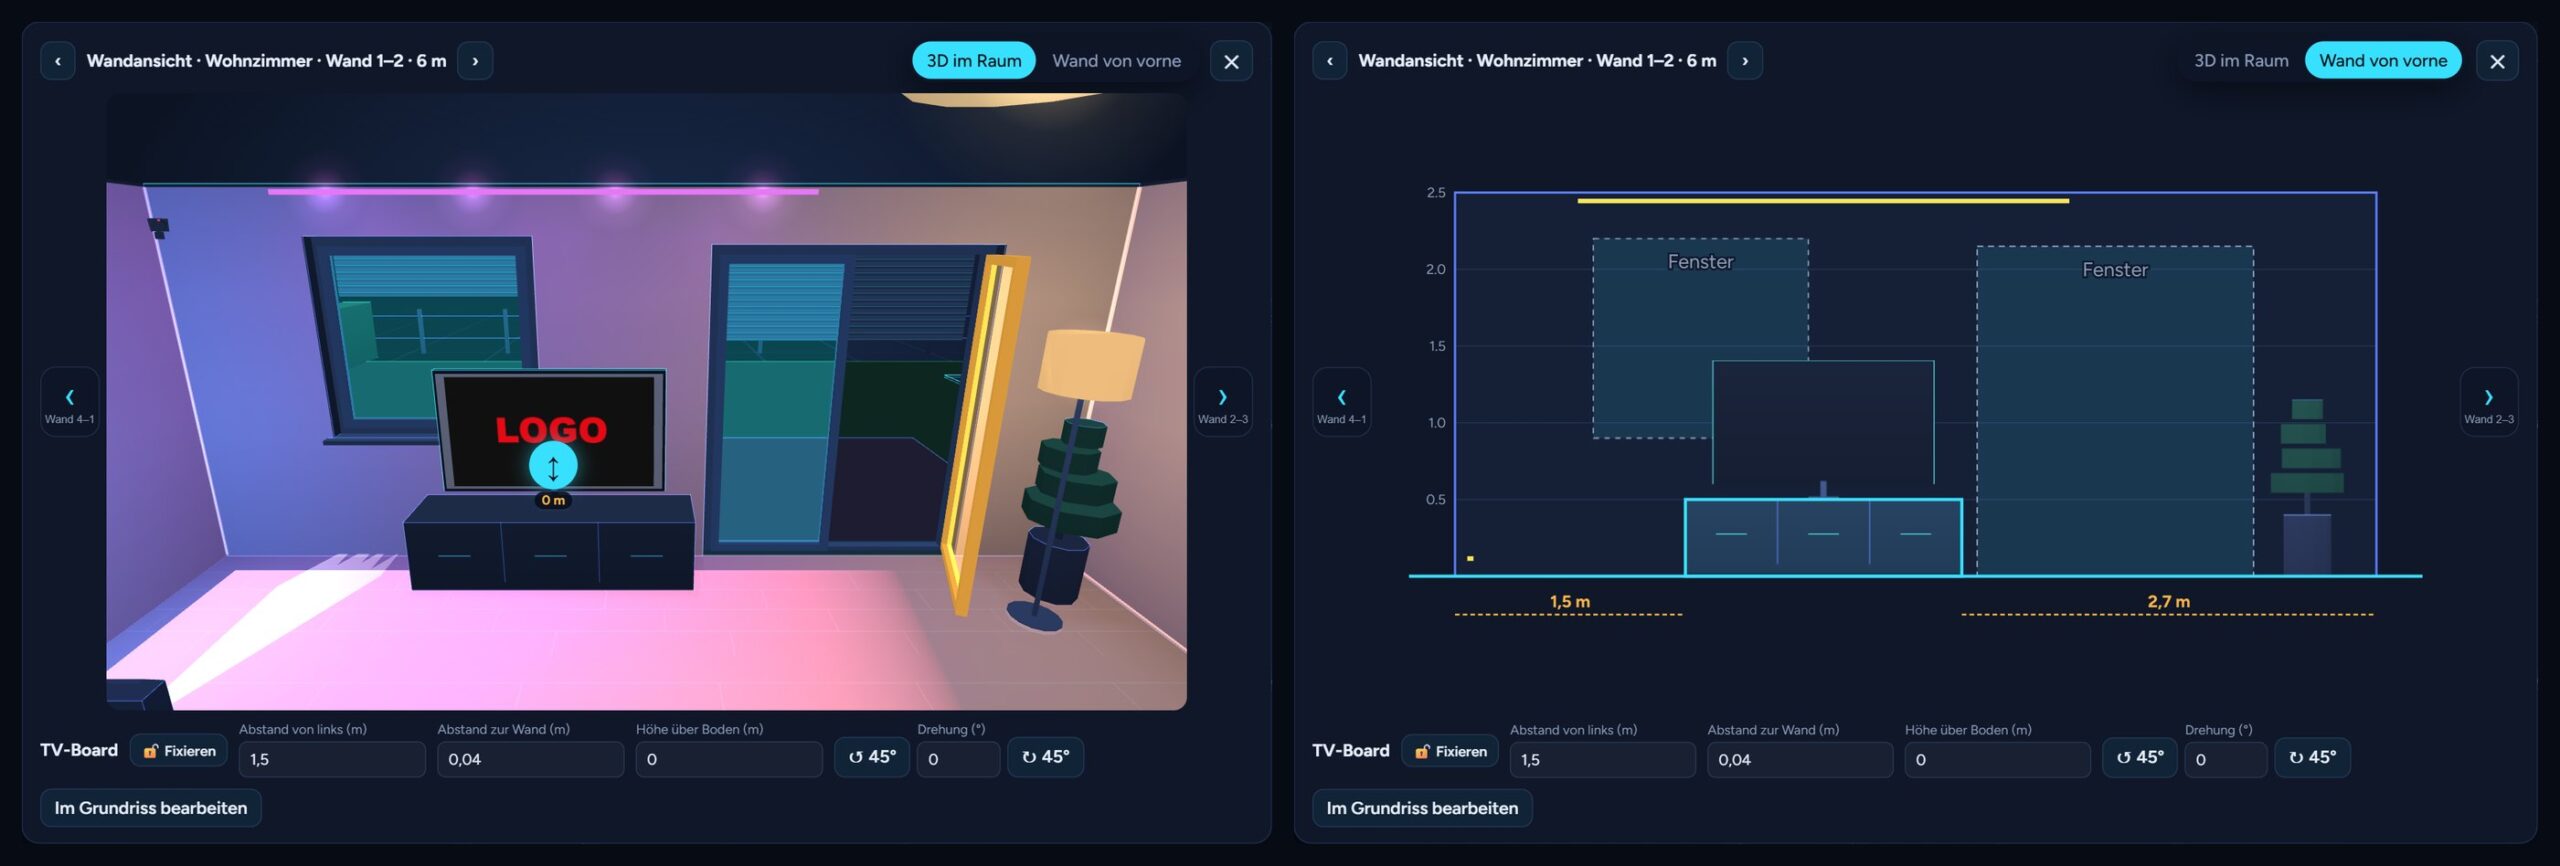
- Wall view: Wall view at the top of the toolbar, then click into a room (near a wall opens exactly that wall) – or ▦ See this room's walls from the front in the room form, ▦ Wall view in the furniture form and the right-click menu, ▦ beside each wall under Wall heights – shows the wall from the front – with its doors and windows and everything standing or hanging on it, as a real front view of the furniture: cabinets, shelves, wall cabinets, TVs, wall lights. Drag a piece along the wall there and, when it hangs, up or down; dimension lines show the distance to the wall's ends and to the floor, and edges snap to the wall's ends, doors, windows and other furniture (Alt drags freely). Arrow keys move by 1 cm, with Shift by 10 cm; below, Distance from the left and Height above the floor can be typed in. The arrows ‹ and › at the left and right (and ← → when no piece is chosen) turn you to the wall joining on that side – once round the room. A double click opens the piece in the plan. At the top right you switch between 3D in the room and Wall from the front: in 3D you stand in the middle of the room at eye height looking at the wall – with everything in the room, the table in front of the corner bench too. Tap a piece to choose it, drag to move it on the floor, the round ↕ handle above the chosen piece lifts or lowers it (with its height shown), the mouse wheel or two fingers walk closer or back, the middle or right mouse button (two fingers on a tablet) looks around – so the left button is kept for the furniture; below, Distance from the left, Distance from the wall and Height above the floor can be typed in, with ↺ 45° / ↻ 45° and the Rotation in degrees – turned at a wall, the piece moves back into the room by itself. A fixed piece shows 🔒 Release at the bottom: release it first, then it can be dragged. Wall from the front is the flat view for lining things up on the wall to the centimetre. Zoom there with the mouse wheel (towards the pointer), two fingers on a tablet or + / − at the bottom right; ⤢ shows the whole wall again, and while zoomed the arrows beside them move the view. With Energie Pro, a side bar on the left puts the meter, inverter, home battery and wallbox straight onto the wall shown.
- State from: any piece of furniture can show an entity that reports on, occupied or home – its top then glows: the bed with an occupancy mat, the armchair, the sauna. A second entity lights the other half (left/right, bottom/top for a bunk bed); set the first one to none and the second moves up into its place. Lamps, energy devices and screens have fields of their own for this.
- Only show while … (new): the piece stands in 3D only while an entity is in a state – the Christmas tree while
input_boolean.christmasis on, the garden decoration only while a season sensor says "summer". Separate several states with commas,<20or>80compares a number, a!in front turns it round; empty means "on". Hidden, its light and its marker go too. The editor always shows the piece; while it is missing in 3D it is faint in the plan. So you place decoration once and switch it on every year with a switch or an automation. - 🎨 Finish (new in 3.4): own colours for wood, fabric and fronts – a sofa in blue, a table in walnut, a kitchen in sage. Shown in the homely styles; the neon looks colour every item themselves. It works for the built-in furniture and every pack item made of these parts; Standard goes back to the style's colours. Since 3.5.0 cabinets, dressers and kitchens also have Carcass: as long as you choose nothing there, Fronts colours the whole cabinet as before; with an own carcass colour the sides, top and bottom take it and only doors and drawers take the front colour. Worktops take the wood colour, pack lamps their body colour (pack updates for 3.5.0). For all the same in the plan gives every item of this kind the same finish.
- ⚡ Live parts (new in 3.4, on pack items that have them): parts move with Home Assistant – the server rack's door opens with its contact, the print in the 3D printer grows with its progress, the home battery fills with its charge, status lights show green, off or a pulsing red, fans turn, parts glow. Pick the fitting entity for each part; an item with only one takes the item's entity without a choice. Without an entity everything stands as drawn.
- Duplicate and Delete are there too.
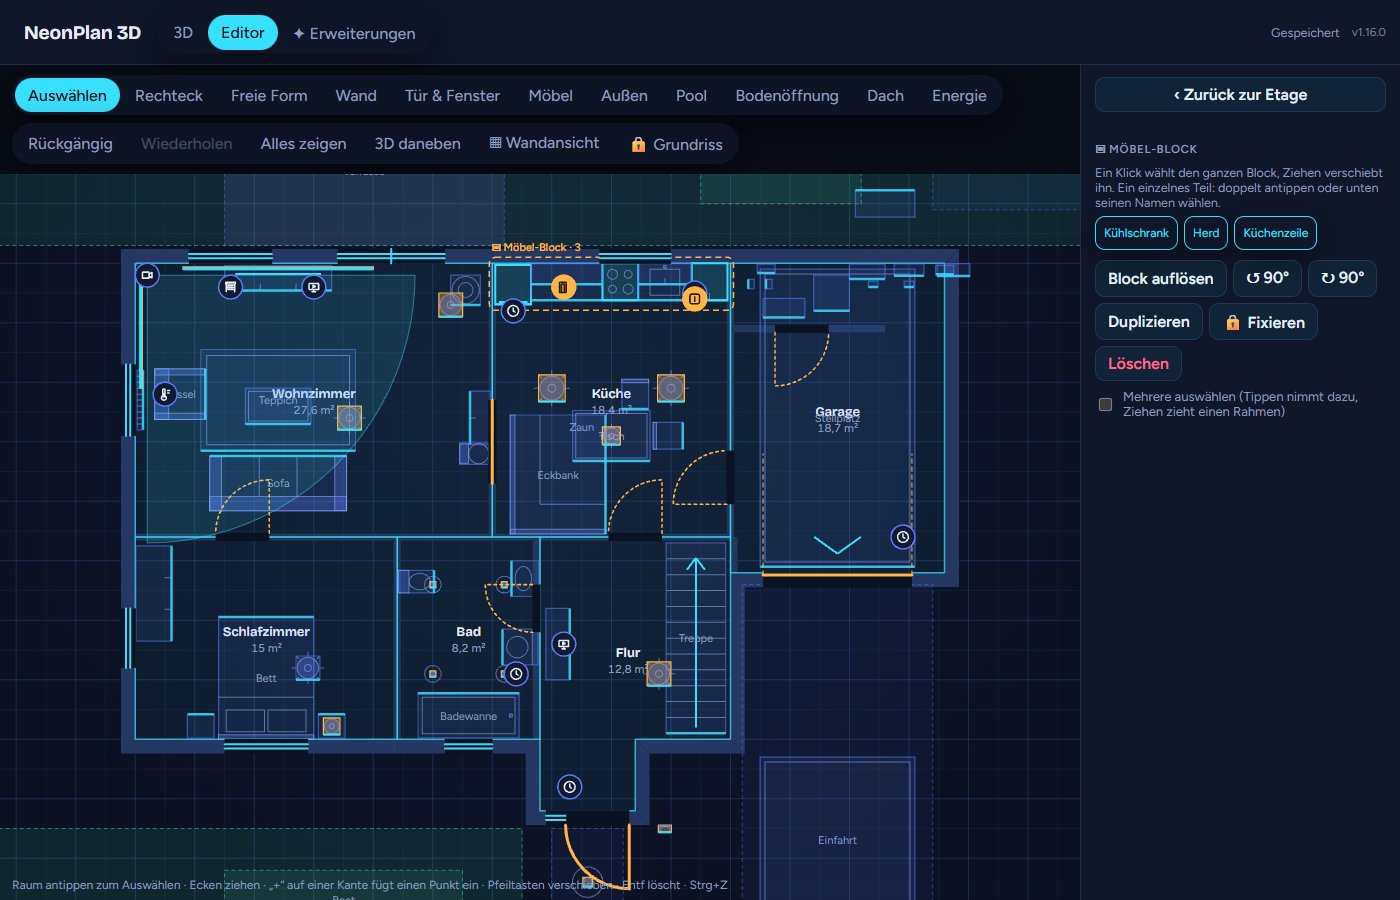
Furniture blocks (a kitchen, a wall unit): place the pieces one by one as they fit, then join them into a block.
- Shift + click adds a piece to the selection or takes it out again, Shift + drag over an empty spot draws a frame – everything whose centre lies inside is selected. On a tablet without a Shift key, switch on Select several in the furniture form: a tap then adds and a drag draws the frame.
- Several selected pieces move, turn (R, ↺/↻ 90° – about their common centre), copy (Ctrl+D), fix or delete together. Join into a block makes them a lasting block (orange frame labelled "Furniture block").
- From then on, a click on any part selects the whole block; dragging moves it, in 3D beside too. Edit a single part with a double click (double tap on a tablet) or by its name in the list on the right – a wall cabinet 2 cm higher, say. Select the whole block goes back, Break up block makes single pieces again. If a part is fixed, the whole block stays put – a note says so, Release all frees it.
- In the wall view blocks work the same way – in Wall from the front and in 3D in the room: Shift + click (Select several on a tablet) or Shift + drag (a frame, front view only) selects several parts, Join into a block at the bottom. Dragging slides the whole block along the wall (it snaps with its outer sides); at the bottom you switch between Whole block and This part only – to line up a single cabinet without breaking up the block. A double click on a part of a block selects just that part too.
- Onto the wall (side bar on the left of the wall view): a few symbols instead of a long list – base cabinets & boards, hanging, tall cabinets, seating & beds, lights, your packs (and energy with Energie Pro) – plus a search and Recently used. Tap a free spot on the wall: NeonPlan measures the gap (low: standing, high: hanging) and shows only what fits – what fills it best first. Cabinets built to measure (kitchen unit, wall cabinet, tall cabinet, sideboard, shelf …) take the gap's width (↔), anything else goes to the gap's left end in its own size. Every piece shows a small picture. Resize in Wall from the front: on the chosen piece the handles left and right change its width, the top one its height and, for hanging pieces, the bottom one its lower edge – the other side stays put, edges snap to neighbours, the wall's ends, doors and windows (Alt freely), and the size shows live above it. Below, Width and Height can be typed in too (in 3D in the room as well). Delete a chosen part (or several) with Delete at the bottom or the Del key.
Neon sign (since 3.2, under Decoration): an own text in glowing tubes on a dark plate on the wall. Its form has Text (split two lines with |) and Colour of the tubes. Linked to a light or switch it only glows while that is on; a coloured light sets its colour. With nothing linked it always glows.
4.9 Furnishing rooms
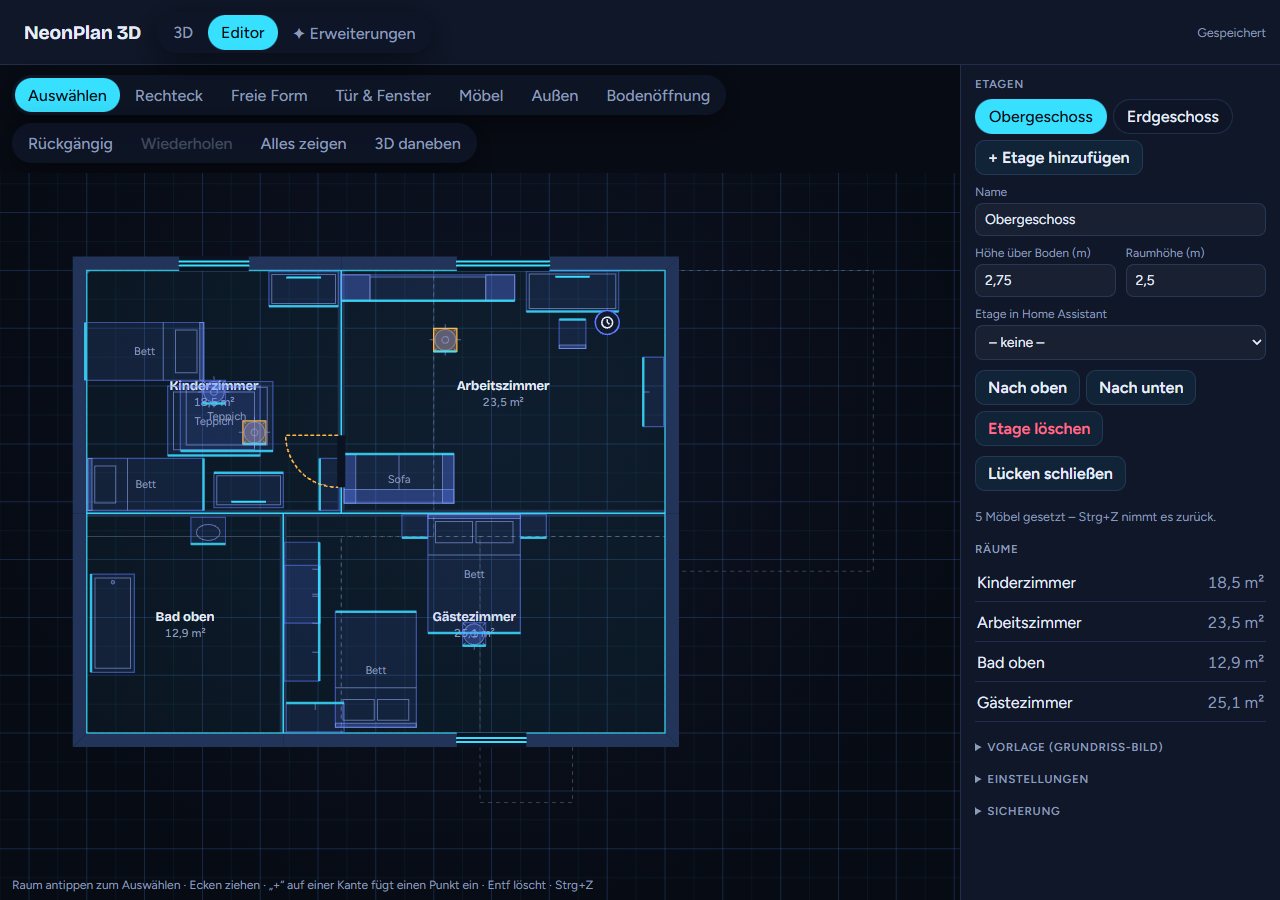
Furnish … on a room puts a whole set of furniture against the walls: kitchen row, L-shaped kitchen, bathroom, bedroom, living room, dining room, office, kids' room or hall. Lamps link to the area's lights. Adjust single items afterwards. Ctrl+Z takes the whole set back.
4.10 Devices
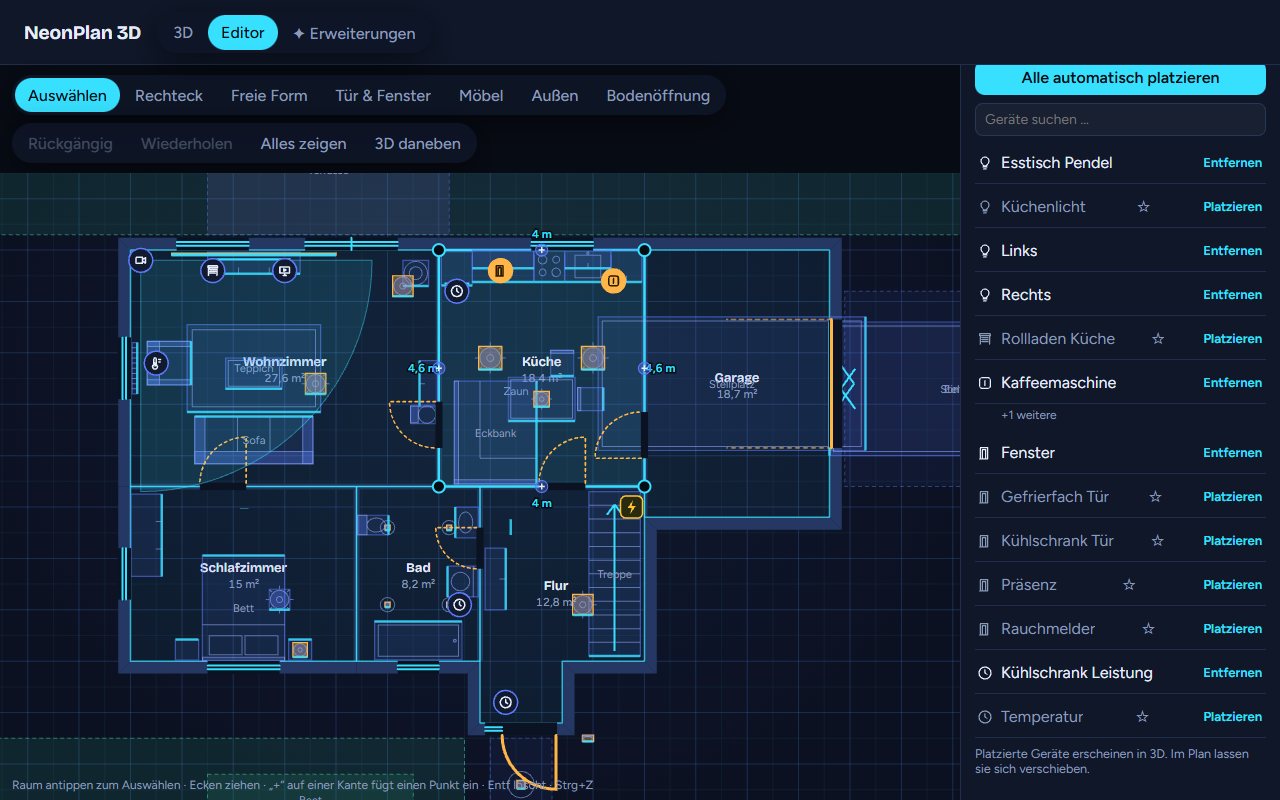
A room with an area lists all devices of that area on the right, grouped by device. The main entity comes first, further ones such as LED indicators or effects sit behind "+n more". A search field helps with big areas. When a device brings very many entities (such as the segments of an LED strip from Govee2MQTT), the unfolded list shows the first 40 – the search narrows it down – and "Hide all n in the room panel" takes them out of the room panel with one click ("Show all n again" brings them back).
Sensors appear when they measure something for the room: temperature, humidity, CO₂ and air quality, power and energy, gas and water meters, illuminance and pressure. Meters without a device class count too when their unit fits (m³, l, kWh, lx). Battery and signal sensors stay out. The value shows the decimals set in Home Assistant. If a device is missing, check in Home Assistant that it is assigned to the room's area.
Above the list you choose the source: This area (default), Other areas (the devices of the other areas, grouped by area; if a device already stands in another room, that is shown, and Place brings it here) or No area (e.g. template lights, groups and helpers; here any sensor with a numeric value and a unit counts). The area in Home Assistant does not change.
Room climate: In the room form, Room climate sets which sensors give the room's temperature, humidity and CO₂ (heatmap and room panel). Automatic takes the sensors of the area and the ones placed in the room, but leaves out device temperatures, e.g. of a 3D printer or a heat pump's flow. Without a sensor of its own, the room takes the current temperature (and humidity) of its thermostat (climate entity); a thermostat can also be chosen by hand. None hides the value.
- Place puts a device into the room. Place all … below the list puts all main devices in at once after asking; Undo (Ctrl+Z) takes them back in one step.
- Lights are placed as lamps from the library, so they glow in 3D.
- ☆ adds a device to the room panel of the 3D view without placing it. 👁 hides an entity of the area from the room panel (struck through in the list, 🙈 brings it back) – for entities that only clutter it. Aa hides only a device's state in the room panel (∅ shows it again), e.g. for a cover without feedback. Both work for a device's further entities under "more" too, each on its own; a bare "unknown" is left out for switches, covers and lights anyway.
- Drag a placed device to its spot in the plan.
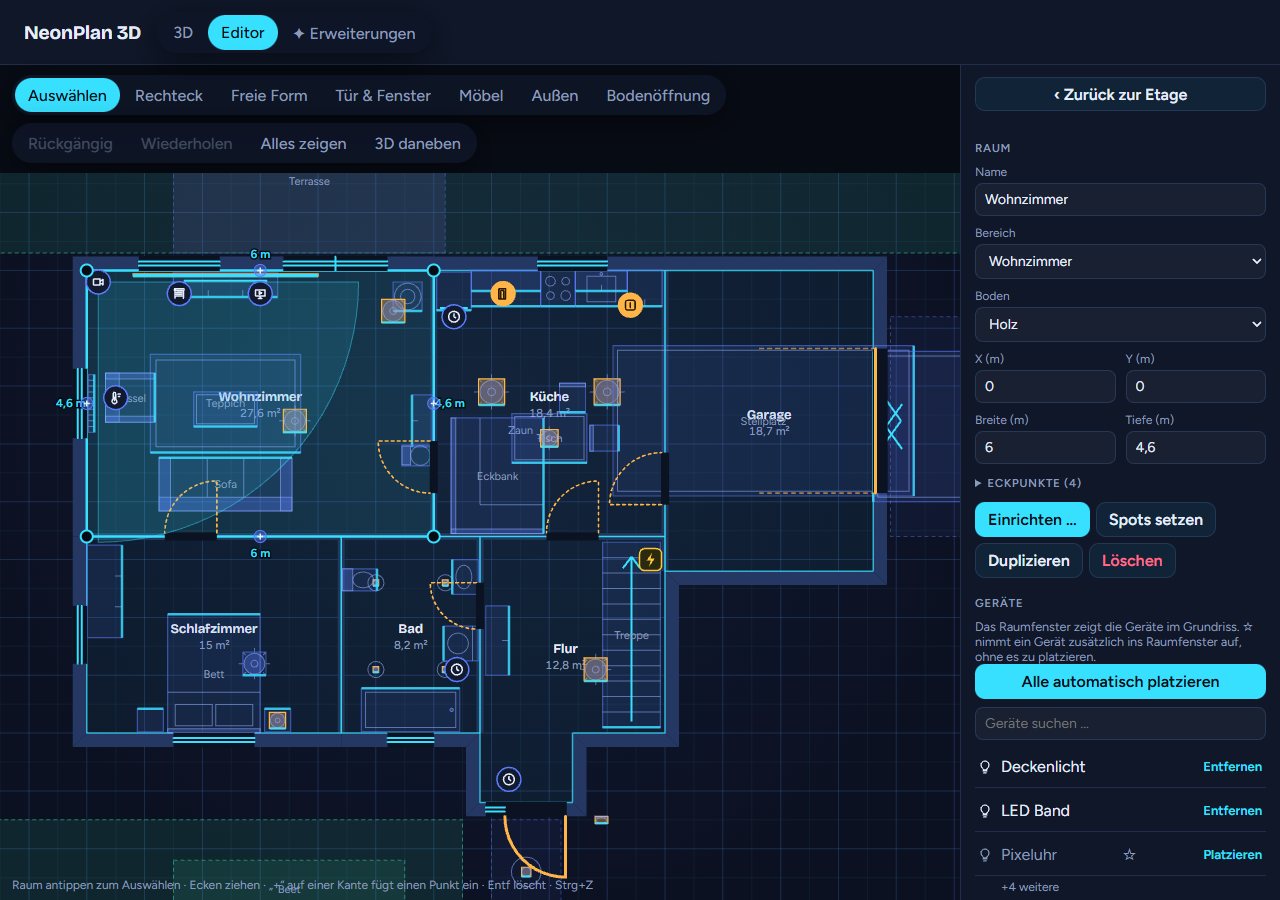
A selected device has:
- Marker height, rotation and, for lights, the mount: ceiling, floor, table or wall.
- Ask before switching: A tap in 3D, the quick menu and the room panel ask first. This protects, for example, a server switch from an accidental tap. A double tap on the room leaves this device out.
- Marker in 3D: Automatic follows the None / Important / All switch of the 3D view. Always show shows the marker with "Important" too, e.g. for a temperature sensor. Without watts leaves out the power, e.g. on a smart plug. Only while active (since 3.0.1) shows the marker only while the device is on, open or triggered – a motion sensor only while it sees motion. Hide never shows a marker. With "None" all markers stay off.
- Own symbol: the name of a Material Design icon as in Home Assistant, e.g.
mdi:thermometerormdi:water-alert, replaces the symbol of the device kind in the pin and in the room panel's device list. Leave it empty for the default. Works for electric furniture and lamps just the same. - Show as furniture: replaces the pin by a fitting furniture item in the same place, already linked to the device – a speaker or smart display for a media player, a lamp for a light, a radiator for a thermostat, the robot vacuum for a vacuum. The list only shows furniture that fits the kind of device. In the furniture form Back to a device pin brings the plain pin back; Ctrl+Z undoes either. For a camera (since 2.0.7) the pin stays with all its camera settings; the chosen model is only its look: it replaces the built-in camera model, moves and turns with the camera, and a new choice swaps it. Built-in camera model in the same list brings the built-in model back.
- Own name and Show the name under the marker in 3D: ticked, the own name sits small under the pin – three thermometers in the garden ("Pool water", "Pool air", "Greenhouse") stay apart. The tick appears as soon as an own name is set; furniture with an own name has it too. The card option
marker_names: trueshows the names of every device with an own name. - To room centre and Remove.
4.11 Lamps
Lamps are furniture with a linked light: ceiling light, downlight, surface spot, LED panel, pendant, ceiling fan with light, floor lamp, uplight, table lamp, wall light, LED strip, path light and garden spot.
- The 3D model glows in the light's colour and brightness. The room's floor and walls are lit too, two coloured ceiling lights mix in between. Light reaches the next room only through doors. A lamp over a stairwell or floor opening (up to 1.5 m beside it) also shines through the opening into the floor below.
- Colour effects such as a colour loop are animated in 3D.
- Table lamps stand on the item below (under a worktop high up from 1.2 m – a step of stairs built from worktops – what fits beneath stays on the floor), wall lights and LED strips snap to the wall, a pendant's height is how far it hangs below the ceiling. On wall lights from packs, the halo and the light sit in the glowing parts (a lantern's glass).
- Ceiling fan with light: the light switches the lamp under the motor. Under Fan (fan entity) you choose the fan: its blades turn in 3D with its speed (about once a second at 100 %, still when off). It gets a symbol of its own beside the lamp showing its speed; a tap switches it, a long press opens the menu with the speed. The width is the blade span, the height how far it hangs below the ceiling. On old tablets the blades turn with few frames per second, and only while the fan runs.
- Height above floor: wall lights hang at 1.75 m by default, LED strips right under the ceiling. Under a sloped roof, ceiling lamps, spots and pendants hang from the roof's underside instead of in the air. In the form you set a Height above floor of their own, e.g. for a strip under the wall cabinets or behind the TV unit. Automatic height resets it. Recessed and surface spots, ceiling lamps, LED panels and flat ceiling lights from packs (such as the workshop light) have the field as well: by default they sit under the ceiling, with a height of their own – under a staircase too – e.g. under the wall cabinets – model and light then shine down from there onto the worktop. A strip below 1 m (skirting board, behind a cabinet) shines up the wall, higher strips shine down. A strip below the cut height stays visible with cut walls. Tilt about its length lays the strip against a roof slope or turns it sideways (90° = its face points to the side); Rise (°) lets it climb along its length, e.g. up the stairs or along a handrail (about 35–40°), its height above the floor then being its middle; Upright stands it on end: it then runs up from the height above the floor, along a door frame or as a light column, and shines all around.
- Colour and brightness from: when a relay (Shelly, switch actuator) switches the lamp while the bulb itself knows its colour and brightness, on/off comes from the switch and the colour from this second entity.
- Fixed colour in 3D: the lamp always glows in this colour in the plan, whatever colour the light reports – on/off and brightness still come from the light. For fixtures that are warm white in reality while their entity reports colours, or when a lamp in the plan should simply have a certain colour.
- Glow only while the light shows this colour: the lamp only glows while the light shows about the chosen colour. A colour light can serve as a signal this way – yellow for "water" at the washbasin – without its other colours (red, green, blue for other alerts) showing there.
- Glow in 3D (%): how strongly the lamp glows in 3D. Below 100 % tones down bright LED strips so the room does not burn out, above 100 % makes a weak lamp glow more. Works for lights placed as devices too; it switches nothing in Home Assistant.
- A switch works instead of a light too, e.g. a relay for the ceiling light.
- Several lamps may follow the same light.
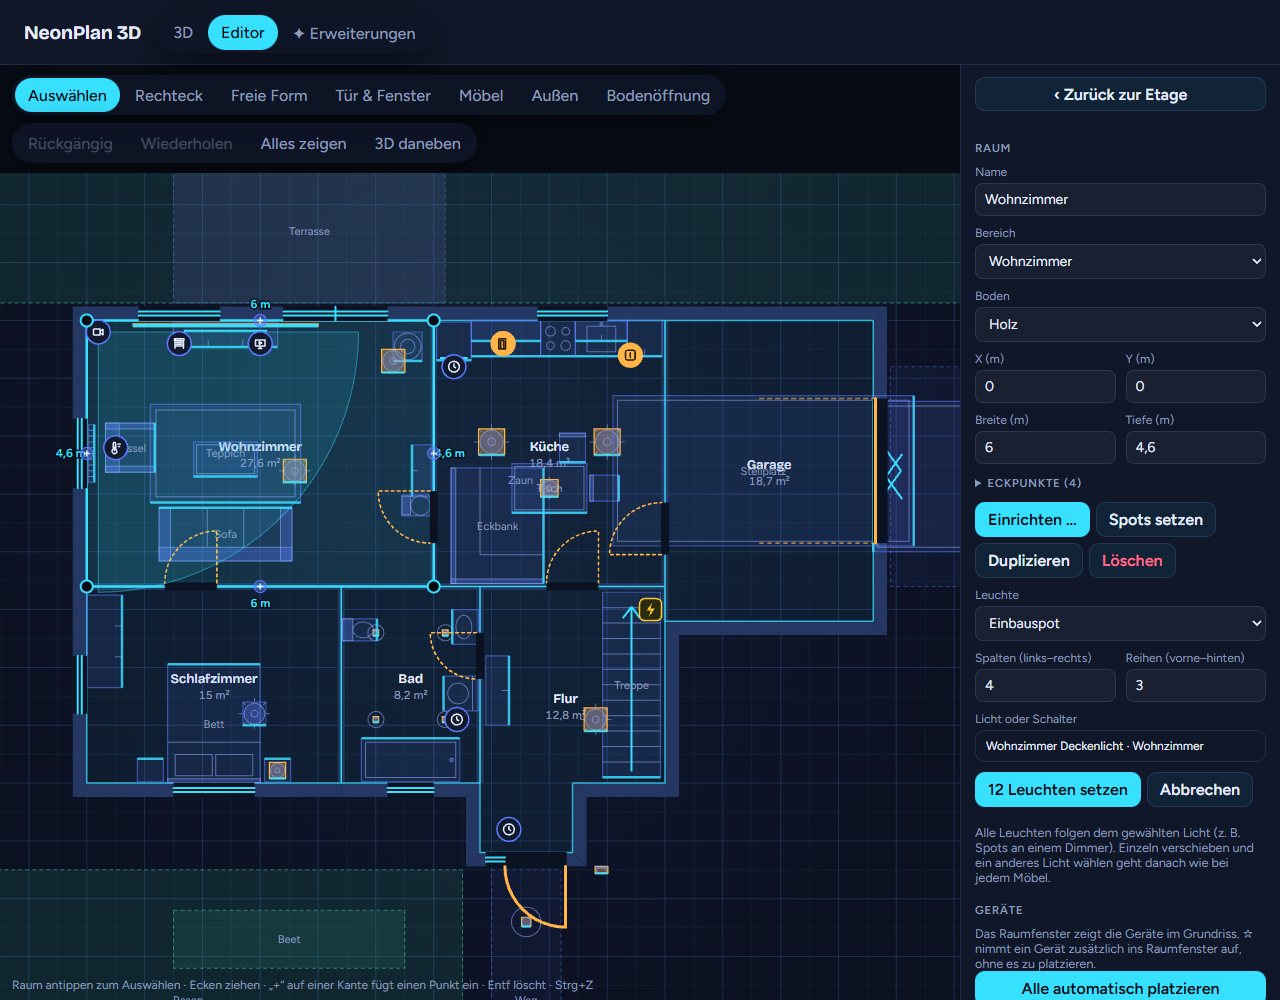
Place spots on a room lays out a grid of lamps that all follow one light, e.g. six downlights on one dimmer. Choose columns and rows first.
4.12 Electric furniture
TVs, media walls, the wall unit with a TV (the wall unit without a TV is a lamp: vitrines and LED strips glow with the linked light), desks with monitors, washing machines, dryers, dishwashers, radiators, robot vacuums and many pack items link to entities:
- Radiator – Heating (sensor): when the thermostat does not say whether it heats (Tuya valves report a "work state" sensor instead), pick that sensor under Heating (sensor): "opened", "heating", "on" or an opening above 0 % makes the radiator glow.
- Device or TV (media player or smart plug): A status sensor works as a device too, e.g. the print status of a 3D printer (Bambu Lab and others); the item then counts as active while the status reports "running", "printing", "prepare" or similar. A TV glows while it is on. An older TV on a smart plug simply takes the plug's switch; the screen glows while the plug is on, and a tap switches it. Washing machine, dryer and dishwasher glow while they run – washer and dryer with a ring of light round their round door. A radiator with a thermostat glows while it heats. The air conditioner (wall) hangs high on the wall and glows at its air outlet in the colour of its mode: red heating, blue cooling, green automatic, yellow drying, white fan only – bright while it works, dimmed on standby. A stove glows on its cooking zones while it cooks; an operating-state sensor (e.g. Home Connect: "run", "ready", "inactive") makes it glow faintly at "ready" and stay dark at "inactive".
- Power sensor (W): The item shows its watts. Running from (watts) sets from how many watts it counts as running and glows (empty: 10 W) – handy for appliances behind a smart plug that draw a few watts on standby, e.g. 100 W. When it is set, the pin shows only the state (or "Standby") below it instead of the standby watts.
- Extra value at the symbol: a sensor whose value stands at the item's symbol – a gas boiler's water temperature, a ventilation unit's humidity. With an extra value the symbol shows by itself.
- Ask before switching and Marker in 3D as with devices.
- Pictures by state on screens: a Pro add-on, see 6.3.
"Automatic" means NeonPlan 3D finds the matching entity in the area by itself.
4.13 Cameras
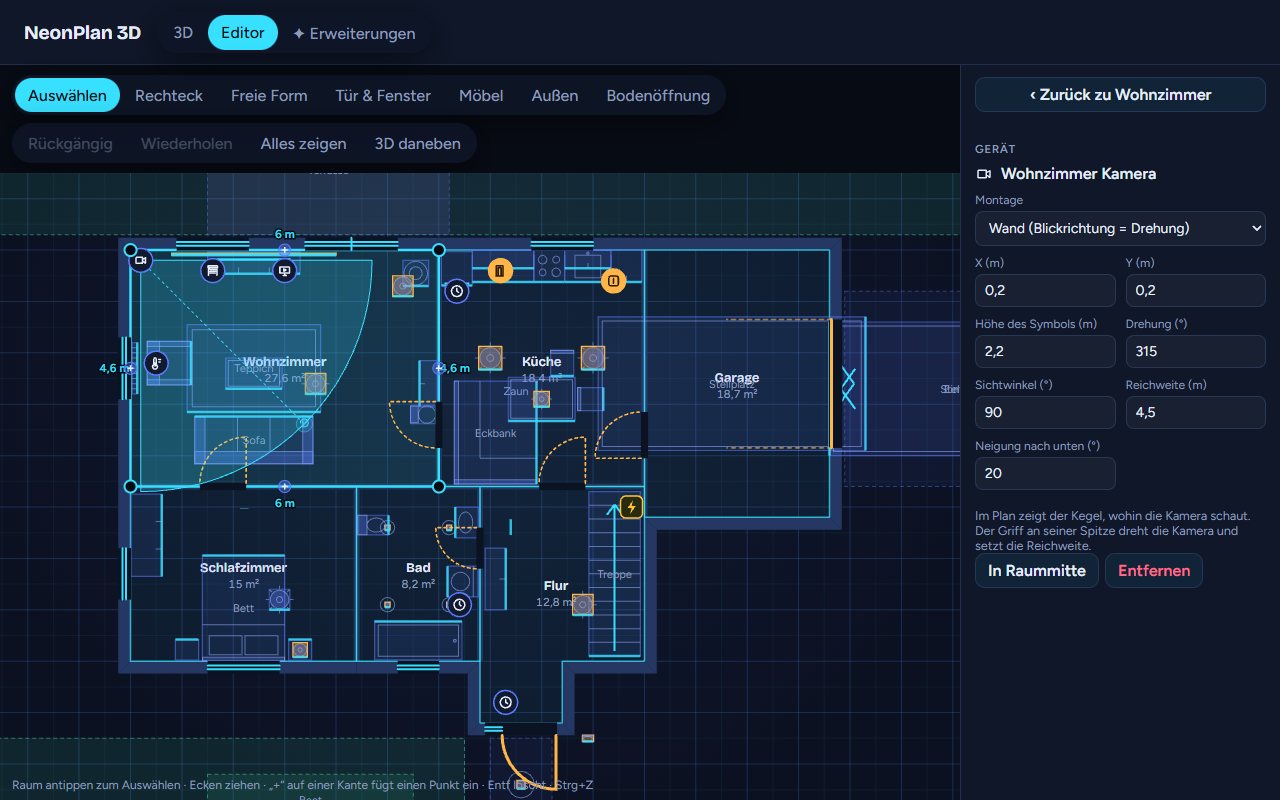
Place cameras like any device. Then:
- Mount: wall, looking along its rotation, or ceiling as a dome that sees all round.
- In the plan a wedge shows where the camera looks. The handle at its tip turns the camera and sets its reach at the same time.
- Show the field of view in 3D can be switched off per camera. In 3D the wedge ends at the first wall: an indoor camera does not see through the wall into the next room.
- Field of view (°), Reach (m) and Tilt down (°) can be typed in as numbers.
In 3D the camera hangs as a small model on the wall or ceiling, its field of view lies on the floor as a wedge. When a motion or presence sensor of the camera reports motion, the wedge turns red.
4.14 Parking spots and vehicles
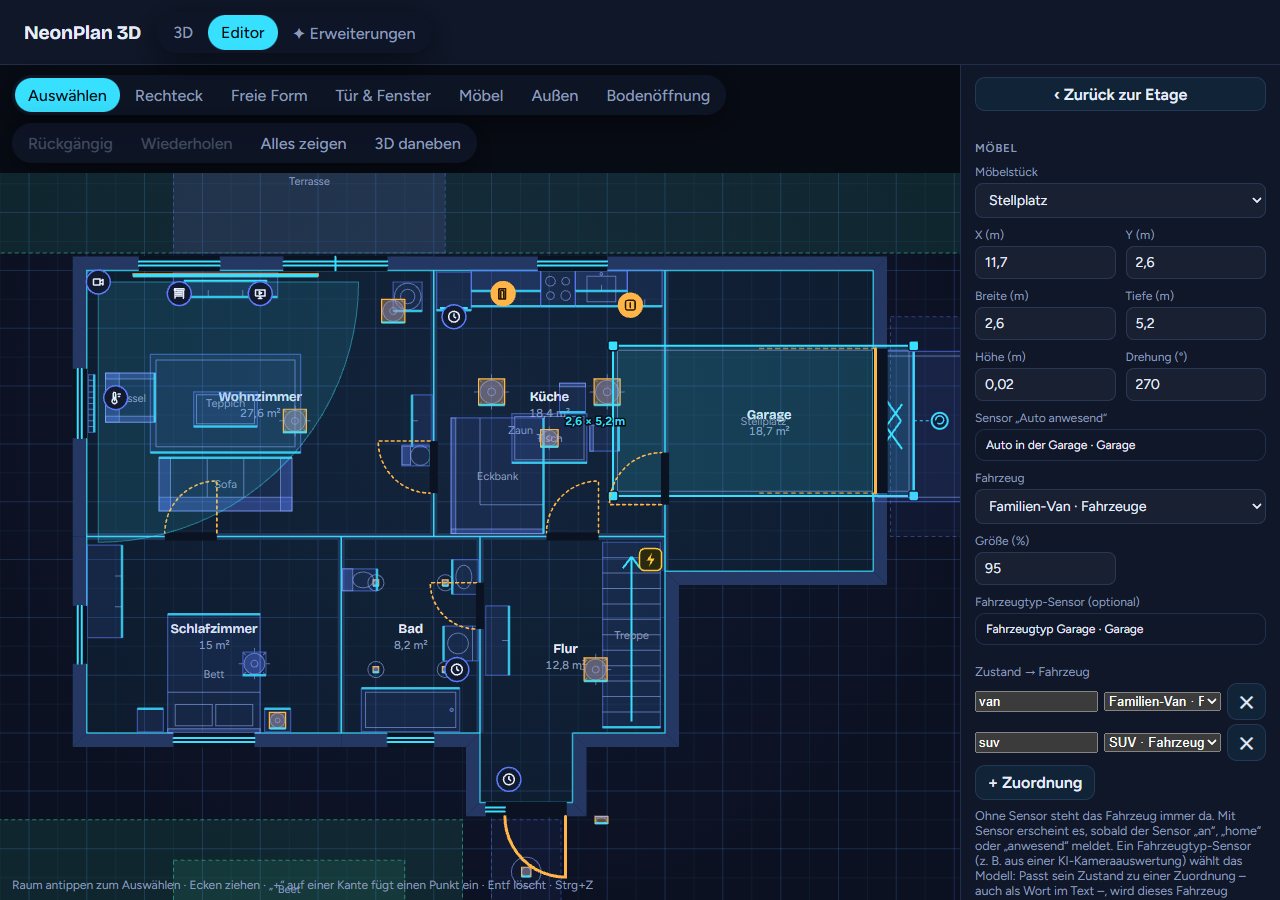
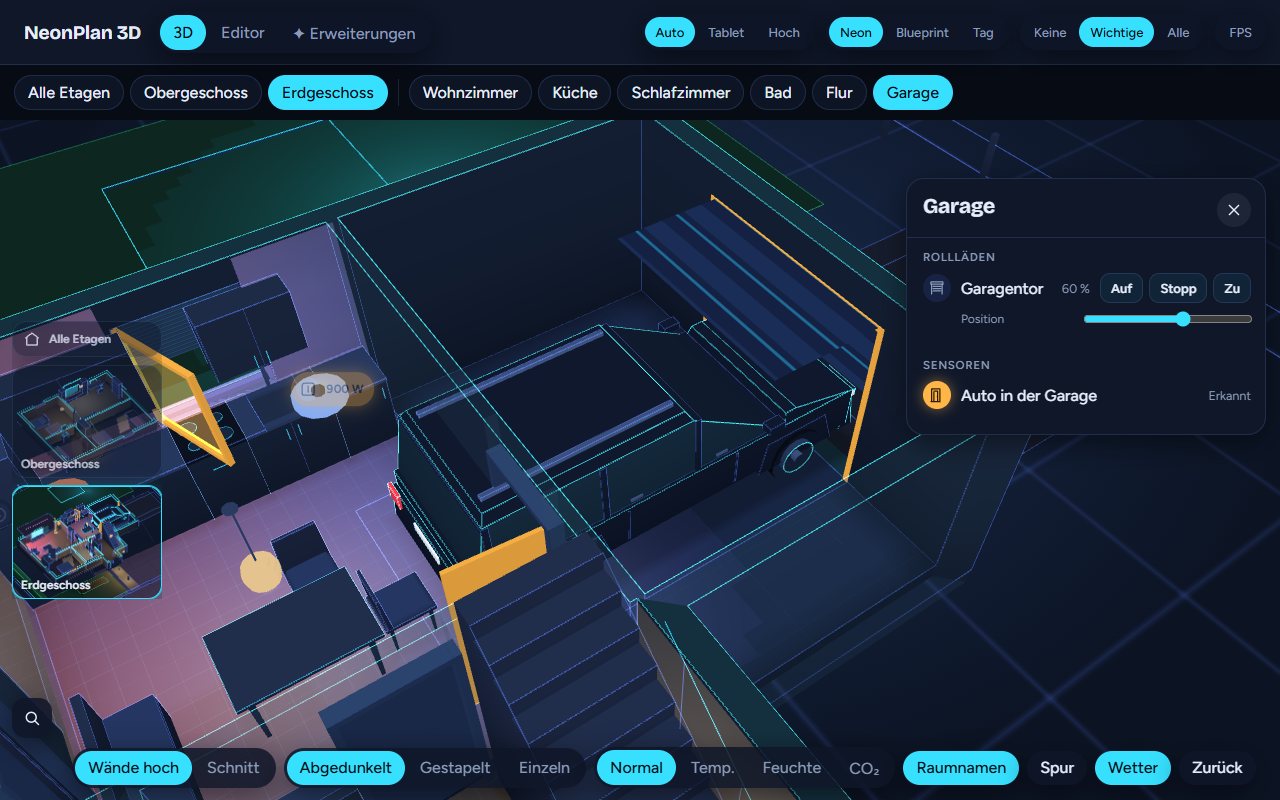
The item Parking spot in the Parking group marks where a car stands: in the garage, on the driveway or anywhere on the plot. A new parking spot points with its arrow from the room's garage door into the garage, without a gate along the room's longer side.
- Sensor "car present": a
binary_sensor,device_trackeror similar. While it reports a car, the vehicle is there. - Vehicle: the model from the "Vehicles" pack.
- Vehicle type sensor (optional): If a sensor reports which car is there, e.g. from an AI camera analysis, assign a model to each state.
- Size (%) fits the model to the spot. If the vehicle is taller than the room, the editor warns.
4.15 Robot vacuum
The robot vacuum item – and the robot vacuum with dock from the Smart Home pack just the same – links to the vacuum entity. While the robot cleans, it drives lanes through the room of its dock in 3D and then returns. The lanes are simulated because Home Assistant usually does not know the real position. With the robot vacuum with dock, the model's own robot drives off: while it is away, the dock stands empty.
Many robots do report the room they are cleaning, for example Roborock and Dreame with a "current room" sensor. NeonPlan 3D finds this sensor on the robot's device by itself; the Current room (sensor) field lets you pick another one. The reported name is compared with the room name and the Home Assistant area, ignoring case and the spelling of umlauts ("Kueche" matches "Küche"). When the robot changes rooms it appears there in 3D and drives its lanes. If no room matches, it stays in the room of its dock.
Its lanes keep clear of furniture standing on the floor: cabinets, sofas, beds, kitchen units and appliances. It drives under tables, desks, chairs, stools and benches, over rugs and under anything hung on the wall, such as wall cabinets.
4.16 Stairs and floor openings
- The Stairs from the library rise from the marked front edge towards the back. If they reach the floor above, they cut the stairwell into its floor.
- The U-stair with landing (Work & other) has two flights side by side: it rises on the left from the marked front edge towards the back, turns at the landing and comes back up on the right towards the front. Mirror turns it the other way. Like the straight stairs it gets the height up to the floor above when you add it and cuts the opening into that floor. Its default size is 2.10 × 2.70 m.
- The Floor opening tool draws a hole straight into a floor, e.g. above the staircase or for a gallery. From above you look through it. Across several rooms it is cut in each of them. Several openings may overlap, for example to make an L shape.
- More stairs and railings come with the Stairs & railings pack.
4.17 Outdoor areas and outdoor lights
With Outside → Outdoor you draw lawn, terrace, path, driveway, flower bed, hedge or fence. Choose in the menu first what you draw; the type can still be changed in the form afterwards. There you also choose Rectangle (drag it open) or Free form: then you place the corners one by one like a free-form room – for curved beds, slanted plot borders or an L-shaped path; a tap on the first corner or Enter closes the area. A selected outdoor area is resized at its corners; a rectangle stays a rectangle. The + in the middle of an edge puts a new corner there (since 3.1.1), as with a room – gates in a fence move along. The plan then shows each corner's number (as in the Corners list) and each edge's length. Under Corners in the form you type each corner as X and Y, like a room's – so edges of a free form become straight or parallel; × removes a corner (gates on the two edges at that corner go with it). Hedges and fences take a height in the form (a 2.5 m thuja screen, a 0.5 m bed border); Show the outline unticked leaves out the glowing line along the edge, say on a plot made of several lawns. Height offset lowers an area below the ground or raises it – the driveway down to a lower garage, a raised terrace; lamps on it follow. Slope tilts an area: the height difference in metres and the direction it falls towards (the high edge sits at the height offset) – a driveway falling to the street, a sloping garden; fence posts and lamps stand on the sloped surface. Wild patch is a type for unmown corners. Balcony is for upper floors: a thin slab at the floor's level with a see-through railing of bars (height in the form); edges along a house wall get no railing – balcony doors behind it stay in view. Cut out of the areas beneath turns an area into a hole in every area drawn before it that contains it whole – a pond or a wild patch in the middle of one single big lawn. Pergola / frame draws corner posts, beams and rafters at the set height, with X-bracing on the sides – for pergolas, carport frames or the support of a roll-off roof. Fences and pergolas can stay open: the edge from the last point back to the first is left out, so the fence leans against the house. Gates in fences (since 2.2): in a fence's form, + Gate in the fence puts a gap into one side, like a door in a wall – as a garden gate (one leaf), a double gate (two leaves) or a sliding gate. You choose the side (in the order you placed the corners), the middle from the side's start and the width; the gap shows in the plan as a yellow bar. Hinge on the other side or Opens towards the other side turns the direction, Opens outwards swings the leaves out of the plot. With a motor or switch (a cover such as a gate motor, a switch, an input_boolean or a lock) and/or a contact the gate opens in 3D too; a tap on it switches it. When the motor only reports "opening"/"closing", the gate runs open in its run time; a contact always wins. Trees, shrubs and brush come as furniture from the Garden & Terrace pack (from release 3: oak, lime, birch, maple, fruit tree, spruce, pine, thuja, shrub, flowering shrub, brush, group of trees); width and height in the furniture form set crown and growth. Path lights, garden spots and outdoor wall lights light the outdoor areas and the facade. Pool: pools are drawn with Outside → Pool; in the menu you choose the shape – Rectangular, Round, Oval or Free – and then draw it (round: as wide as the short side of the box). A round or oval pool is resized at the four corners of its box (a circle stays round) or in the form by diameter or width and depth; the shape itself stays. A pool cuts itself out of the lawn around it. Above-ground pool stands it on the ground as a tub, with a pool height; otherwise it is let into the ground. Basin depth is the depth from the rim down to the floor (1.50 m by default), Rim above the lawn how far the rim stands out – a 1.50 m deep pool standing 20 cm out of the lawn: depth 1.50, rim 0.20. The water stands 15 cm below the rim; you look through the water onto the basin's walls and floor. The depth shows when the pool lies in a lawn, terrace or other area – without ground around it the basin would show from outside, so it stays flat.
Outdoor areas like rooms: give an area (lawn, terrace, balcony, pool …) a Home Assistant area in its form, say "Garden", and a name if you like. It then acts like a room: it is in the room bar, a tap in 3D opens it with the area's devices (garden lights, sockets, irrigation), the camera frames it, and with Show → Values the outdoor temperature stands at its name – sensors with "outdoor" in their name count here on purpose. The area's form lists its devices like a room's: Place, ☆ shows a device in the room panel without putting it on the plan, 👁 hides it there, Aa leaves out its state text. Hedges, fences and pergolas take no area.
4.18 3D beside
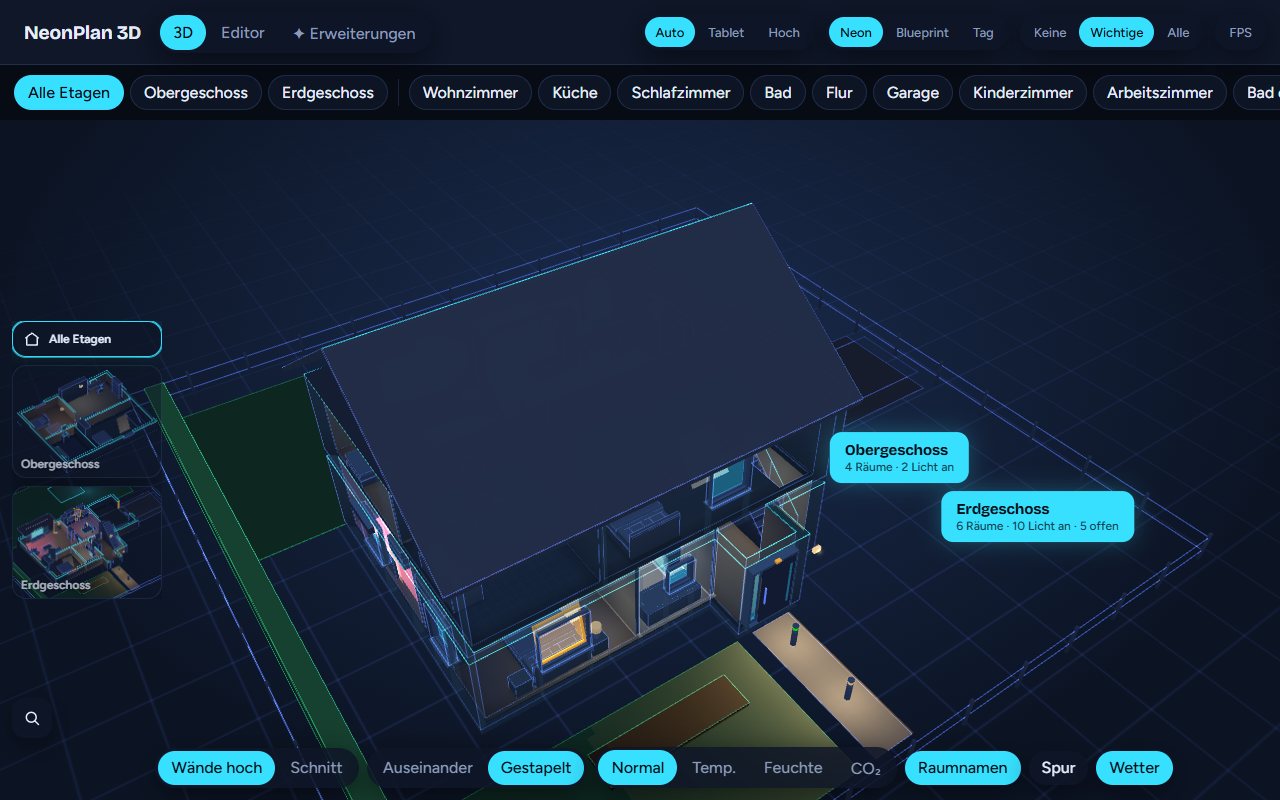
3D beside shows the 3D view to the right of the plan. Every change appears there a moment later.
- Drag the divider between plan and 3D to change the ratio. The browser remembers it.
- At the top of the 3D half you switch between Tall walls and Cut. Beside them sits Effects: off = no weather, no sun, no pets and no ghost in the 3D half, a quiet pane for drawing. Names (since 3.2) hides the room names in the 3D half where many rooms make them crowd the view. The device remembers both switches; the 3D view itself is not affected.
- You can also tap and drag an item or device in the 3D half. A bar with width, depth, height, height above the floor, rotation and delete appears at the bottom.
- Without the pin, the sidebar folds away beside the 3D view as soon as you tap something there, and opens over the 3D half; ‹ at the right edge brings it back. With 📌 Pinned it stays beside it and only folds with Collapse.
4.19 Roof
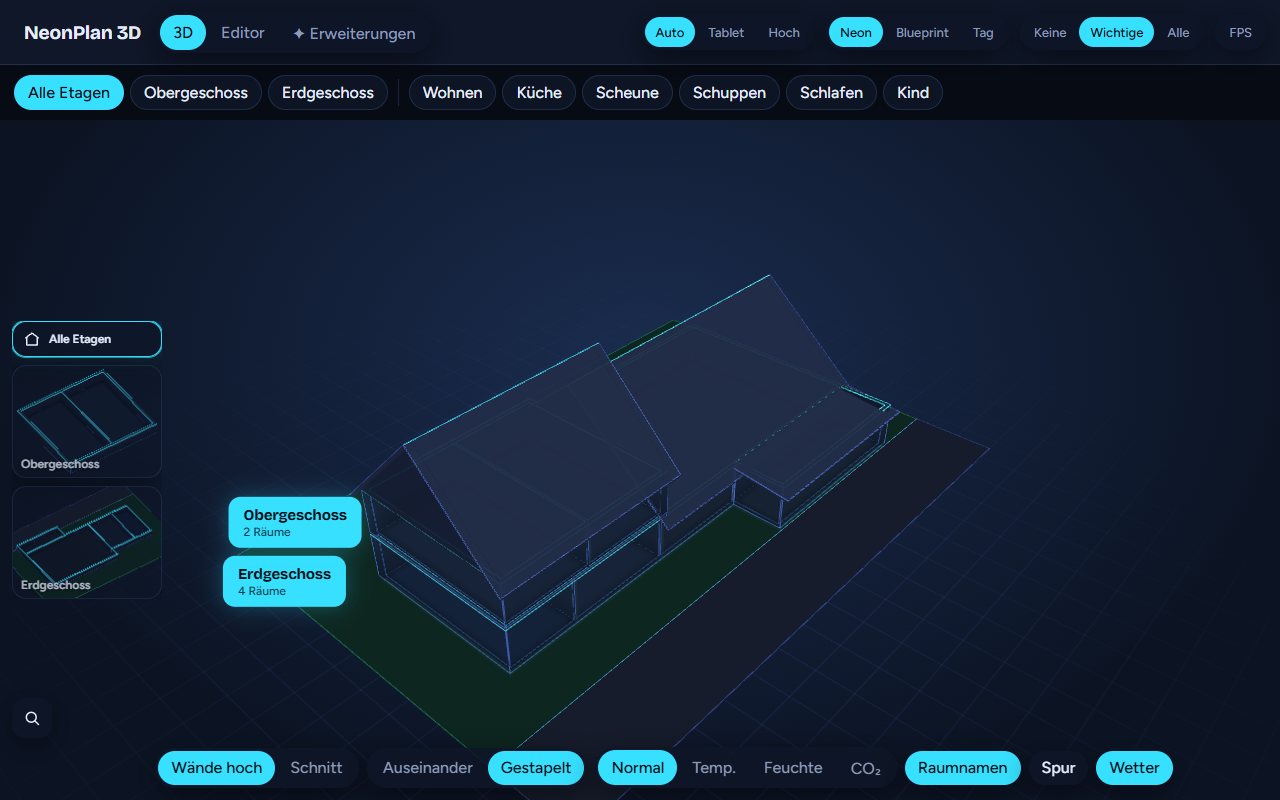
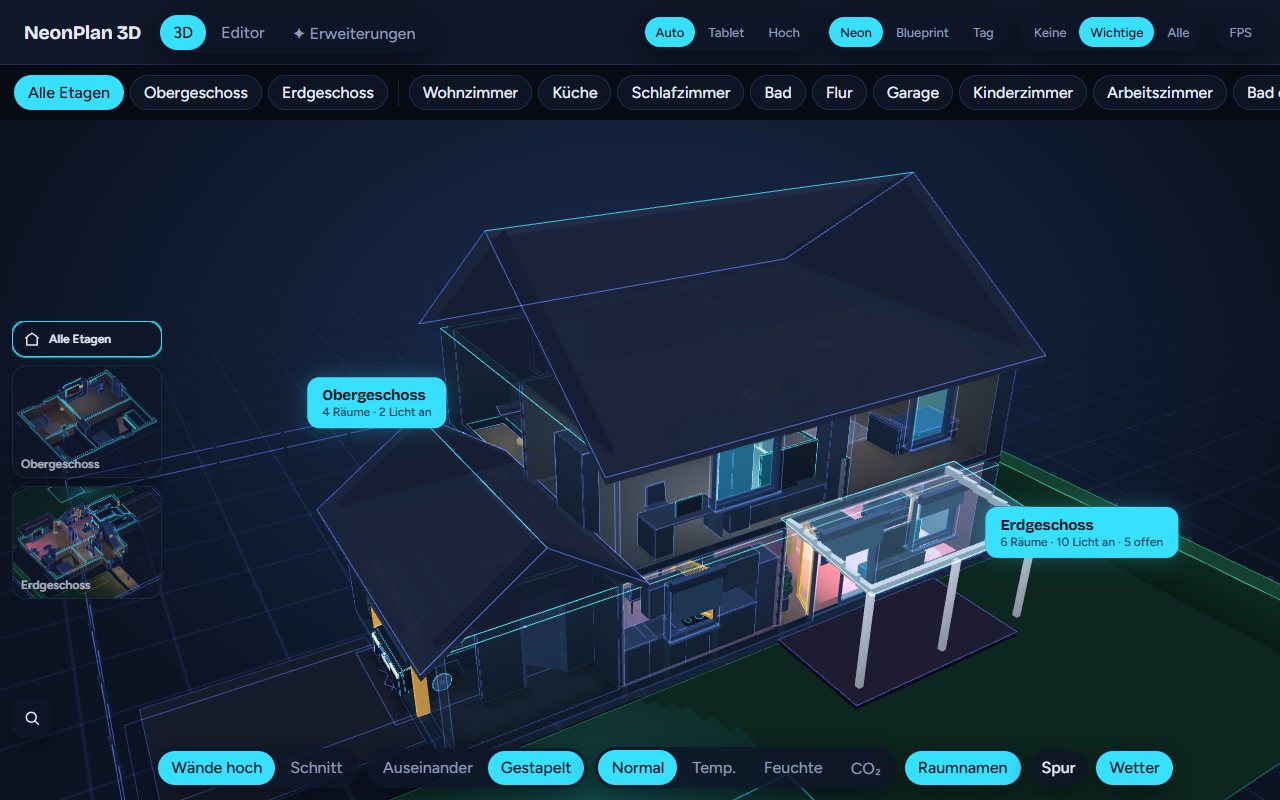
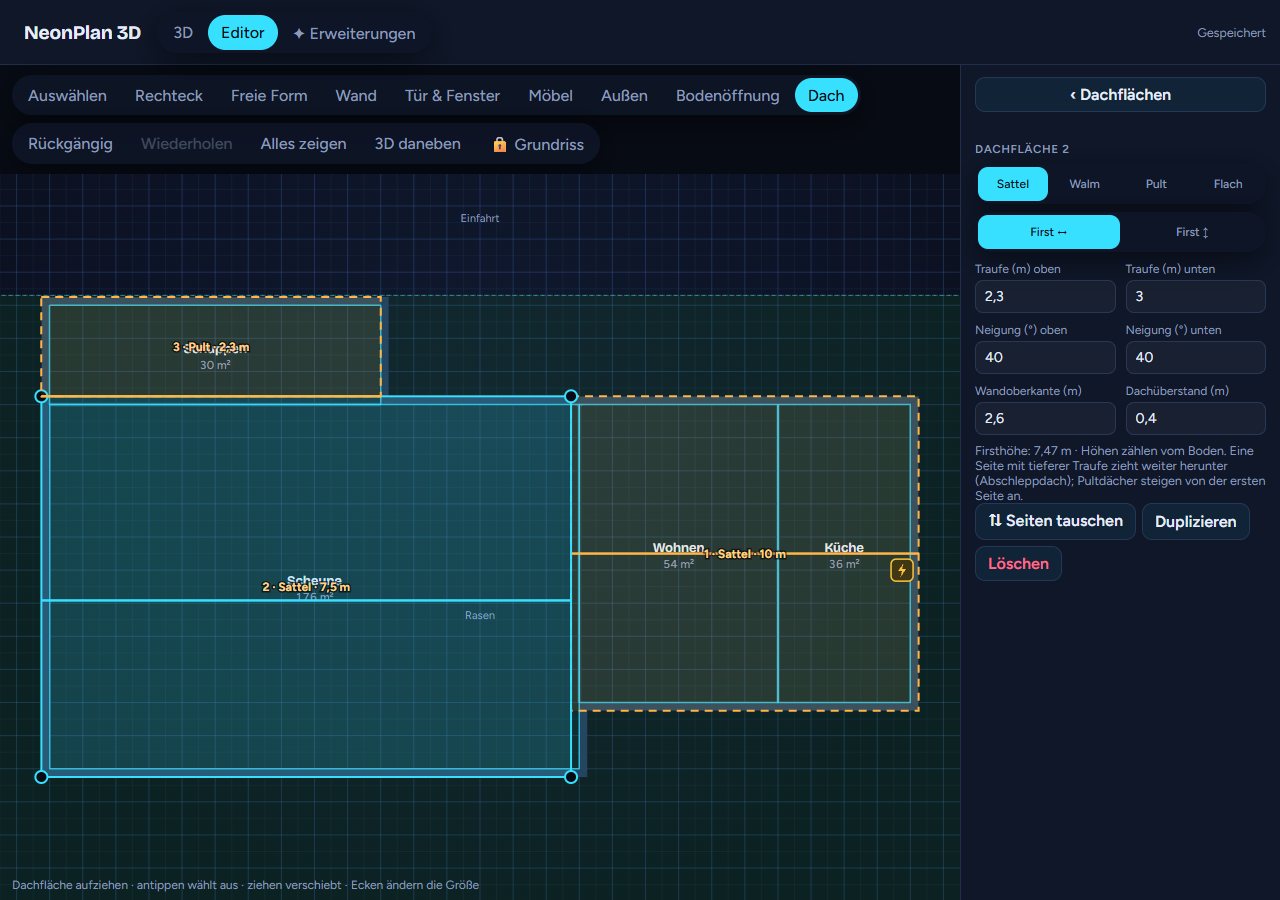
A simple house gets a flat or gable roof over the whole top floor under Build → Roof at Roof shape, with the ridge (along the long or the short side, e.g. a terraced house), pitch and overhang. For everything else – an L- or T-shaped house, a house with a barn, an extension with a pent roof, a roof that reaches far down on one side – you build the roof from roof sections.
-
Choose Roof sections (custom) under Roof, or the Roof tool. The first time, NeonPlan 3D proposes the sections from your rooms: per floor the parts no higher floor covers, each with a gable roof. Then you adjust them.
-
In the Roof tool you drag a new section in the plan. Tap selects one, dragging moves it, the corners resize it. At the top you choose the floor whose rooms the plan shows. The 3D view opens beside it with the whole house, so you see every change at once.
-
With the lock 🔓 Fix (or the key L) a finished section stays put and no longer slips when you tap it; Lock floor plan locks all sections too.
-
Each section has a shape – gable, hip, half-hip (a gable hipped at the top), pyramid (four slopes to a point), mansard (steep below, flatter above; set the upper pitch under Upper roof pitch since 3.5.0, default 30°), pent, flat and parapet (a flat roof with a wall ring) – and a ridge direction (↔ or ↕).
-
For gable, hip and half-hip, End left/right (or top/bottom) sets each end of the ridge on its own to a gable, a hip or a half-hip – a hip roof with an upright gable at the other end, for example. as the shape leaves the end as the shape has it.
-
Eave and pitch are set for both sides separately. All heights count from the ground. A side with a lower eave reaches further down, e.g. a catslide over a low extension. A pent roof rises from the first side; Swap sides turns it round.
-
Turn: if an extension or wing stands at an angle to the house, turn its section with Turn (or ↺ 15° / ↻ 15°), clockwise. Dormers and cross gables on it turn along, roof windows and solar fields stay on it. A turned section is moved by dragging; the corners for resizing come back at 0° (turn back, resize, turn again). Where a turned wing runs into another roof, that roof's slopes cut it off. Since 3.0.5 that also holds for a small turned section sitting on a bigger roof (a gable turned 45° over a pointed bay in a hip roof): it meets the roof below like a wing instead of cutting a dormer's hole into it – shape gable, end gable towards the bay's point, the other end simply running into the main roof. By default every section stays at 0°.
-
Top of walls is the height where the walls below the roof end. A new section takes it from the rooms below, whatever floor the plan shows. Gables and knee walls are built from there up under the roof, so the space under a pent roof is closed too.
-
Sits on floor shows which floor the section belongs to in the 3D view and puts it on another floor's wall tops – top of walls and eaves move along. This helps when a new section landed on the wrong floor, e.g. over an upper floor with a stairwell in the middle.
-
Flat roof as a free shape: a flat roof has the button Take the floor's outline – the surface takes the outline of the shown floor's rooms (L- or Z-shaped too), one surface without seams instead of several rectangles. The corners can be dragged in the plan afterwards; Back to the rectangle drops the shape.
-
Dormers: in a section's form, + Dormer adds a dormer on the chosen side – 2 m wide, its front at the eave wall, eaves 1.4 m above the roof's eave, gable roof, as deep as its ridge needs to meet the slope. A dormer is a small section: move it and change its width, heights and shape (gable, pent) like any other. The main slope opens under it, the cheeks close its sides, and the attic wall rises under the dormer up to its eave – put the dormer window there with Door & window.
-
Cross gables (a "three-gable house"): a gable stepping out of the eave side is a wide dormer whose eaves lie on the top of the walls: + Dormer, then drag its width (say 3.4 m) and set its eave to the top of walls. Its depth follows by itself – the dormer reaches exactly as far as its ridge meets the slope, and the main roof opens only where the dormer's roof lies above it (the valleys). The attic wall under the cross gable rises into the gable; put its window there with Door & window.
-
Roof slopes (knee walls): if the top of walls lies below the ceiling height of the floor underneath (also when the slope already starts in the floor below: its walls on the eave side then end at the slope as well) – say 0.9 m above the attic floor – that floor's walls end under the roof: knee walls at the eaves, gables up to the ridge, inner walls cut by the slope. Windows then only fit where the wall is tall enough (in the gable); on the eave side use roof windows. Dashed lines in the plan show where 1.5 m and 2 m of headroom remain under the slope.
-
Where a section meets a taller part of the house, e.g. a pent roof against the house wall, the overhang is left out there; the roof ends at the wall. This also works when the section is drawn flush against the outer face of a thick wall (since 2.2). Overhang per side in the section's form sets each side's overhang by hand instead (it starts with the automatic values); off, it is automatic again.
-
The ridge height is shown at the bottom of the form. Sections may overlap: the lower roof runs under the higher one, as with a real extension.
-
Create again from the rooms replaces all sections with a new proposal, Back to one roof switches to the simple roof. The sections are kept for later but no longer cut any walls.
-
The ridge height is shown at the bottom of the form. Sections may overlap: the lower roof runs under the higher one, as with a real extension – what lies under the other section is cut away, and a line shows the valley where two sections meet. A wing whose ridge runs at right angles into the slope of a higher roof (an L- or T-shaped house) reaches on into that roof and ends there cleanly in two valleys instead of a gable.
-
Create again from the rooms replaces all sections with a new proposal, Back to one roof switches to the simple roof.
-
Canopy: For a terrace roof or a carport, drag a section over an area without a room. It becomes a canopy by itself: a flat pent roof at 2.4 m, carried by posts and beams instead of walls, with a see-through roof. At the house wall it rests on the wall. The Canopy switch is in the form of every section, too.
Roof windows
Below the roof sections, + Roof window puts a window into a roof face (78 × 118 cm by default). Drag it in the plan, also onto another roof face. Like a window it has a Blind, a Contact and a Tilt contact: open, the sash swings out, hinged at the top; tilted, a little; the blind comes down over the glass from the top.
Every roof window has a name (optional), a blind, a contact and a tilt contact – and a window motor: Velux, Roto or Fakro report the window's position as a cover, and the sash opens in 3D as far as the motor stands. Open or tilted, the frame glows warm like a wall window's. In a roof section the window cuts a hole into the slope, so the attic looks out through it. When the roof fades out as you zoom in on a floor or a room, the roof windows fade out with it. With Show over the room without the roof a window stays where it is over the room – open, tilted, with its blind. Its pane is see-through like a wall window's and its blind has slats, so you can tell from afar whether it is down. Where the slope reaches over a room of the floor below, the window belongs to that floor and shows with it. Every roof window belongs to the room below it: tap the room and its blind, contact and window motor are in the room card, and when the sun shines on that roof face, its light falls through the window onto the room's floor (less with the blind down).
4.20 Energy: solar fields
In the Energy tool only solar fields and energy devices can be moved, in the plan and in 3D; rooms and furniture are locked there, as a note at the top of the plan says. The tool gathers everything about energy in the house, starting with the solar fields (meters, heating and heat pump will follow). + Solar field puts a field on the sunniest free roof face, as large as fits. + Free-standing puts a field on frames beside the house, e.g. in the garden or on a flat garage roof. + On a wall hangs a row of modules on the sunniest outer wall of the floor shown (facade, balcony).
Drag fields in the plan and in the 3D view beside it, also onto another roof face or wall. Roof windows work the same way in the Roof tool. The modules lie in the slope of the face; on a flat roof they stand on frames. This works on the single gable and flat roof and on all roof sections (gable, hip, pent, flat). On hip and pyramid roofs the two triangular hip ends are offered too, e.g. the south end of a hip roof with an east-west ridge; fields get narrower towards the tip.
| Field | Effect |
|---|---|
| Roof face | The face with its compass direction and pitch, e.g. "Main roof · south · 35°" |
| Name | E.g. "String 1 south"; several fields for several strings or roof faces |
| Rows and Modules per row | Size of the field. A list like "4, 4, 3" gives every row its own length (from the eave); shorter rows sit left, centred or right. Modules that would reach beyond the face are left out |
| Modules on/off one by one | Tap single modules in the plan to take them away or put them back, e.g. around a chimney or a roof window |
| Full black / Blue | Look of the modules: all black (default) or classic blue |
| Module width / Module height | Size of one module in portrait, 1.13 × 1.72 m by default |
| Module power (Wp) | Peak power of one module, 400 by default – sets the kWp of the field and its string and how bright the living modules (Energy Pro) glow |
| String | Fields wired together, also on different roofs: e.g. 5 modules on the house and 5 on the garage in "String 1". A string has a name, a PV sensor and is connected to an inverter – or to a battery with a solar input of its own (a power station such as EcoFlow); add both under Devices |
| PV power of this field | The power sensor of its string, for the coming Pro add-on |
| Portrait / Landscape | How the modules (1.13 × 1.72 m) lie |
| Distance from the edge / from the eave | Position of the field. Drag it in the plan, also onto another roof face; it does not slide beyond the edge of its face |
| Tilt of the frames | Flat roofs and the garden: the angle of the frames, plus the direction |
| Free-standing | The field stands on frames and moves freely. Height of the surface lifts it, e.g. 2.8 m onto a garage roof (0 = ground). Rotation turns the rows, as do the ↺/↻ 15° buttons and the turn handle in the plan; the field turns about its middle |
| Wall | Modules hang on an outer wall; in the list every wall is named by floor, room and the corner numbers from the plan (“Wall Ground floor · Hall 4–5 · East · 1.2 m”), free-standing walls say “free-standing”. On a wall the field keeps as many modules as fit in the row; too short for a module lying down, it takes it upright, and a wall narrower than a module (say a 0.9 m garden wall) carries one centred, overhanging both ends. Instead of "distance from the eave" there is the height above the floor. Tilt away from the wall angles them: standing off at the top or at the bottom, up to 90° as a canopy. The floor buttons at the top choose the floor you work on |
| Fill face | Puts as many modules on the face as fit |
Below the field you see its power, counted with 400 W per module. The plan lock does not hold solar fields; 🔓 Fix in the form fixes a single field (and a roof window just the same). Devices: solar inverters, home batteries and wallboxes are added in the Energy tool as well, under Devices, on the floor chosen at the top. A wallbox goes into the garage by itself, inverters and batteries into a utility room (utility room, basement …), each against a wall without a door or gate, and the plan moves there. Tapping a device in the list shows it in the plan. There, in the Energy tool, every device carries a round marker with a symbol (⚡ inverter, 🔋 battery, 🔌 wallbox) to grab and move it by, also below a solar field on the roof. With a power sensor they show their watts. The home battery also shows its charge with the State of charge field, e.g. "64 % · ▲ 1.5 kW" (▲ charging, ▼ discharging), the wallbox "charging · 11 kW" or "plugged in" with a Status sensor.
Meter and grid connection: The electricity meter is the fourth energy device; it takes the grid sensor (W, + = import) and shows "Grid import 420 W" or "Export 900 W". The grid connection marks where the cable to the utility leaves the plot, e.g. at the end of the driveway; it is added where the cable would end by itself and can be dragged in the plan. Every device has a Name field in its form ("Inverter north") that shows in the list, the form and on the pins in 3D, and inverters and batteries a Model: wall unit, slim and tall or hybrid; tower, wall battery or compact balcony battery. Several inverters and batteries work, e.g. a big plant and a balcony plant: each gets its own sensor. Cable hub (Energie Pro, since 2.2.0): normally every cable runs to the meter. If the meter stands at the grid connection, far from the house board, tick Cables meet at a point of their own in the energy tool's devices and Set the point in the plan with a tap – the cables then meet there, and the checklist counts it as done. In an inverter's form, Cable ends at the grid point lets its cable run to the grid connection instead of the meter.
Energy balance: NeonPlan takes grid, solar and battery from the devices in the plan (meter, inverters, batteries; several add up, charges are averaged). In the Energy balance section you choose other sensors, flip signs and set the house consumption. Take over from the energy dashboard fetches the sensors you set up in Home Assistant's energy dashboard: for every energy statistic the power sensor of the same device, plus the gas and water meters. Check the signs afterwards. Gas meter and water meter are counters (a meter reading, e.g. in m³); with Energy Pro the house card shows how much was used today.
At the bottom, a card announces the coming Pro add-on Energy Pro. Everything you set up here stays free and is used by it directly.
4.21 Cellar and ground
A cellar is a floor with a negative elevation, e.g. −2.6 m. Under ⚙ Settings → Ground you set:
- Ground height (in metres, ground floor = 0) says where the ground lies around the house. Lawns, paths and terraces lie on it. For a semi-basement or raised ground floor you lower it as far as the cellar should show, e.g. to −1.2 m. If the house then stands higher than the ground, it gets a plinth down to the ground in 3D – nothing floats.
- Show cellars in the earth: floors below the ground sit in the earth in 3D. Open the cellar and you see it as in a building pit, with the earth walls around it. Unticked, they stand free as before.
- Reset the ground sets everything back.
Cellar window: in a window's form, Cellar window sets the right size – 100 × 50 cm, 25 cm under the ceiling. A window below the ground gets a light well with a grate in 3D by itself. The tick Light well is in the window form exactly when 3D draws a well (a window in an outer wall below the ground) and takes it away again (e.g. where a path runs past outside); Rim above the ground raises the rim and grate so a gravel or paved path around the house does not cover them. Where a lawn, path or terrace of the garden tool reaches over the well up to the house, its rim stands just above that surface by itself. Since 2.2 a lawn or path raised up to the house counts as the ground too: a cellar window under it gets its well even when the plan's ground level lies lower. Depth from the wall (m) sets how far the well reaches out (0.8 m by default), so it stays within a narrow path.
4.22 Awnings
Under Furniture → Terrace & balcony there is the Awning. In 3D it runs out and in with its cover – like a blind.
- Kind: Folding-arm (the classic over a terrace), Drop-arm (balcony, window – the arms swing out and down), Vertical / ZIP (the fabric runs straight down in side rails), Pergola / conservatory (a fixed frame with posts, the fabric runs out on top) and Side awning (a privacy screen pulled out sideways from a post). Choosing a kind sets its usual sizes, which you then adjust.
- Size: width is the awning along the wall, depth its projection fully out (for a drop-arm the arm length, for a pergola up to the posts). The back of the frame goes against the house wall; Height above the floor is the cassette's underside (for a side awning the fabric's height). Fall is the fabric's slope.
- Awning (cover): the cover from Home Assistant. If it reports its position while it runs, the awning runs out slowly in 3D; if it only says opening/closing, it moves at its Run time fully out. A separate Position sensor works too. Reverse direction helps with covers that report 100 % while the awning is in.
- Valance: the fabric edge hanging at the front, can be switched off.
4.23 Waste bins and mailboxes
Under Furniture → Household you find the waste bin and the mailbox.
- Waste bin – shape: wheelie bin 120 l or 240 l, 1100 l container, multi-compartment bin, bag, caddy / pail or underground container (only its column stands out of the ground). The shape sets the usual size.
- Waste: general, food / organic, paper, packaging, glass, garden, recycling or other. It gives the bin the colours usual in your country (by the country set in Home Assistant: in Germany paper is blue and food waste brown, in the US recycling is blue; in Australia the lid tells the kind). Colour and lid can be changed freely afterwards.
- Mailbox – shape: wall mailbox (hanging at 1 m), mailbox on a post with a flag, post box with a newspaper holder, parcel box or mailbox bank.
4.24 Home technology: light switches, sockets, Wi-Fi and hot water
Under Furniture → Home technology (in the wall view under 🔌 Switches) you find the light switch and the socket. They hang on the wall: the switch at 1.05 m, the socket at 0.3 m (the outdoor socket at 0.5 m); Height above floor sets your own. A socket placed a little into the wall is shown on the wall's face in 3D; on a low wall (a balcony parapet, say) it comes down, without a height of its own, far enough to stay below the wall's top.
- Buttons / sockets in the frame: 1 to 4 in one frame; the frame grows wider to fit.
- Every button, every socket gets its own entity: a light, a switch (the relay, the smart plug) or a fan. It glows in 3D while the entity is on – a socket green, a light switch's button softly: for a light in its colour, otherwise in the accent colour.
- The same entity on several sockets: when one relay switches two sockets (inside and outside, or a double socket), choose the same entity for both. This works across any number of frames.
- Power (sockets only): an optional power sensor per socket. The socket glows brighter the more it draws and counts as a consumer.
- Kind (socket): indoor or outdoor socket with lid.
- Tap: with one entity a tap switches it right away. With several, a small menu opens with one button per gang. Ask before switching applies to every gang.
- With several gangs, the symbol above the frame shows how many are on (e.g. "1/2"); sockets show their power too.
Wi-Fi access point: a flat disc under the ceiling or a plate on the wall (Mounting). As its status pick whatever says whether it is there – a connectivity sensor, its state, a device_tracker; diagnostic entities (UniFi's, for example) are offered too. Its ring glows blue while it is there and red when it is gone; its symbol then shows with "Offline". With the connected clients sensor their number stands at the symbol.
Water heater: a standing tank or a slim tank on the wall (at 1.1 m). Link the water_heater entity, a thermostat or the heating element's switch, plus optionally a sensor with the water temperature and a power sensor. It glows warm while it heats (thermostat heating, switch on or power above the threshold), faintly while it is ready, and shows the water temperature. The heat pump (indoor unit), gas boiler, buffer tank and water heater from the packs take a water_heater entity as well; their pin shows the mode and the water temperature.
4.25 Several floor plans and the property (new in 3.0)
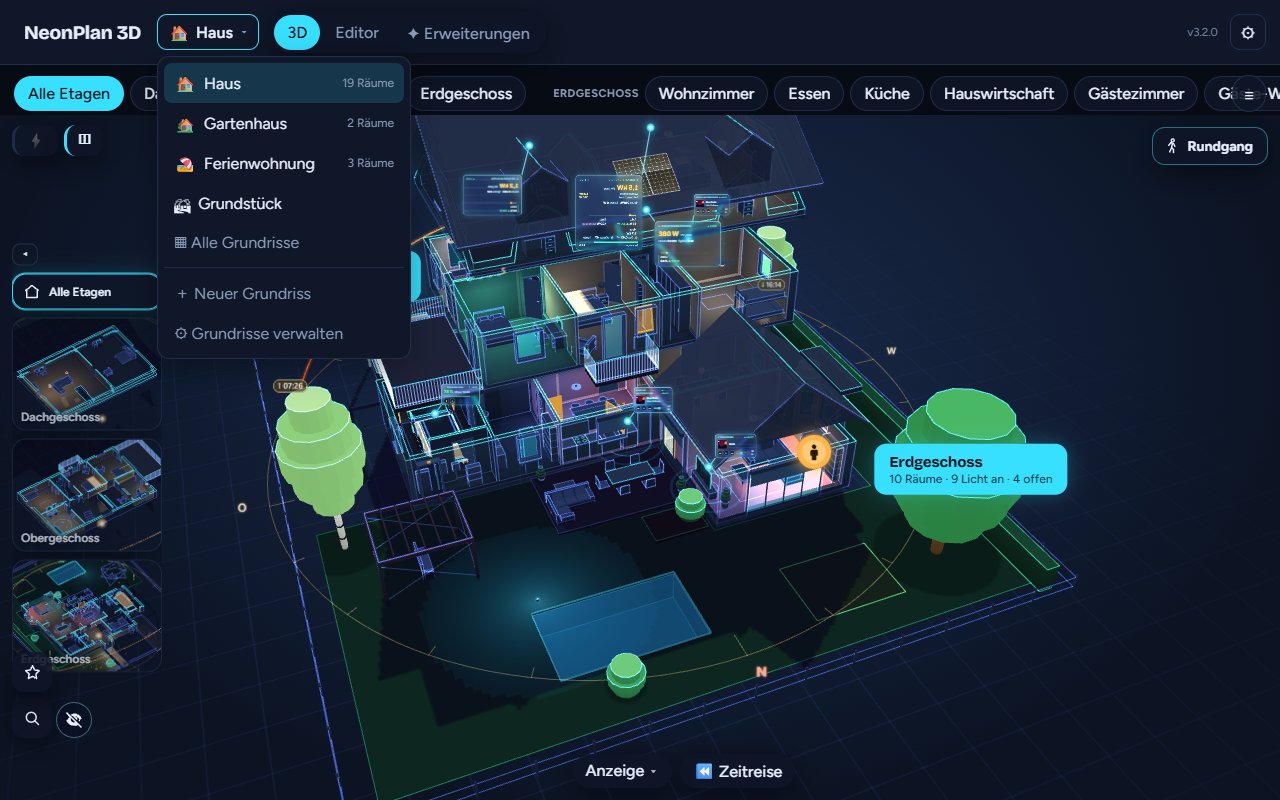
One installation can hold several floor plans: the house, the garage, the garden house, a granny flat or the holiday flat by the sea. Each floor plan has its own floors, rooms, furniture, devices, card templates and restore points. Your plan so far stays as it is – it is the first floor plan.
- Create: ⚙ Settings → 🏘 Floor plans → New floor plan: type a name, choose where it comes from (Empty, Copy of … or From a file – an export, also one from the import page) and Create. The new floor plan opens in the editor at once.
- Switch: the picker with every floor plan sits at the top next to "NeonPlan 3D"; admins also create one there with + New floor plan. Other users see the picker once there are two. Each device remembers which one was open last. A link with
?plan=<id>opens a particular one. - Manage: in the same list you rename a plan, choose an icon (🏠 🏡 🏢 🏖️ …), sort with ↑ ↓ and open it with Open. 🗑 moves a floor plan to the bin: it can be restored for 30 days, only then is it deleted. The first floor plan cannot be deleted. Each floor plan shows its id for the dashboard card.
- All floor plans: in the picker, ▦ All floor plans shows a tile per floor plan with the lights that are on, open windows and doors, the temperature and warnings. A tap opens it.
- Warnings from everywhere: if the water sensor in the garden house goes off while the house is open, "Garden house: Workshop · Water …" shows at the top with Show, which jumps straight into the room. The picker's button shows the number of warnings.
- The property: under ⚙ → 🏘 Floor plans → Property you place the other buildings beside the house: tick one, drag it to its place in the view from above (0.5 m grid), turn it in 15° steps with ↺ ↻ or by 90°. Unticked, a floor plan is somewhere else, like the holiday flat. 🏘 Property in the picker then shows every building together in 3D, with lights, devices and warnings. A tap on a room of another building opens its floor plan in that room. The property view is for looking and switching; each floor plan is edited on its own. Every building brings its own roof.
- Live Presence works with one floor plan. Which one, you choose at the bottom of the list.
- Announcements find rooms in every floor plan. Without a room they go to the floor plans on the property; with Floor plan (
plan:) to one only.
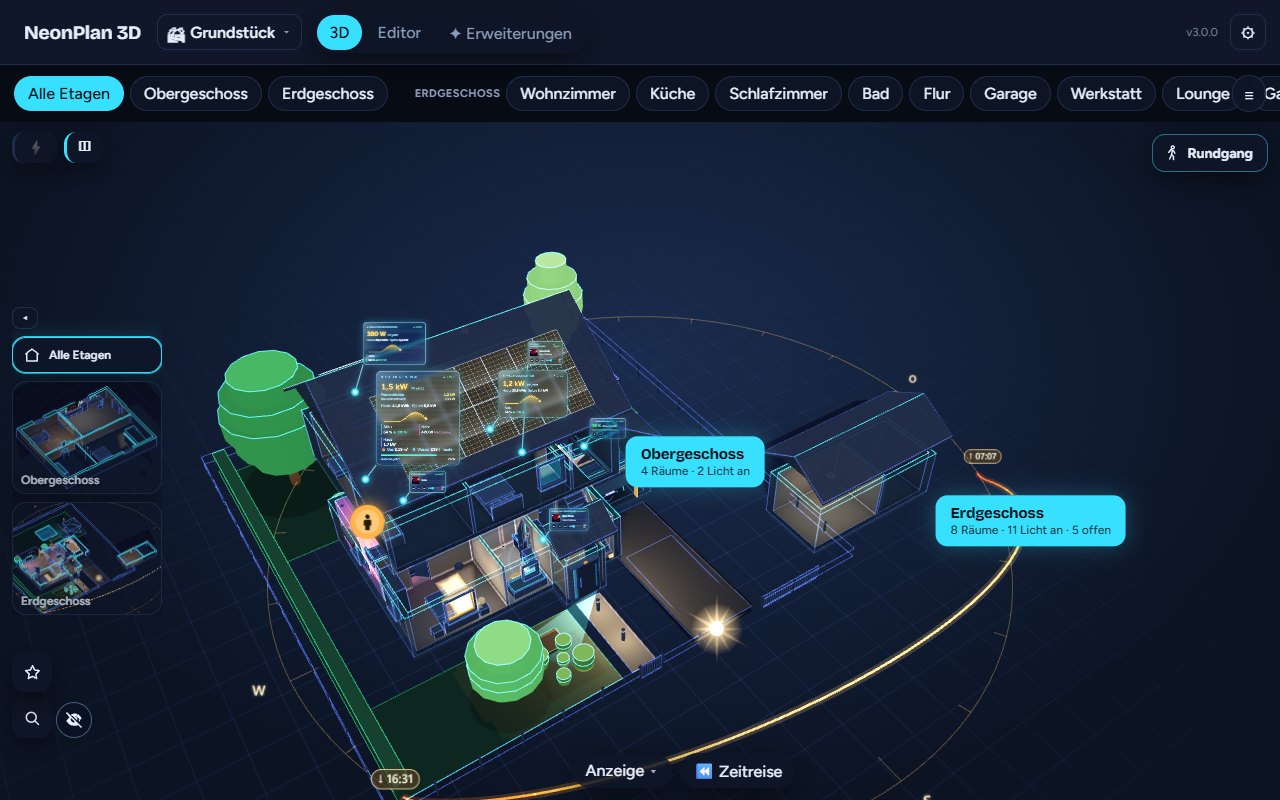
4.26 The surroundings from the map (new)
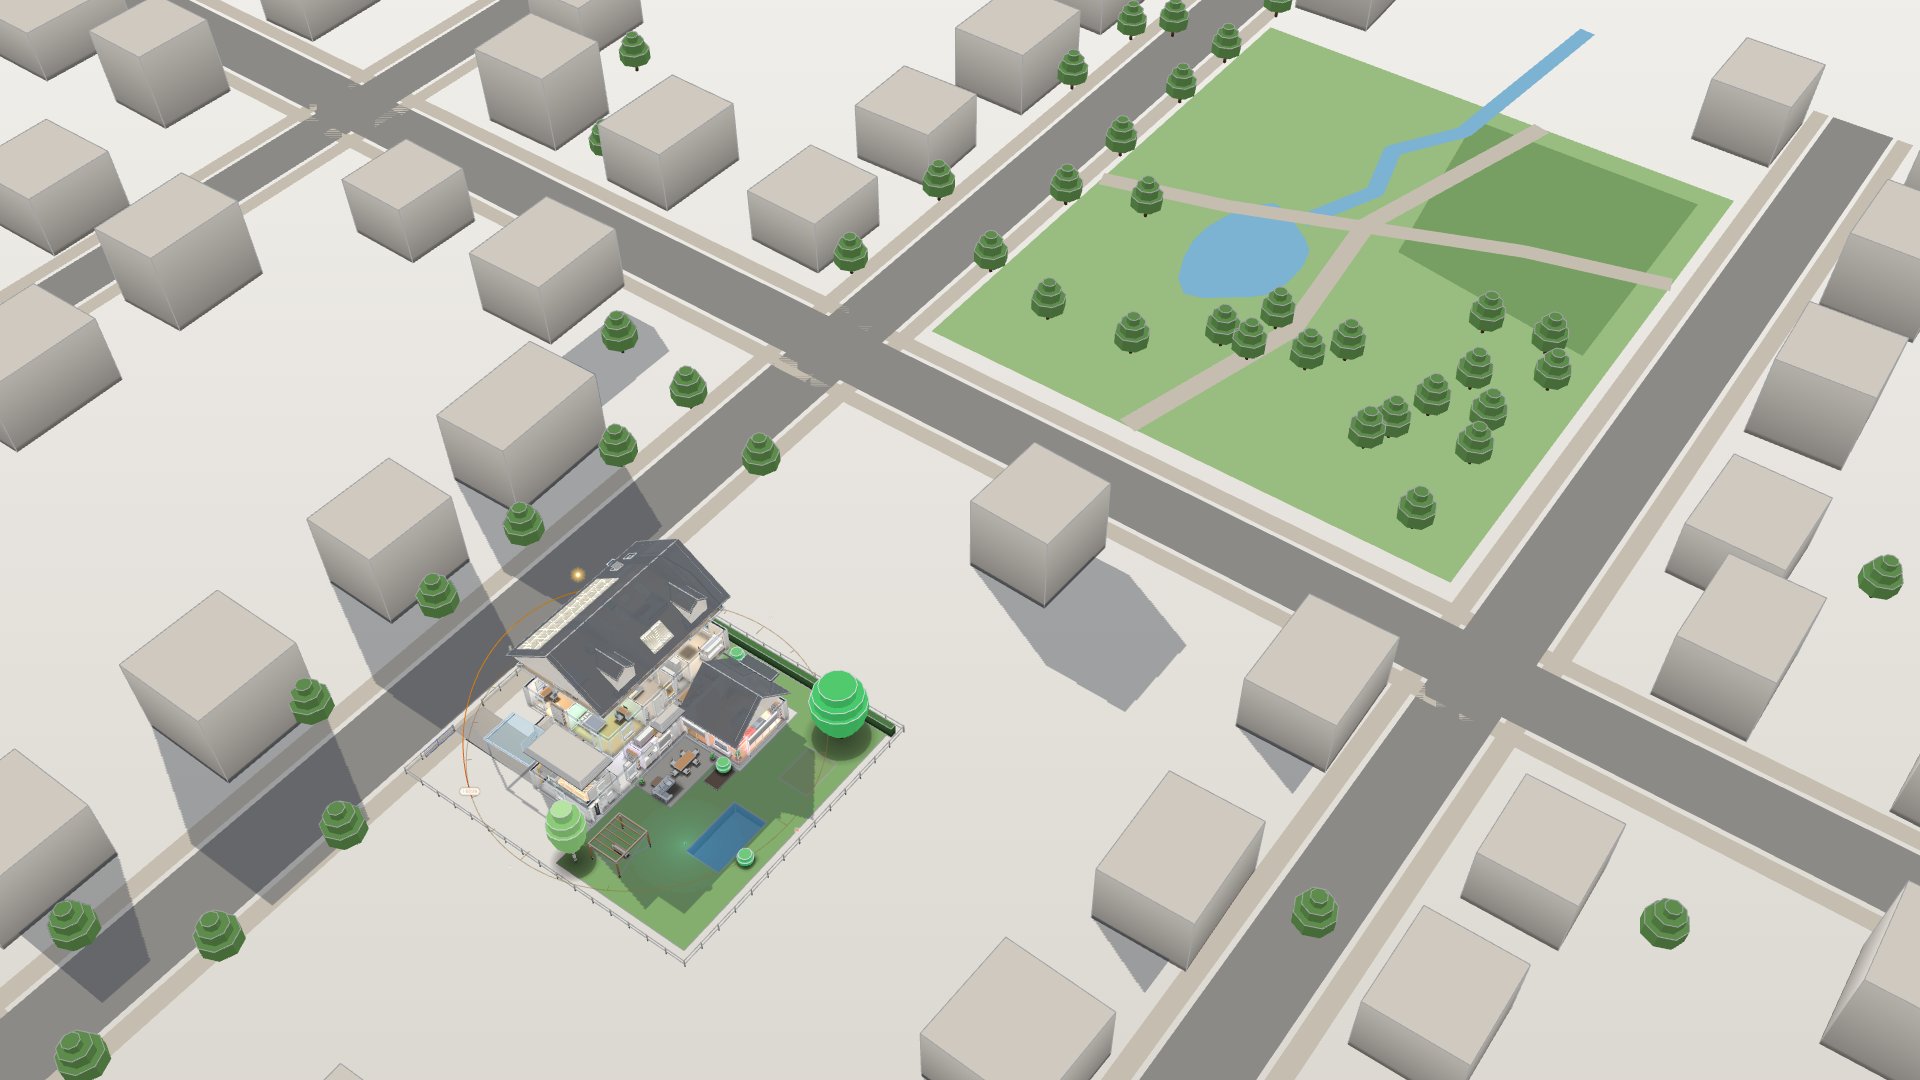
Start with the map: while the ground floor is still empty, NeonPlan offers to start with the map. Load the map fetches the surroundings; your house from the map then stands dashed yellow in the plan, turned square to the grid with a corner at the origin, and north is already set. Draw the outer walls on it (the outline's corners snap) or load your floor-plan picture and lay it exactly onto it with 🗺 Align to the map (see 4.2). How exact the outline is depends on the area; check one wall's length with a tape measure.
Under ⚙ Settings → 🗺 Surroundings NeonPlan brings in your house's neighbourhood from the free map OpenStreetMap: the neighbours' houses as blocks at their height, streets, paths, railways, streams, ponds, parks, woods and single trees. It works worldwide; how many houses the map knows depends on the area.
- Load surroundings fetches everything within the chosen radius (100, 150 or 250 m) around the location set in Home Assistant (Settings → System → General). For this, that location is sent once to the public OpenStreetMap service Overpass. The neighbourhood then stays in the plan; it is only fetched again when you tap Load again. When the map servers are busy, loading can take a minute or ask you to try again later.
- NeonPlan finds your house on the map (the building at your location), lays it onto your plan and turns north so that house and rooms lie on top of each other best (an attached garage included; a garden shed apart does not count). That puts the sun's path and the shadows right too. Your house from the map is dashed yellow in the plan; map buildings standing in your rooms (a garage you drew yourself, say) are not drawn twice.
- If it does not fit quite, turn the map under Align in steps of 90° or 1° and move it by 50 cm with the arrows. The house stays where it is, the map turns around it. Your house is then the map's house under your plan; if NeonPlan took a neighbour's house for yours (your location lies on no house of the map), it shows again as soon as you move the map off it. Align again places it automatically once more.
- The neighbours' houses cast their shadows into your garden while Sun arc and house shadow is on (see 5.7), in the All floors view and not at the Tablet level.
- Show in 3D hides and shows the surroundings, Remove deletes them from the plan. Room cards show only their rooms, without surroundings.
- Under Show and hide houses a small map shows your house and the houses around it. Tap a house to hide it or show it again (dashed yellow = hidden). Map buildings standing mostly on what you drew yourself are hidden by NeonPlan itself: on your rooms (on a floor of its own for the garden too), under your roof sections (a carport, a garden house) or on a pergola – such as a garage the map keeps as a building of its own. Since 3.3.1 the plan shows the map on every floor at the ground floor's level.
- Neighbours' houses as outlines only shows the neighbours' houses flat as an outline on the ground instead of as blocks; they then cast no shadows.
- Height of the surroundings (m) moves the whole map up (+) or down (−) – for a street that lies higher or lower than the ground floor (a slope, a sloping drive). Default 0.
Bottom right in the 3D view it says "© OpenStreetMap": the map data comes from the OpenStreetMap contributors under the Open Database Licence.