5. The 3D view
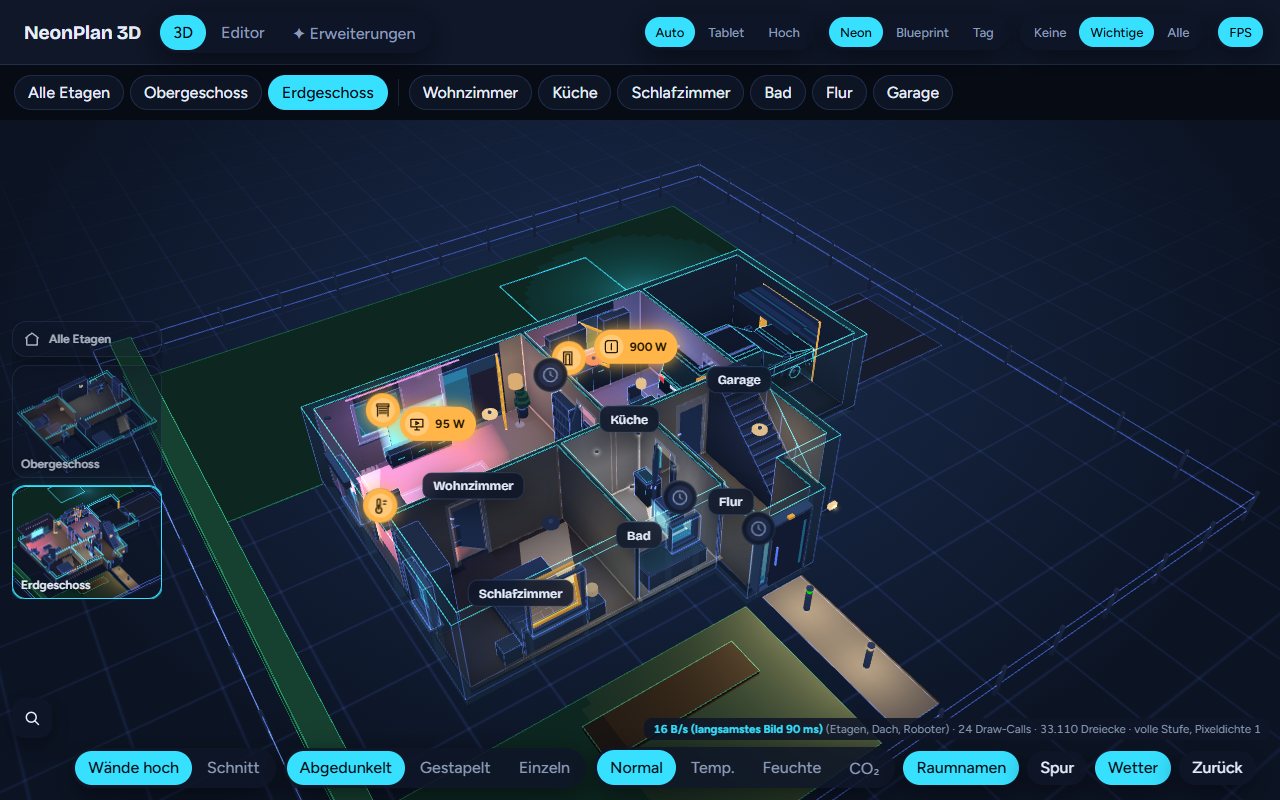
5.1 House, floor, room
The 3D view has three levels:
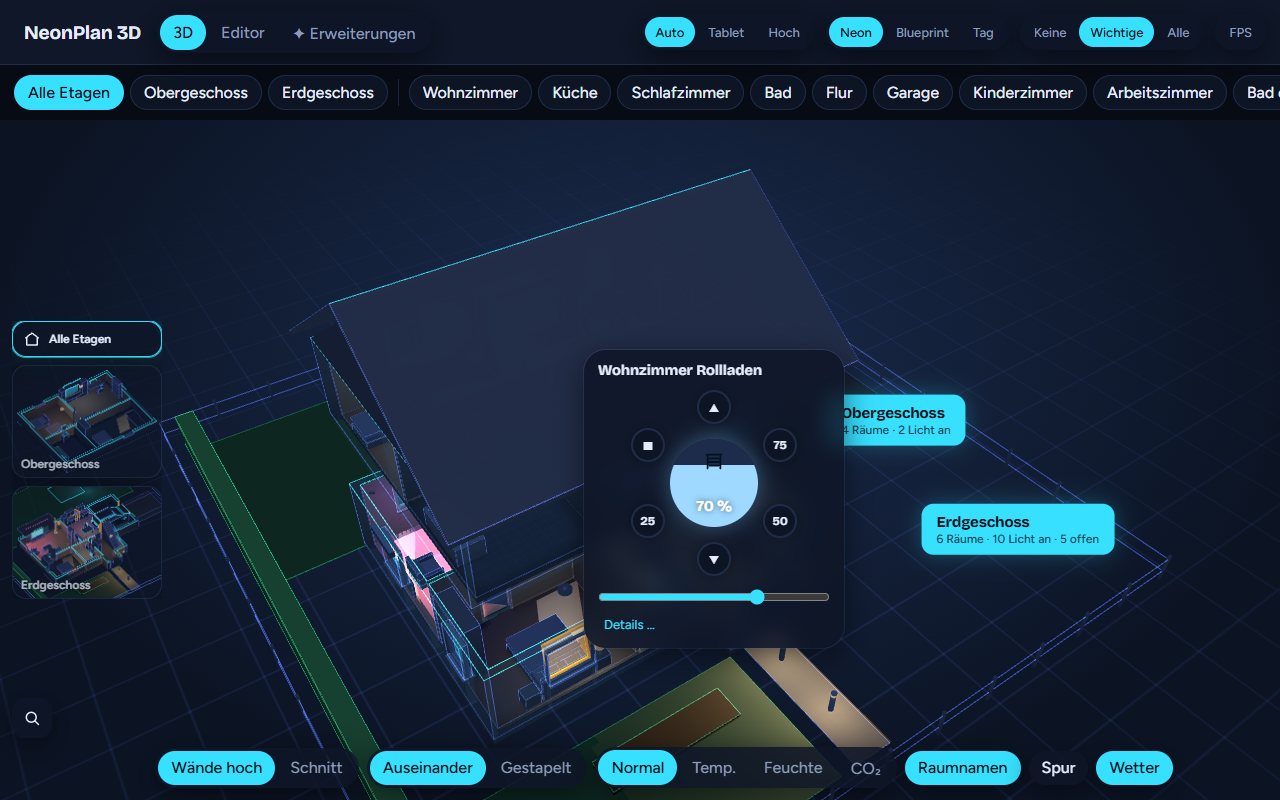
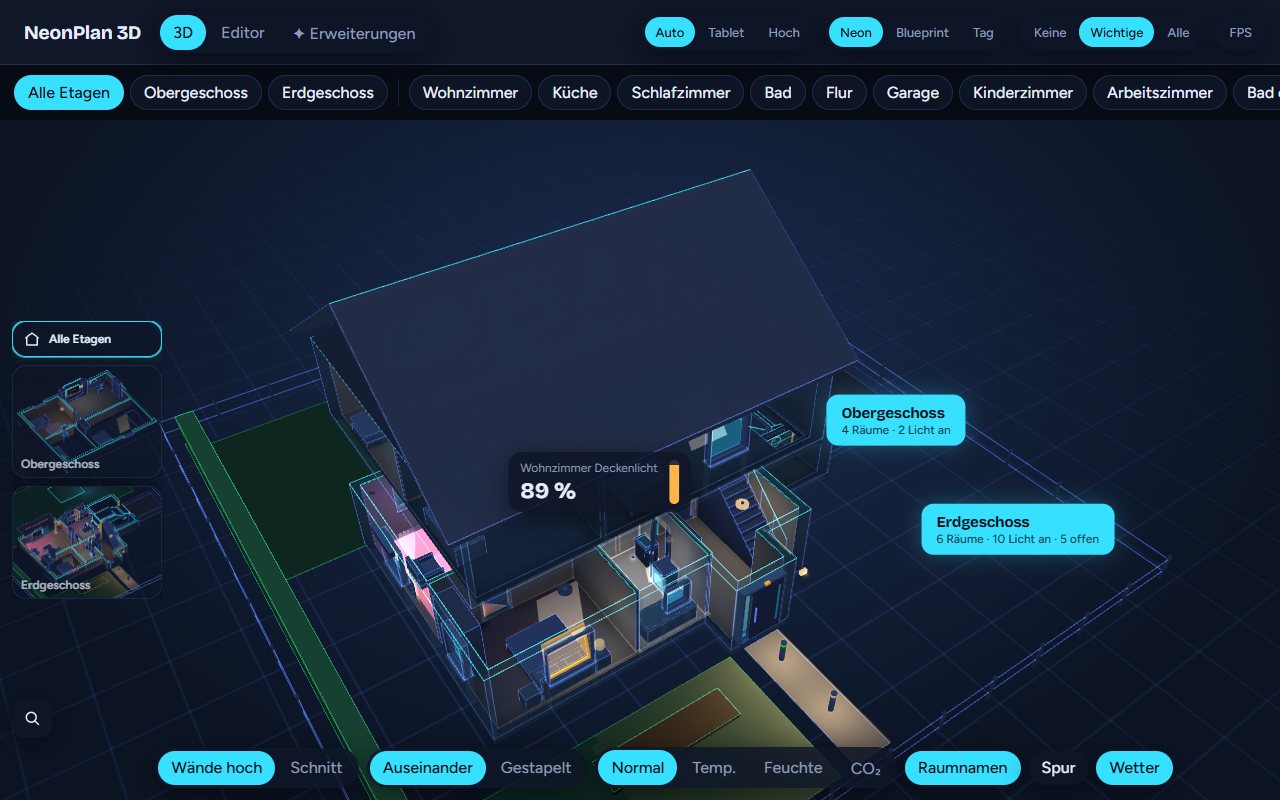
- The whole house with a label per floor: rooms, lights on, open windows.
- One floor: The floors above fly away, the ones below stay dimmed, stacked or hidden, as you choose.
- One room: The camera flies in, the room panel opens.
Navigating:
- Tap a floor label or a room to go one level down.
- Double tap an empty spot, Esc or Back go one level up.
- Drag to turn the view, two fingers or the mouse wheel zoom.
- The floor pictures on the left jump straight to a floor. The small arrow above them folds them into plain floor buttons (the device remembers it); in the card
floor_thumbs: falseturns them off. - Buttons at the top list all floors and the rooms of the open floor.
5.2 The switches at the bottom
The switches for walls, floors, roof, heat map and the Pro displays are in the Show ▾ menu at the bottom left; a tap beside it closes it.
| Switch | Effect |
|---|---|
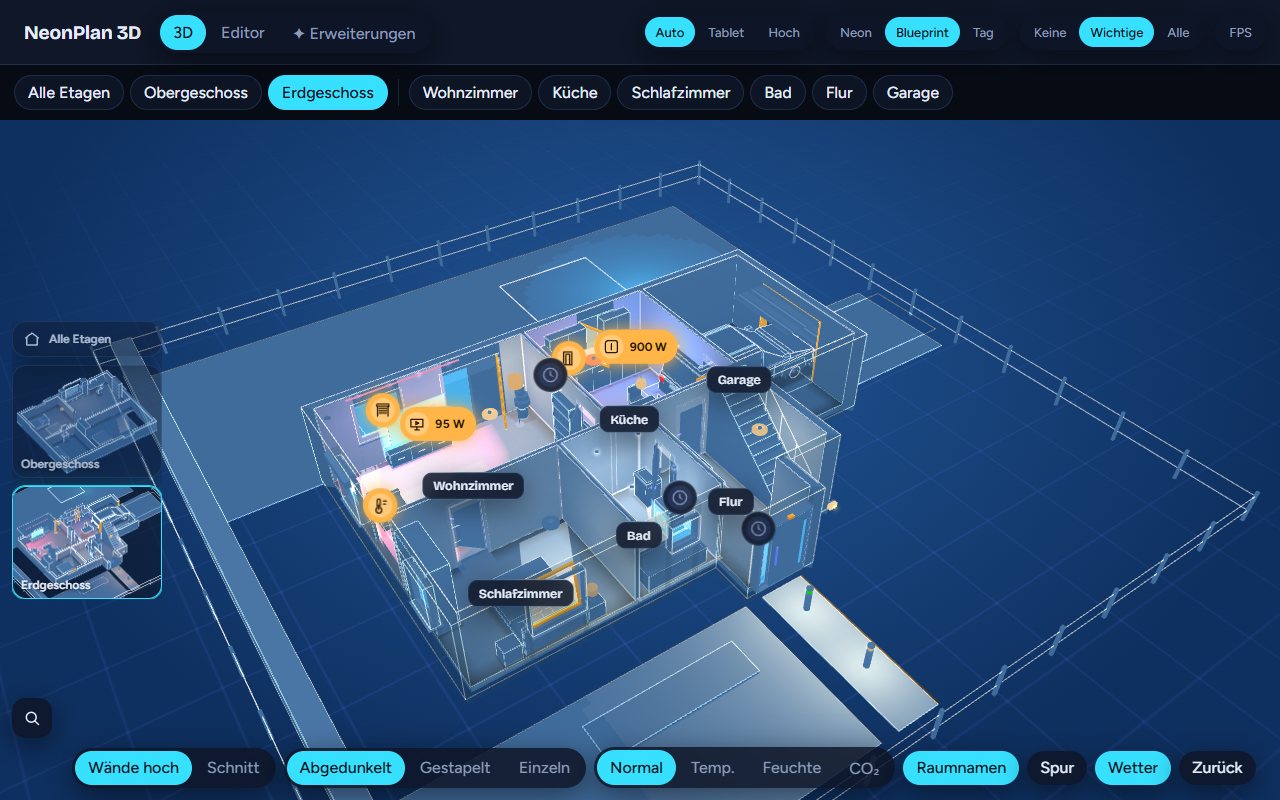
| Tall walls / Cut | Walls at full height, the front ones as tinted glass, or all walls cut at hip height – tall furniture (wardrobe, stairs, tall units) is cut with them, so it hides nothing behind it. Each device remembers the choice |
| With furniture / Floor plan only | Floor plan only (since 2.2): walls, doors, windows and stairs without furniture – devices and their markers stay. Each device remembers the choice |
| Apart / Stacked | In the house view: floors pulled apart or on top of each other |
| Roof stays | In the house view: the roof stays while zooming in instead of lifting and fading (in the editor's roof and energy tools it always stays) |
| Dimmed / Stacked / Alone | With an open floor: what happens to the floors below |
| Normal / Temp. / Humidity / CO₂ / Values | Heatmap: floors coloured by the room's value; Values colours nothing and writes temperature, humidity and CO₂ as numbers under the room names |
| Room names | Show or hide the room names |
| Trail | Motion trail, Pro, see 6.1 |
| Weather | Weather outside, Pro, see 6.2 |
| ⏪ Time travel | Replay the last 24 hours in the house, view only, Pro, see 6.7 |
| ≡ / ↔ (right end of the floor and room bar) | Wrap the bar at the top onto several lines when many rooms do not fit in one, or back to one line; in one line it scrolls sideways, on a PC with the mouse wheel too. In the house view the rooms of every floor follow its name. You change the order of the rooms in the editor: with nothing selected, ↑ and ↓ in the floor's room list |
| ⚙ (at the top next to the version) | Unfolds and folds the view options quality, look, icons and FPS; so the header stays slim |
| Eye (bottom left, next to the magnifier) | Hides everything that is not the 3D view: header, floor and room bar, energy values, floor pictures, switches. The stage alone remains – half a screen more on a phone. A tap on the eye brings it all back; rooms can still be tapped. The device remembers the choice |
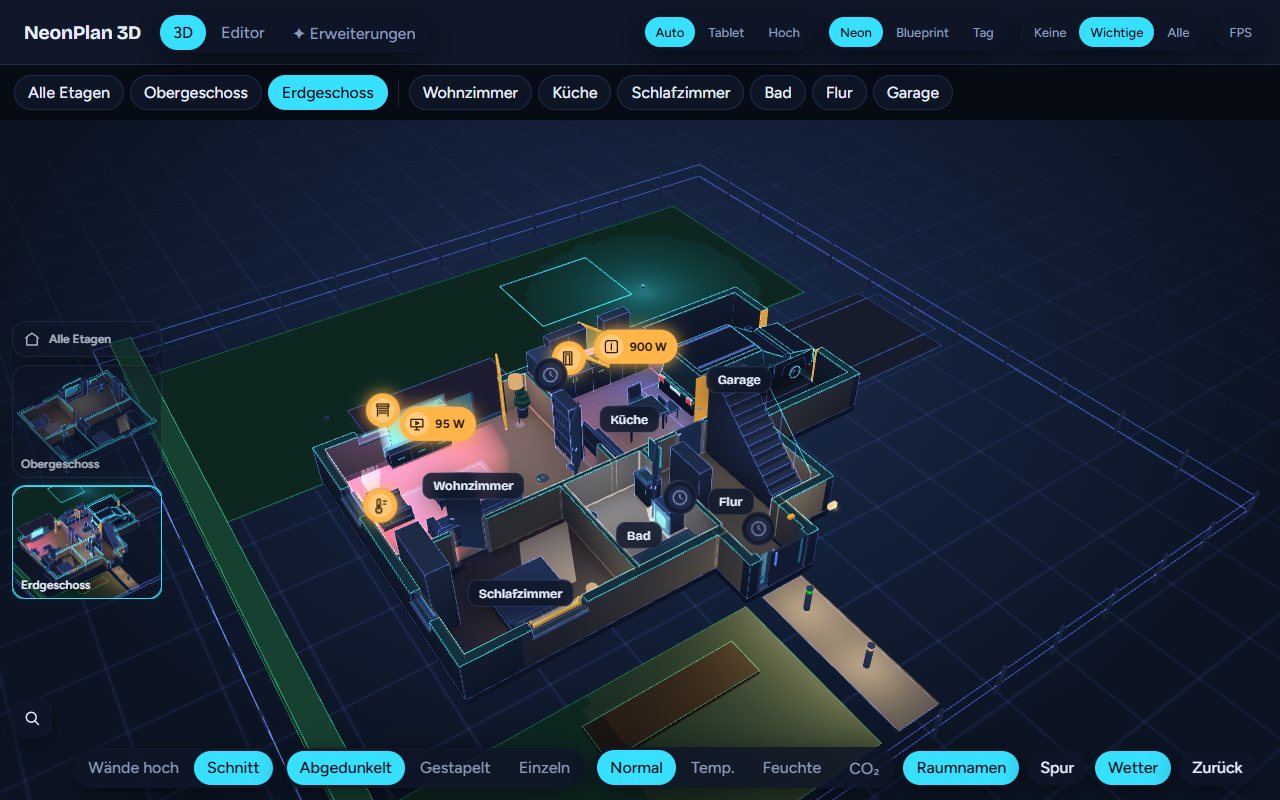
At the top right:
| Switch | Effect |
|---|---|
| Auto / Tablet / High | Quality level. Tablet leaves out patterns, shadows and halos and is chosen automatically on Fire tablets and slow devices. High adds light cones under spots |
| Clock | Date and time in a corner of the view (↖ ↗ ↙ ↘) or off – per device; in the card clock: tr. 12 or 24 hours as set in your Home Assistant profile under Time format |
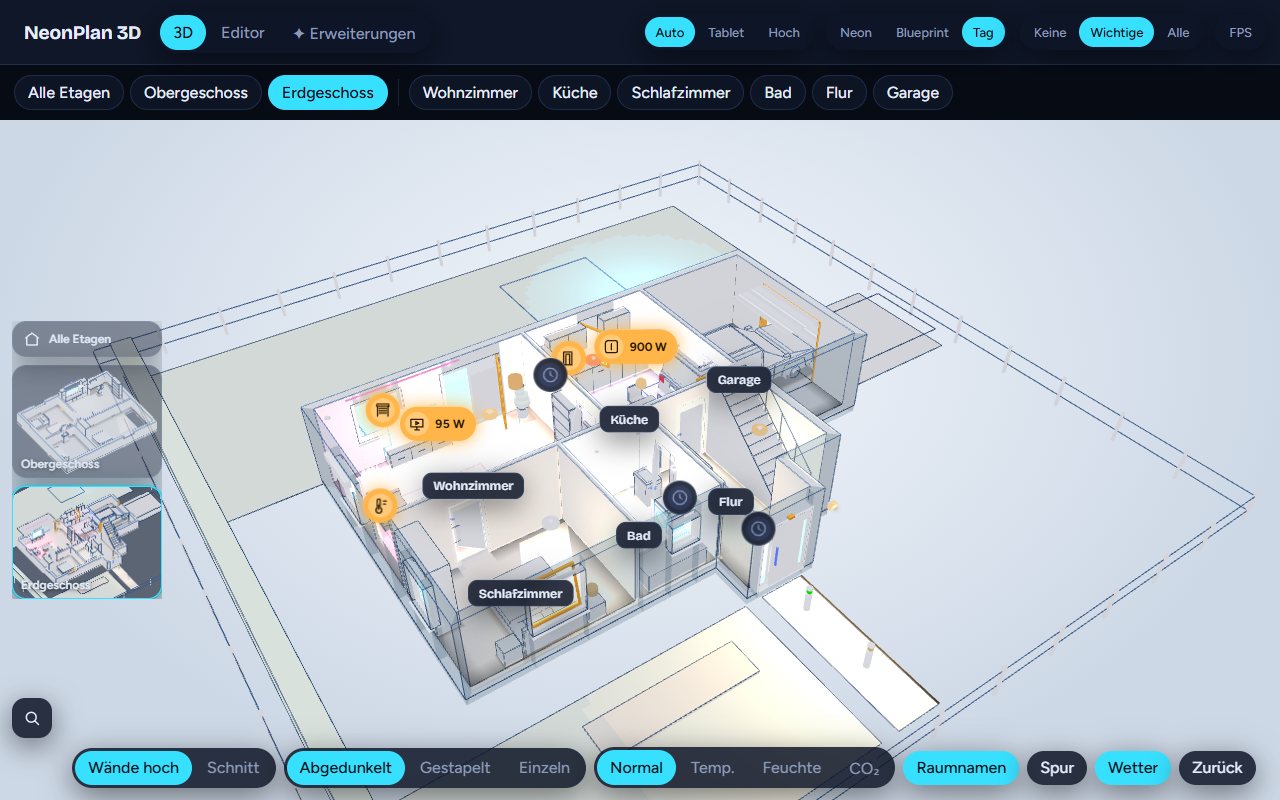
| 🎨 | The style: Neon, Blueprint, Day, the homely and designed styles, your own styles, Auto (Day while the sun is above the horizon, then Neon) or House plan, see 5.12. In the card theme: cozy. The colour well beside it sets an accent colour of your own: in the neon look lines and glowing edges take it, the buttons and pins in every look; ↺ brings the cyan back |
| None / In the room / Important / All | Which device markers appear. Important shows only devices without their own 3D model and values such as watts or the running app. In the room shows no markers in the house and floor views and, in an open room, only that room's own – handy with many sockets and sensors |
| Small / Normal / Large | How large the device markers are; the device remembers the choice (card: marker_size) |
| ◧ / ◨ | Floor pictures, star, search and eye on the left or on the right – handy when the view sits at the left edge of a dashboard |
| ⌖ Keep view | Switching between the house and the floors keeps the camera where it is; only its height follows |
| 🔒 3D lock | The angle stays fixed: a drag moves the view, zooming still works, flights to rooms keep the angle; a saved start view (house, floor or room) brings its own angle – nobody turns the house on a wall tablet by accident. Per device; in the card angle_lock: true |
| FPS | Frame rate, slowest frame and the reason for every drawn frame. At rest it reads 0 fps |
At the far right of the header stands the installed version (e.g. v1.11.0); hovering it shows which version the integration in Home Assistant reports.
Each device remembers these switches.
5.3 Controlling
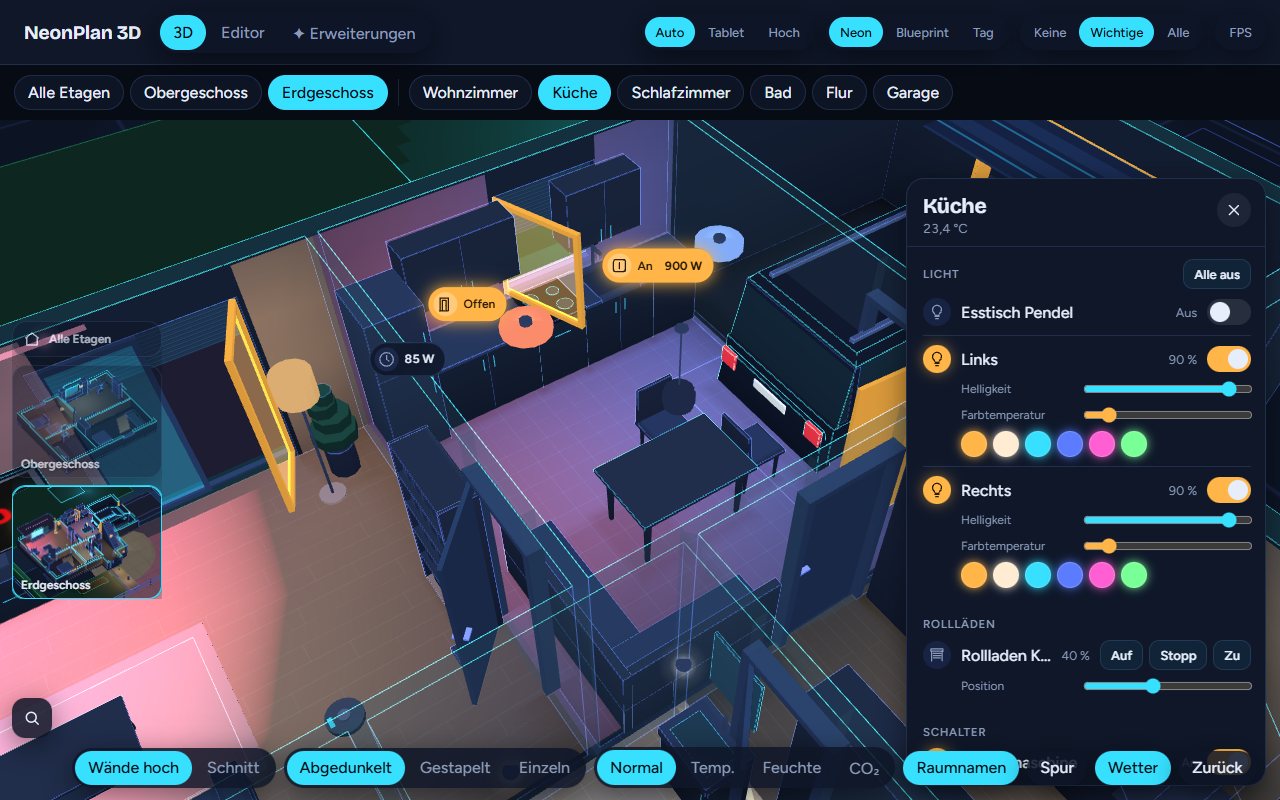
- Tap switches lamps and switches. The lamp flashes briefly to confirm.
- Swipe up or down on a lamp dims it; on a blind or window it moves the blind. The value appears at your finger. Devices and windows with "Ask before switching" do not react to a swipe.
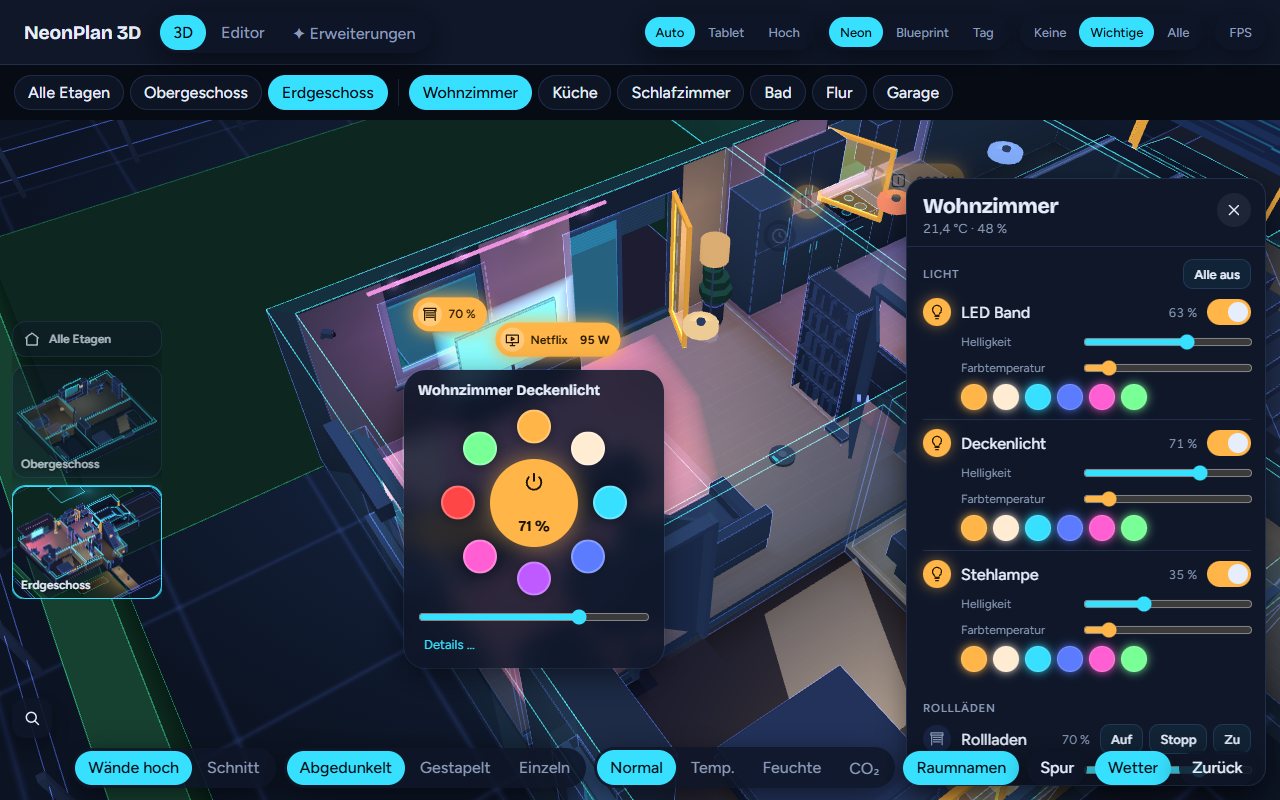
- Long press opens the quick menu: brightness, colour temperature and colours for lights; up, stop, down and fixed positions for blinds. Venetian blinds and Raffstores get a Slats slider there and in the room panel (or slats open/closed) as soon as the entity supports it. Roller shutters, garage doors and curtains only get them when they report a slat position (some integrations such as KNX announce slat buttons for roller shutters, too).
- Tap a window – frame, glass or blind – to open the blind menu or show the contact.
- Double tap a room switches all its lights on or off. Devices with "Ask before switching" stay out.
- TVs, doors and garage doors can be tapped directly as well.
5.4 The room panel
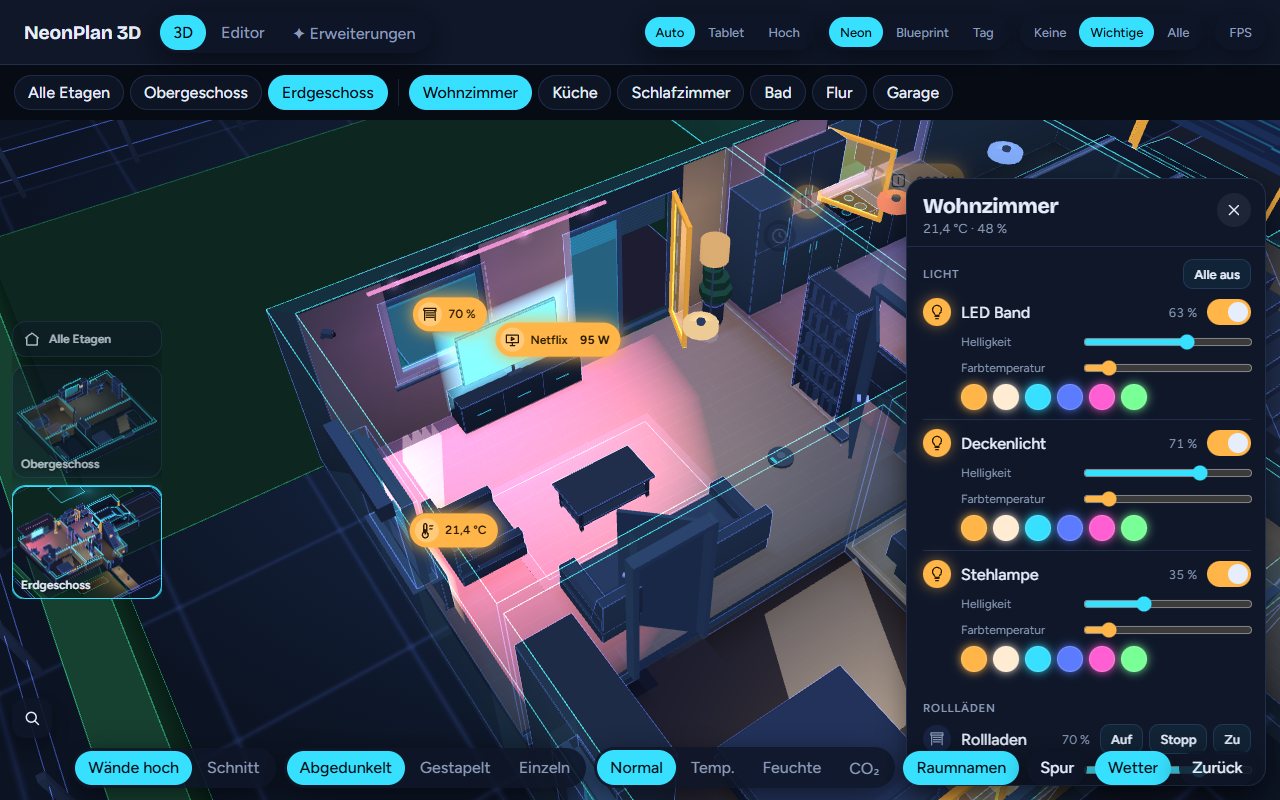
In a room the room panel opens on the right, at the bottom on phones and portrait tablets. It shows the room's devices by kind: lights with brightness, colour temperature and colours, All on and All off, covers with All up and All down, heating, media, switches, cameras with snapshot, sensors, and scenes & scripts.
It shows the devices placed in the room and everything you added with ☆ in the editor. More devices of the area shows the rest.
With a selected room and no open room panel, the area's scenes and scripts appear as buttons at the bottom.
5.5 Search
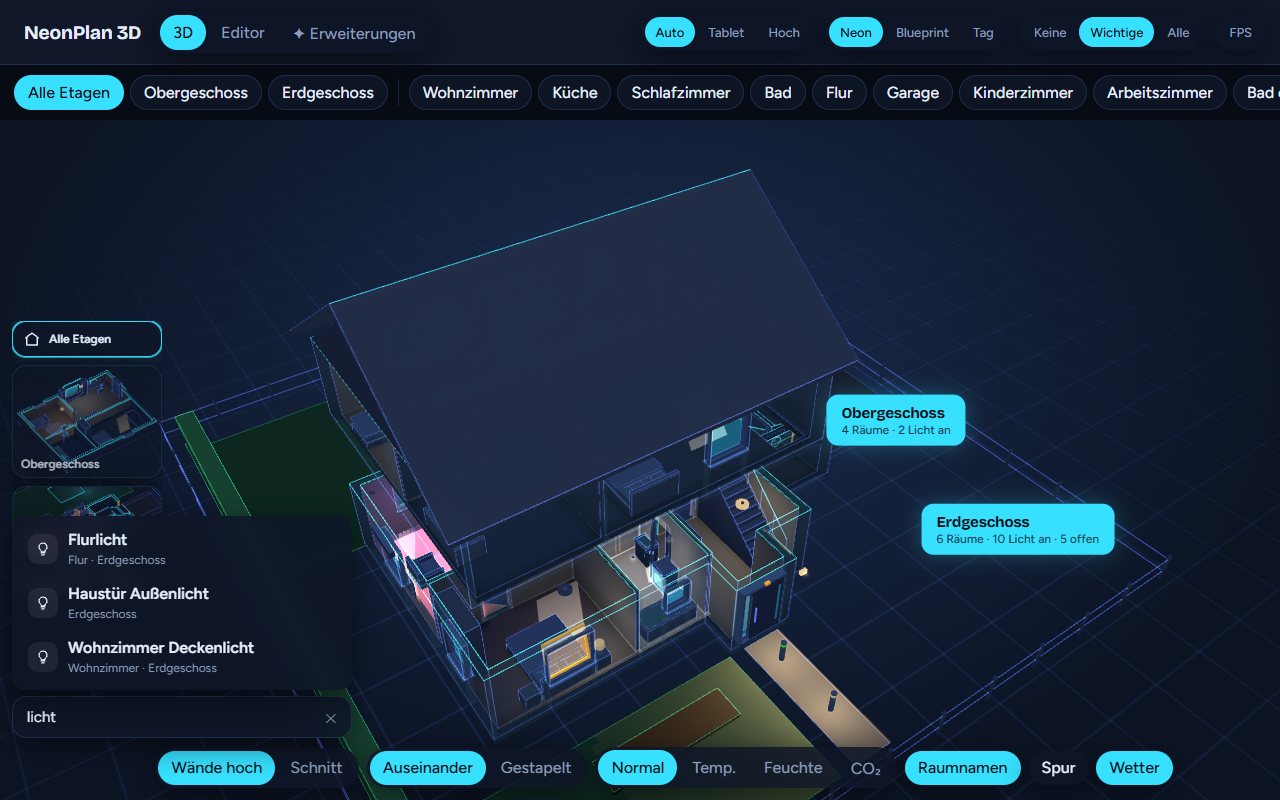
The star above the magnifier opens the central menu: lights on or off and blinds up or down for the floor shown – in the house view for the whole house, then with a confirmation ("Sure?", a second tap runs it). Garage doors and gates do not count as blinds. Below it the favourites from the editor; a tap starts a scene or script, presses a button or toggles a switch. In the card, central: false hides the star.
⚙ Settings (since 2.0.7): at the top of the central menu, ⚙ Settings opens the most used settings right in the 3D view, without the editor: Look (sun path and house shadow, windows glowing out at night, sunlight through the windows, since 2.1.0 the size of the glass cards for energy, heat pump, car and devices), Controls and Warnings (window open while it rains, contact unavailable, device names in warnings). Below, every module with settings has a section of its own, such as the Announcements (7.5). The settings apply to the whole house; only administrators can change them. Everything else stays in the editor under ⚙ Settings.
Switch devices only in the opened room (since 2.0.11, off by default): in the 3D view under ⭐ (the star above the magnifier) → ⚙ Settings → Controls, in the editor under ⚙ Settings → Weather & warnings. In the All floors view and on a floor, a tap on a device, a pin or a linked piece of furniture then opens its room instead of switching it, so no blind starts moving when you only meant to tap the ground floor. In the opened room a tap switches as usual – but only what is in that room: a device of another room (a blind of the house, seen from the opened garden) opens its own room since 3.1.1. A device that lies in no room (a camera on the outer wall, say) acts directly on its own floor since 3.3.1; in All floors the tap opens its floor. A long press opens the device's menu everywhere. Good for wall tablets.
Right click goes one step back (since 2.2, off by default): under ⭐ → ⚙ Settings → Controls. A short right click in the 3D view then closes the opened room or goes from the floor back to the whole house – like a double tap on empty space. Dragging with the right mouse button still pans the view. Switched off, a right click works like a click.
When a module offers something for the whole house (📢 Announcement), it is in the central menu too.
The magnifier at the bottom left opens "Where is …?". Type a device or room name. A hit flies the camera there and the device flashes.
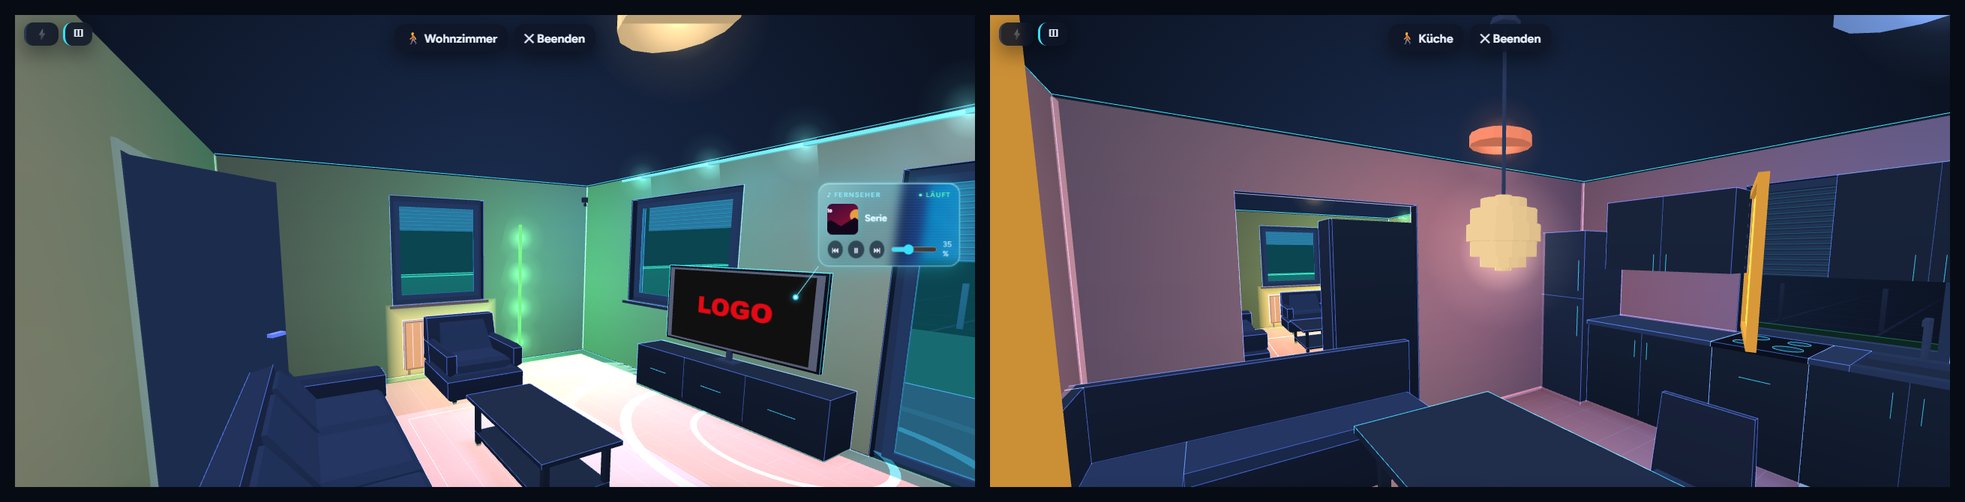
Walk: the 🚶 Walk button at the top right starts a walk through the house: you stand at eye height in the chosen room (else the biggest of the floor shown) and walk through it. Drag to look around, tap the floor to walk there – through doors into other rooms too –, W A S D or the arrow keys walk, on a tablet the stick at the bottom right. Walls stop you, doors let you through. The house lives on around you: lights, TVs, sun patches, glass cards. At the top you see the room you are in; ✕ End or Esc takes you back. With a room open, the 🚶 button in its room panel (beside ✕) starts the walk right in that room; the panel steps aside meanwhile. In the card, walk: false hides the button. While walking, only the glass cards of the room you stand in show.
5.6 Heatmap
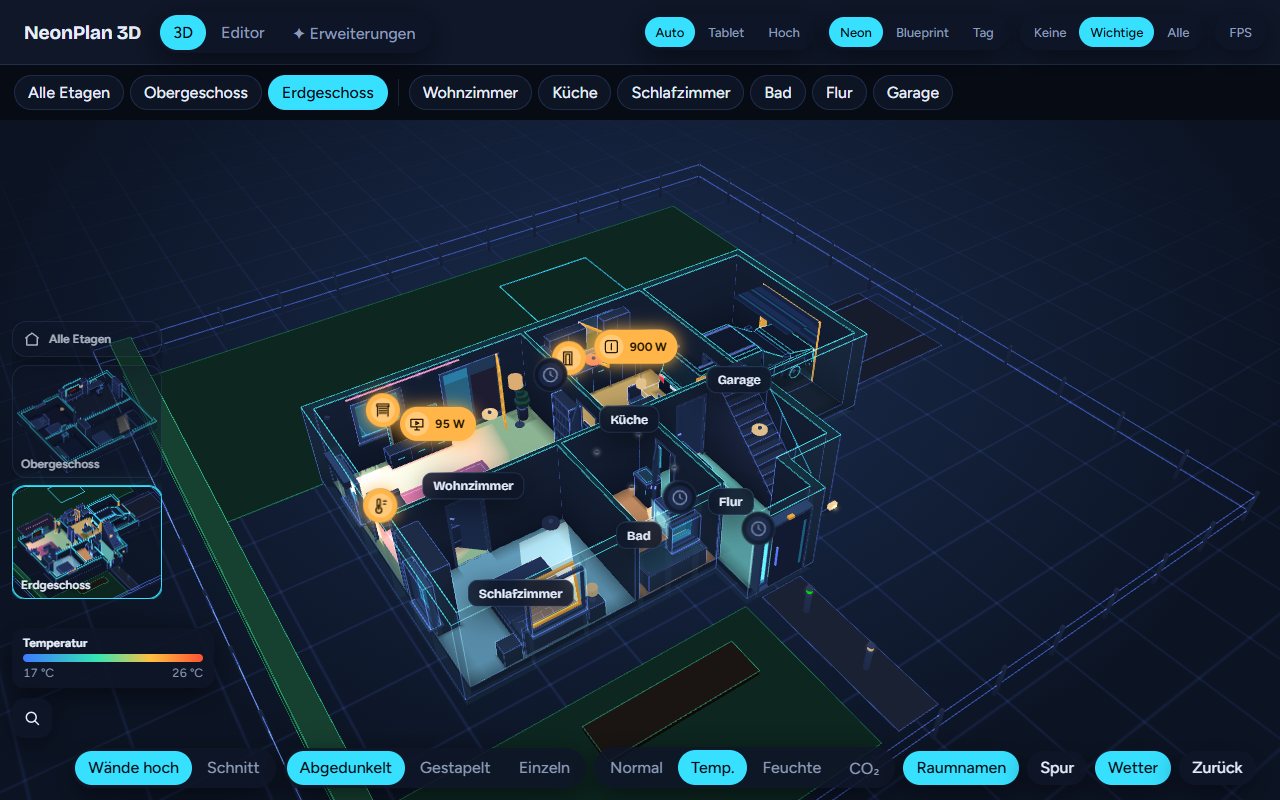
Temp., Humidity and CO₂ colour the floors by the area's sensors, with a colour scale at the edge. Temperatures appear in the unit set in Home Assistant (°C or °F); sensors in °F are converted correctly.
5.7 Sun and daylight
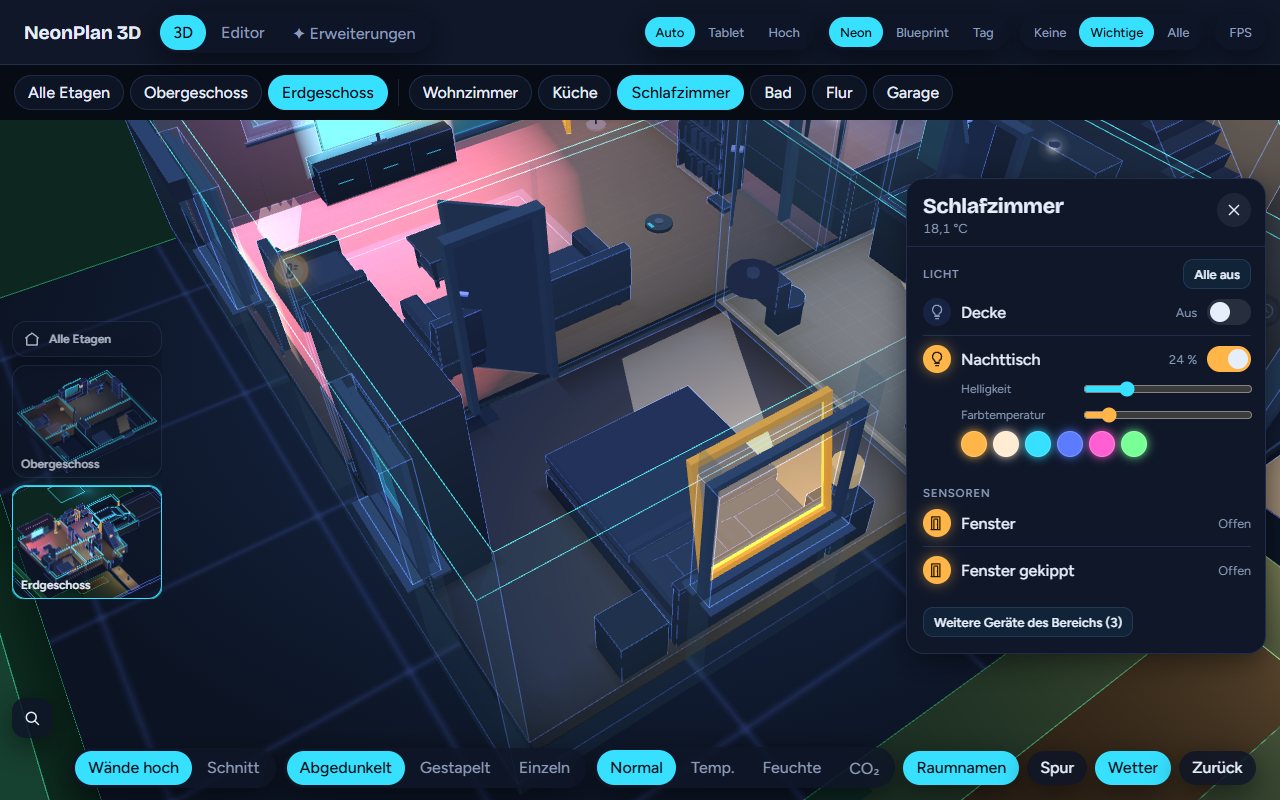
With north set, sunlight from sun.sun falls through the windows facing the sun as soft patches on the floor. Lowered blinds make the patches smaller. If you do not like the patches, switch off Sunlight through the windows in Settings. By day the sky behind the house gets lighter.
Sun arc and house shadow (since 2.0.7): a dotted arc around the house shows the sun's way today, with the times of sunrise and sunset at its ends. A glowing dot on it is the sun now, a brighter dot marks every full hour. The house's shadow lies on the ground and moves with the sun, so you can see when the terrace gets sun. The shadow shows in the All floors view and not on the Tablet level, the arc on every level. Both need the north direction and the home's location in Home Assistant; switch them off in the ⭐ central menu under ⚙ Settings (or in the editor's settings) with Sun arc and house shadow. On a large plot, Sun arc around: the whole plot (in the same place, since 2.2.0) puts the arc and the compass ring around everything drawn – rooms, outdoor areas, fences and free walls – instead of only the house.
Real sky (since 3.5.0): behind the house stands a sky that follows the real sun: sunset colours, the blue hour, at night stars that move through the night and the moon in its real phase. It turns with the view. With Weather outside (6.2) clouds drift with the real weather and wind. In the homely day styles it paints the whole sky; in the neon look and the evening styles stars, moon, sunset glow and clouds come over the look's own background. Off with an own background and in the blueprint look; a still picture on the Tablet level. Switch it off under ⚙ Settings with Real sky.
Fly in from space (since 3.5.0, option): with Fly in from space under ⚙ Settings, a neon globe turns to your home (the location in Home Assistant) when the view opens, a beam marks it, the view dives in and the camera comes down from high above onto the house. Once per page load, a tap skips it. Not in the editor and not on the Tablet level; switched on, it plays once right away.
Windows glow outside at night (since 2.0.7): when it is dark outside, the light of lit rooms on the ground floor falls out of the windows as a warm glow onto the lawn and terrace in front, in the lamp's colour. Since 3.0.5 the glow is each lamp's cone through the window opening: it lies shifted away from the lamp (a lamp to the left of the window lights the ground to its right), fades with the distance from the lamp, and a lamp around the corner that cannot see the window past a wall throws nothing out. A dimmed lamp glows correspondingly less outside. Lowered blinds dim it. A window over a balcony lights the balcony; the glow ends at its edge. Switch it off in the ⭐ central menu under ⚙ Settings (or in the editor's settings) with Windows glow outside at night.
5.8 Warnings
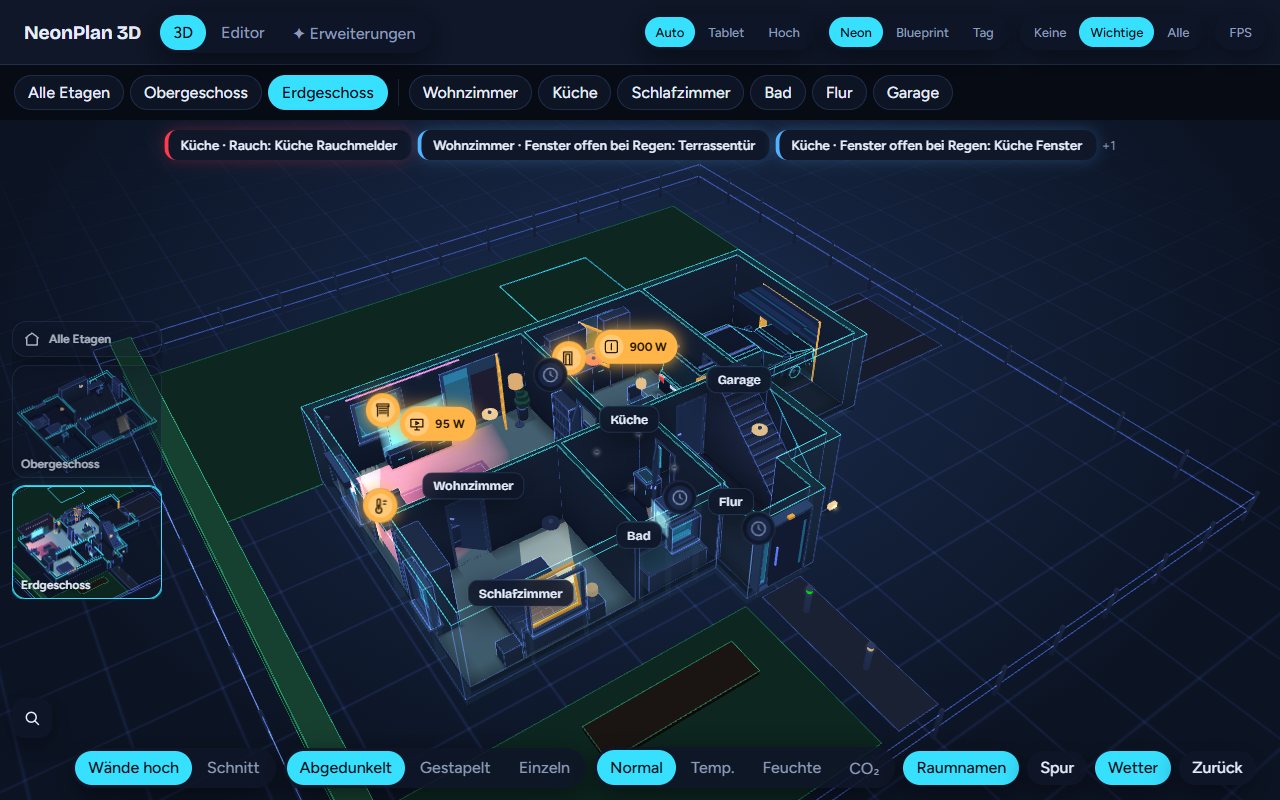
NeonPlan 3D warns for free and without setup:
| Warning | Trigger |
|---|---|
| Smoke, gas, carbon monoxide, water | A binary_sensor of that device class in the area reports on |
| Alarm | An alarm_control_panel is triggered or about to trigger |
| Power outage | The entity from the plan settings (Report a power outage with) reports an outage: a grid sensor of class power is "off", a UPS runs on battery, the mains voltage is below 100 V, a grid status says "Off Grid", or a helper of your own is "on". Since 2.0.8 the list only offers entities that fit, no switches. The grid connection in 3D is crossed out meanwhile |
| Window open in the rain | A window is open or tilted while the weather entity reports rain, lightning rain, hail or sleet |
The room pulses red and a banner appears at the top. A tap on the warning jumps into the room. The rain warning uses the weather entity from the plan settings and can be switched off there on its own under Warning: window open while it rains. A single window that may stay open in the rain (under a canopy, say) gets the tick No rain warning in its form. With a weather station of your own, choose its rain sensor (on = rain) or rain rate (mm/h) under Rain from your own weather station: then what counts is whether it really rains at the house – for the warning and, with Weather outside, for the rain in 3D.
On a wall tablet the banner can get long: "Guest WC · Window open in the rain: Guest bathroom window". Switch off Show device names in warnings in the plan settings, and it reads "Guest WC · Window open in the rain". A warning without a room keeps the device name.
Contact unavailable (since 2.0.6, off by default): when a window or door contact has been "unavailable" for 10 minutes (empty battery, out of radio reach), the window looks shut in 3D although nobody knows. Switch on Warn when a window or door contact is unavailable in the settings under Weather & warnings, and a warning names the contact. A short gap while Home Assistant restarts does not warn.
5.9 Cameras in 3D
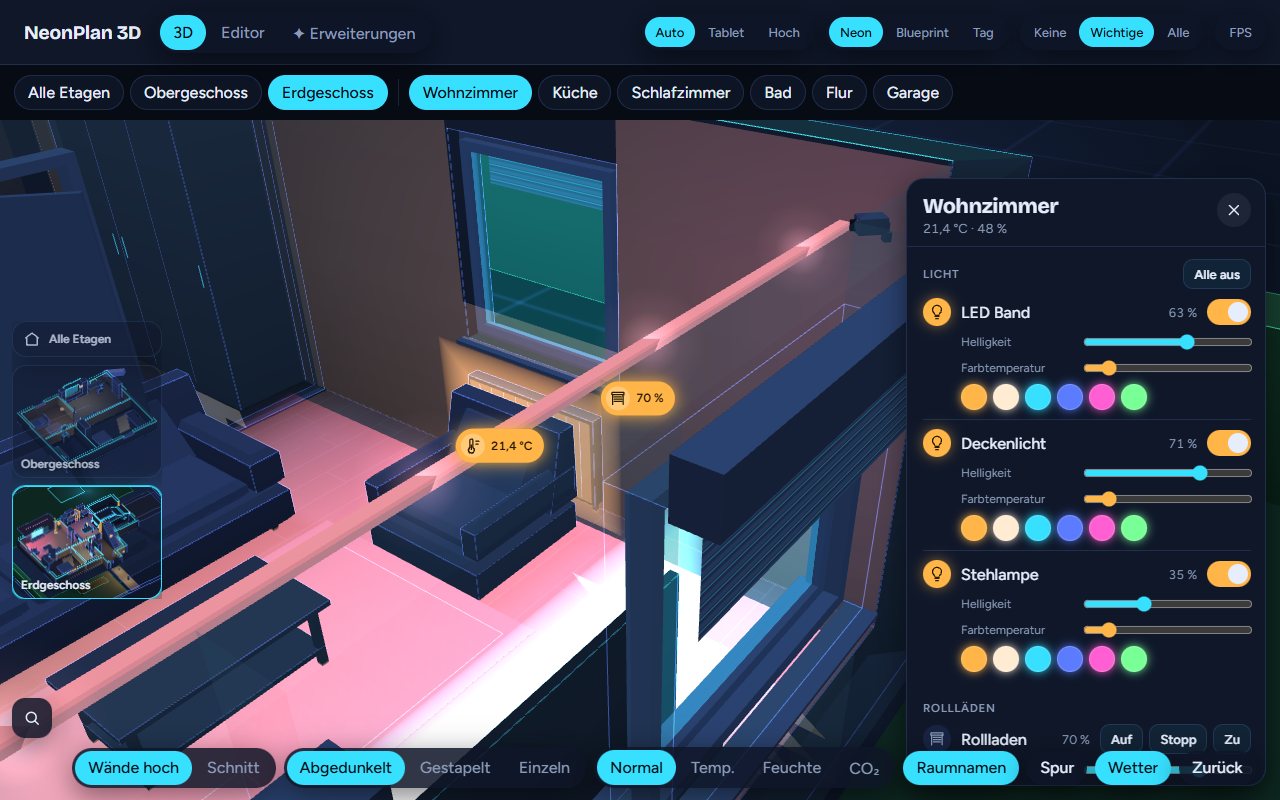
A tap on the camera or on its wedge opens the snapshot, which refreshes every few seconds. A tap on the picture opens the Home Assistant live view. The wedge is a much bigger target than the small camera.
5.10 Voice control (new)
New in 1.20 and still in development. Voice control is switched on for everyone, free, and already works well. If a sentence is not understood the way you mean it, send us the sentence in a GitHub issue.
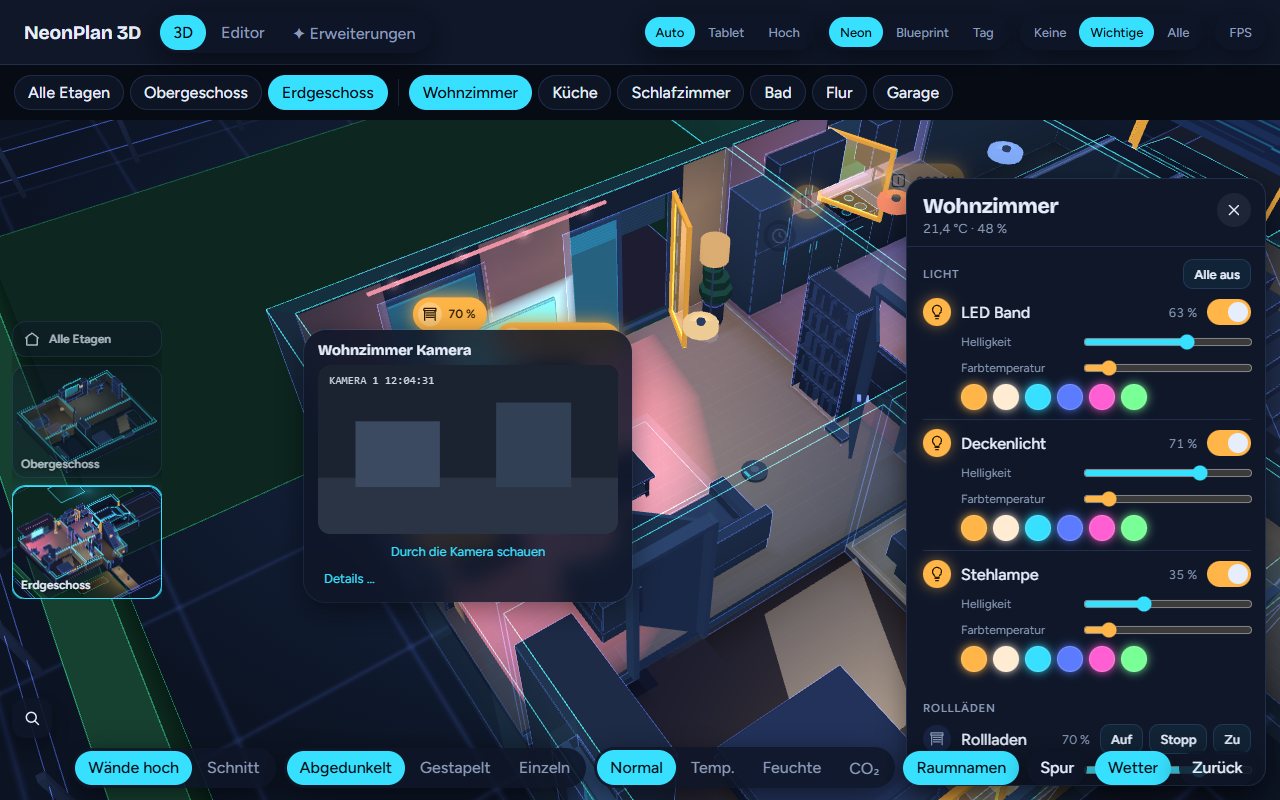
Talk to your house. A microphone button 🎙️ appears at the bottom left of the 3D view. Tap it: it turns red and "Listening …" shows above it. Say your sentence and pause briefly, and NeonPlan responds.
What you can say:
| You say | What happens |
|---|---|
| "Show the living room", "Go to the kitchen" or just "Bathroom" | The room opens, on its floor. |
| "Show the upper floor", "Cellar" | The floor opens. |
| "Show the whole house" | Back to the house view. |
| "Show the garden", "Terrace" | An outdoor area with a name and an area opens like a room. When a room and an outdoor area (or its Home Assistant area) share a name, the room's own name wins: "Show the garage" opens the room Garage, not the driveway in the garage's area. |
| "Show the washing machine", "Where is the floor lamp?", "Show the TV", "Where is the dryer?" | The view flies to the device or piece of furniture and it flashes. Furniture answers to its kind ("dryer", "pool pump"), its own name and everyday words ("TV", "telly", "heating", "car") – with or without a linked entity. If the sensor is called "Washing machine power" in the plan, "washing machine" is enough. With several of a kind, name the room too ("the heating in the living room"). |
| "Show the front door camera", "Show the camera in the garden" | The view looks through the camera (with the Camera Cockpit). |
| "Show the cameras" | The camera wall opens (with the Camera Cockpit). |
| "What is open?", "Where is it cold?", "Is the washing machine running?", "What is drawing power?", "Who is home?", "What is the weather like?", "Is everything OK?", "What is on today?", "Good morning", "Good night" … | With the module The house answers (free in the shop, see below): the answer shows as a speech bubble, is spoken through Assist's text-to-speech, and the house shows it – open windows flash, the coldest room opens, the view flies to the washing machine. The full list is below. |
| "NeonPlan style homely", "House to synthwave", "Style back" | The screen changes its style, see 5.12. |
| "Turn on the hall light", "Lower the blinds" | Commands go to Home Assistant's Assist. The answer shows as a speech bubble. |
Compounds work too: "driveway camera" said as one word finds the camera "Driveway". Under ⚙ Settings → Voice control the list What NeonPlan understands shows the sentences, with those of the installed modules.
NeonPlan knows the names from your plan: rooms, outdoor areas, floors, devices and furniture. A room also answers to the name of its Home Assistant area. Devices need a "show" or "where is", so "turn on the living room light" stays a command for Assist and switches the light instead of flying there.
Further names. Your TV is called "Smart TV Pro" in Home Assistant, but you say "living room TV" or "telly": every room, piece of furniture and placed device has the field Further names for the voice below its name in the editor (comma separated, up to twelve). They count for voice control and the search.
The house answers – the questions. The module (see below) answers from your plan and your sensors, without AI, all local:
| Topic | You ask, for example |
|---|---|
| Open | "What is open?", "Which windows are open?", "Is a window open in the bathroom?", "Is the garage closed?", "How long has the window been open?" – the view flies to each open window, from inside, and says there what it is |
| Temperature | "Where is it cold?", "Where is it warmest?", "How warm is it in the living room?", "How warm is it outside?" |
| Air | "How humid is the bathroom?", "How is the air in the bedroom?" (CO₂), "Should I air the house?" |
| Heating | "What is the heating set to in the living room?", "Is the heating on?" (the room's thermostats) |
| Appliances | "Is the washing machine still running?", "Is the TV on?", "What is running right now?", with Haushalt Pro: "How long does the washing machine need?", "When is the laundry done?" |
| Media | "What is playing on the TV?", "What music is playing?" |
| Energy | "What is drawing power?", "What is the solar doing?", "How full is the battery?" |
| Lights, blinds, locks | "Which lights are on?", "Is a light still on in the hall?", "Are the blinds down?", "Is the front door locked?" |
| People | "Who is home?", "Where is Anna?", "Is anyone in the living room?", "Where is motion?" |
| Warnings | "Is everything OK?", "Any warnings?" (smoke, water, a window in the rain, a power outage …) |
| Household (Haushalt Pro) | "What is on today?", "When is the bin collected?", "Is there mail?", "Do the plants need water?" |
| Car (Auto Pro) | "How full is the car?", "Is the car charging?", "How far can I still go?", "Is the car locked?", "Where is the car?" |
| Weather, time | "What is the weather like?", "Is it raining?", "What time is it?", "What day is it?", "When does the sun set?" |
| The house | "How many rooms does the house have?", "How big is the living room?", "How many windows does the house have?" |
| The day | "Good morning" – the morning report: weather, warnings, what is open, what is on today, who is home, the car. "Good night" – the night check: open windows and doors, unlocked locks, lights, running appliances, with a tour |
| And more | "Who are you?", "How are you?", "Tell me a joke", "Thank you", "Hello", "What can you do?" |
Commands ("turn on the light", "set the heating to 22 degrees") still go to Assist. The answers come in your user's language (German or English).
Modules. Some abilities come as a module from the shop: a signed pack that carries code NeonPlan loads – checked and bound to your installation like a furniture pack. The first module is The house answers (free with a customer account). You import the .fp3dpack file under ⚙ Settings → 🧩 Modules → Import a module … (or on the Extensions page in the Modules section); it is then listed there as "Module by Mastershort", and its sentences show under 🎙 Voice control. Speaking needs text-to-speech in the Assist pipeline (Settings → Voice assistants → Text-to-speech); without it the speech bubble stays.
Switching it on. Voice control is off by default. You switch it on where you want to speak:
- NeonPlan page (panel): editor → ⚙ Settings → 🎙 Voice control → Switch on on this device. This only applies to this browser, e.g. the wall tablet but not the phone.
- Dashboard card: edit the dashboard → NeonPlan card → Features → Voice control (microphone button), or
voice: truein YAML. The card setting applies on every device that shows this dashboard, so you can set it on the PC even when it is meant for the tablet.
What you need:
- An Assist pipeline with speech to text in Home Assistant: Settings → Voice assistants. Home Assistant Cloud, Whisper or Speech-to-Phrase (local and fast, even on a Raspberry Pi) all work well. NeonPlan uses the preferred pipeline, the starred one. Under Assist pipeline on this device you can choose another one per device.
- https: browsers only give out the microphone on secure pages. It does not work over
http://192.168…, but it does over Nabu Casa, your own certificate or a reverse proxy. - The microphone allowed:
- in the browser, "Allow" on the first tap;
- in Fully Kiosk: Settings → Web Content Settings → enable microphone access (Plus licence), plus Fully's microphone permission in Android.
Asking through Assist – without a microphone on the tablet. Everything NeonPlan understands you can also say to Assist: a voice satellite (Home Assistant Voice, ESPHome), the Assist dialog or the app. Assist needs a sentence file for that: NeonPlan writes custom_sentences/en/neonplan3d.yaml and …/de/… into your configuration folder only once you make a choice under Sentences for Assist (since 1.24 – before, this happened on start). Say "Show the living room" or "What is open?" to Assist and the sentence goes to every open NeonPlan view – the wall tablet shows the room or the open windows, and Assist speaks the answer where you asked. The tablet itself stays quiet. Which sentences stand there you choose under ⚙ Settings → 🎙 Voice control → Sentences for Assist: Only distinct ones ("show …", "go to …", "ask the house …", "NeonPlan, …", "good morning", "good night" – nobody says those to Home Assistant itself), All questions (adds "which windows are open", "where is …", "is the washer running" – careful, some of these Home Assistant answers itself otherwise) or None (default: no file; a file NeonPlan wrote is removed). A file you changed yourself is never overwritten or deleted by NeonPlan – the dialog tells you which language it left alone. Removing the integration takes NeonPlan's sentence files with it. "Ask the house which windows are open" reaches NeonPlan in every mode. Your own sentences go into a further file under custom_sentences for the intent NeonPlanAsk.
The service neonplan3d.ask. For automations and scripts: fields Sentence (text), Screen (screen, optional) and Speak (speak, off by default). The service returns the answer (answer, answered, screen_open), e.g. for a notification. With speak: true the view speaks the answer itself through its Assist pipeline's text-to-speech. Example – the night check on the wall tablet every evening at 10 pm:
action: neonplan3d.ask
data:
  text: "Good night"
  screen: "Hall"
  speak: true
Screen names. With several tablets, give each view a name: in the editor under ⚙ Settings → 🎙 Voice control → Screen name (for this device) or on the card with the option screen: Kitchen. When the service names a screen, only the view with that name reacts; without one, all of them do. With no view open, Assist answers "No NeonPlan screen is open right now".
Room of this device – "here" (new in 2.1). When a tablet hangs in one room, choose it under ⚙ Settings → 🎙 Voice control → Room of this device (for this device, empty by default). Then sentences without a room name are enough: "Lights on", "Turn off the lights here" or "Close the blinds" switch only in that room. When you name a room ("Turn on the kitchen lights"), that room counts. You can choose the rooms (and outdoor areas) that have a Home Assistant area, because Assist switches by area: NeonPlan hands the sentence to Assist as if a device in that area had heard it. On a dashboard you set it on the card: edit the dashboard → NeonPlan card → Features → Room for "here", or in YAML voice_area: kitchen (the area id from Home Assistant). The card applies on every device that shows this dashboard; without a choice, the room set on the device counts. A voice satellite like the Voice PE does not need this setting, it knows its area itself.
"there" – the room you tapped. With a room open in the 3D view, "there" means that room: on the kitchen tablet tap into the living room, then "turn off the lights there" or "TV there off". "here" stays the tablet's room.
Vacuum and "everything off" per room. In the editor every room has the field Cleaning (robot vacuum): the script or button that sends your robot to this room (the room cleaning of your robot's integration, e.g. a script with the room segments). The room panel then shows 🧹 Vacuum, and by voice "vacuum here", "vacuum the kitchen" or "vacuum there" work. ⏻ Everything off in the room panel and by voice ("everything off", "turn everything off there", "everything off in the kitchen") switches off the room's lights and fans, turns off the TV and pauses playing speakers. Plain switched sockets only when a lamp hangs on them in the plan, so the fridge never goes off.
Testing: in the 🎙️ Voice control section, 🎙️ Test the microphone starts a probe. It checks https, the microphone, the level and Assist one after the other. It also shows which room a spoken sentence would open, and switches nothing while doing so. Wherever there is a ✖, the fix stands next to it.
Good to know:
- The microphone is only open while you speak. It does not listen all the time, so there is no wake word. That also spares old tablets.
- Speech to text is done by your Assist pipeline, so how fast and accurate it is depends on that pipeline. With Speech-to-Phrase or the cloud a sentence usually takes one to two seconds.
- If the live director is on, it does not interrupt you while you speak.
5.11 Locating (new)
New in 2.0, free. Who and what is where in the house – without Bermuda, without ESPresense, without new hardware. NeonPlan uses the Bluetooth scanners Home Assistant already knows.
NeonPlan shows which room you are in right now – and where your iPhone or your keys are. People stand as a glowing figure in the room and glide over when they change rooms. Every device gets a sensor in Home Assistant ("Torsten's watch room: Kitchen"), and by voice you ask "Where is my iPhone?".
What you need:
-
Bluetooth scanners in Home Assistant – what you already have is enough:
- Shelly Gen2 and Gen3 (plugs, in-wall). In the Shelly device set Configure → Bluetooth scanning to passive.
- ESPHome Bluetooth proxies (an ESP32 for a few euros). They report more often than Shellys, so room changes arrive faster.
- the Bluetooth adapter of the Home Assistant machine.
About one scanner per room is ideal. Rooms without a scanner of their own (hall, guest toilet) are still recognised: learning remembers how they look to the scanners in the rooms next door.
- Something you carry:
- Apple Watch and iPhone with their key (IRK) – the key helper reads it in three minutes (see below). The watch on the wrist is ideal: an iPhone in a pocket goes quiet about a minute after its screen turns off.
- Android phones: in the Home Assistant app switch on Settings → Companion app → Manage sensors → BLE Transmitter. No key needed. Set the transmit power to "High" and the advertise mode to "Low latency" there: out of the box the app sends so weakly that the scanners barely hear it. NeonPlan then finds the phone by itself and shows a hint when a setting is too weak.
- Pairing Android through the key helper does not help: Android does not send this key in the background, so the device stays "not heard".
- Key tags with a fixed address or as an iBeacon (e.g. Nut, Tile, iBeacon tags). AirTags do not work – they change their address, and Apple gives no key.
Setting up (editor → ⚙ Settings → 📡 Locating, admins only):
- Scanners: NeonPlan lists all Bluetooth scanners of Home Assistant and suggests their room – from the device's Home Assistant area, a pin or a piece of furniture in the plan (the washing machine with the Shelly plug's power sensor) or the name ("PC office plug"). Outdoor areas with a Home Assistant area (a terrace, the garden) are in the list too and count as rooms, joined to the room whose door opens onto them. After learning NeonPlan knows from the signals where each scanner stands and offers "Signals say: … – use it" when they disagree.
- Devices: the watch and the iPhone through the 🔑 Key helper, Android phones appear by themselves under 📱 Android with the Home Assistant app, key tags through 📱 Add an Android phone or a key tag (hold the device right next to a scanner). When no scanner hears a device right now, it says ⚠ not heard; a key you already have goes in under 🔑 Paste a key you already have. Give every device a name, a person and – for "ring my iPhone" – the phone's Home Assistant app.
- Learning: tick the devices you are carrying. Go into every room, tap it and walk around slowly for 90 seconds, into the corners and along the walls. Keep a phone in your pocket (screen off), as in everyday life – best tap with another tablet or phone. Learning once is enough: devices without learning of their own use the others'. The countdown runs; at 0 the room is done (✓). Check accuracy then shows how surely each room is recognised. Simply learn a weak room again.
- Live: switch locating on and walk through the house – the list shows at once where NeonPlan sees you.
In the 3D view:
- A person's watch and phone: what is worn on the body (watch, band – tick ⌚ worn, already set for "watch" in the name) tells where the person stands while it was heard in the last two minutes; otherwise the device heard last. When the watch and the phone are heard at the same time in different rooms (typically at a shared wall), the phone only wins when it is clearly surer (by more than 15 percentage points). A phone left lying in another room while you walked on with the watch shows there as a small symbol of its own. Presence sensors with zones (such as an Aqara FP2): when a zone named like a piece of furniture in the room ("Sofa", "Armchair", "Dining table", "Bed", or the furniture's own name) reports someone there, the figure stands at that furniture instead of in the middle of the room. A zone at a door ("Entrance hall", "Terrace door") puts the figure in front of the door to the room of that name, or of a door to the outside; "rest of the room" keeps the middle. The sensor belongs to the room by its Home Assistant area. The other way round too: a watch that has lain in one room for ten minutes while the phone changed rooms after it counts as taken off – the phone then tells where the person is, and the watch stands as a symbol where it lies.
- People stand as a glowing figure in their colour in the room, with the name above. Things (keys, an iPhone without a person) are small round symbols. A tap shows the room, the certainty and since when.
- In the assistant under 4 · Live → People in 3D: figure, pin or off – once for the whole house.
- The room panel shows under its name who is here now, and the floors count the people.
- Show people to admins only (in the Live step) hides them from all other users.
Faster with presence sensors: motion and presence sensors (radar like the Aqara FP2 too) that belong to an area in Home Assistant speed locating up by themselves: Bluetooth tells who it is, the sensor tells when someone enters the room. Without sensors a room change takes two to five seconds – with one often just a moment.
Voice (with the Assist sentences under ⚙ Settings → Voice control): "Where is my iPhone?", "Where is Torsten?", "Who is home?", "Ring my iPhone". The answer comes straight from Home Assistant – even without an open NeonPlan screen. Open NeonPlan views fly into the room of the answer, on "Who is home?" into every room with someone in it, one after another (a tap stops it). Switch it off in the locating assistant under Live; while people are shown to admins only, only admins' views fly to them. "Where is Anna?" with the names locating knows is understood by Assist even when an AI agent (such as Gemini) answers everything else. Ringing sends a loud notification to the Home Assistant app (on an iPhone a critical alert that rings in silent mode too).
For automations: every device has a sensor, e.g. sensor.torstens_watch_room. Its state is the room name; the attributes are room_id, area_id (the room's Home Assistant area), floor, probability (certainty 0–1), since and last_seen. Example – the light follows you:
triggers:
  - trigger: state
    entity_id: sensor.torstens_watch_room
    to: Kitchen
actions:
  - action: light.turn_on
    target:
      area_id: kitchen
How fast a room change shows: usually after two to five seconds. That comes from the scanners, not from NeonPlan: a Shelly passes a device on only about every three to four seconds, an ESP32 Bluetooth proxy about every second. Watches send once or twice a second, an iPhone in a pocket much less often. NeonPlan also waits for two or three readings so the view does not jump between two rooms. It gets faster with ESP32 proxies instead of Shellys – and with presence sensors, then almost at once.
Where scanners work best:
- In a corner or on an outside wall of the room – not on the wall to the next room. A plug right behind the wall hears you in the next room almost as loudly as in its own; then the view jumps between the two. (Example: you sit in the kitchen, and the living room's Shelly is plugged in right behind you in the shared wall.)
- Not back to back: two scanners on both sides of the same wall make the two rooms hard to tell apart.
- In the open, not hidden: not behind a fridge, radiator or mirror or in a metal cabinet – metal and water swallow Bluetooth.
- About one per room. Rooms without a scanner of their own still work; large or angled rooms gain from a second one.
- After moving a scanner, learn the rooms around it again briefly.
Good to know:
- Room-level, not to the centimetre. Bluetooth wavers (your own body damps the signal). NeonPlan reliably tells the room, not the spot in it.
- Everything stays in the house. The signals are only evaluated in Home Assistant, nothing goes to the internet.
- Learn again when you move scanners or add new ones.
- Using Bermuda or ESPresense? NeonPlan runs alongside and does not disturb them. Just set your devices up here; once everything works, switch your automations to the new sensors and remove the old tools.
Getting the key (IRK) of an iPhone or Apple Watch: the easiest way is the NeonPlan key helper – no Mac needed, the Apple Watch too:
- Plug an ESP32 (ESP32, ESP32-C3 or ESP32-S3, about 5 €) into the computer and click Install on neonplan3d.mastershort.de/keys with Chrome or Edge. Then enter your Wi-Fi.
- Home Assistant finds NeonPlan Key as an ESPHome device: Settings → Devices & services → Discovered → Add.
- In the assistant under Devices → 🔑 Key helper pick "For an Apple Watch" or "For an iPhone" and pair: on the watch tap "NeonPlan Key" under Settings → Bluetooth → Health devices, on the phone under Settings → Bluetooth. The key appears at once – tap Add. Afterwards remove "NeonPlan Key" from the Bluetooth settings again.
- More devices: tap 🔄 Next device first – the helper gets a new Bluetooth identity, so the device paired before does not connect in between.
You can reuse the ESP32 afterwards, best as an ESPHome Bluetooth proxy – it then even makes locating faster. The helper is built on irk-capture by Derek Seaman (MIT licence) – thank you! Another way: with a Mac through Keychain Access (the Mac must be on the same iCloud account). Then paste the key in the assistant under Devices → Paste a key (as 32 characters or the way the Mac shows it).
5.12 Styles (new in 3.1)
Neon was just the beginning. Since 3.1 NeonPlan shows your home in many styles, free for everyone. The editor and the controls stay neon, the house may become homely. Every style also runs on old wall tablets: the styles only colour differently and need no extra computing power.
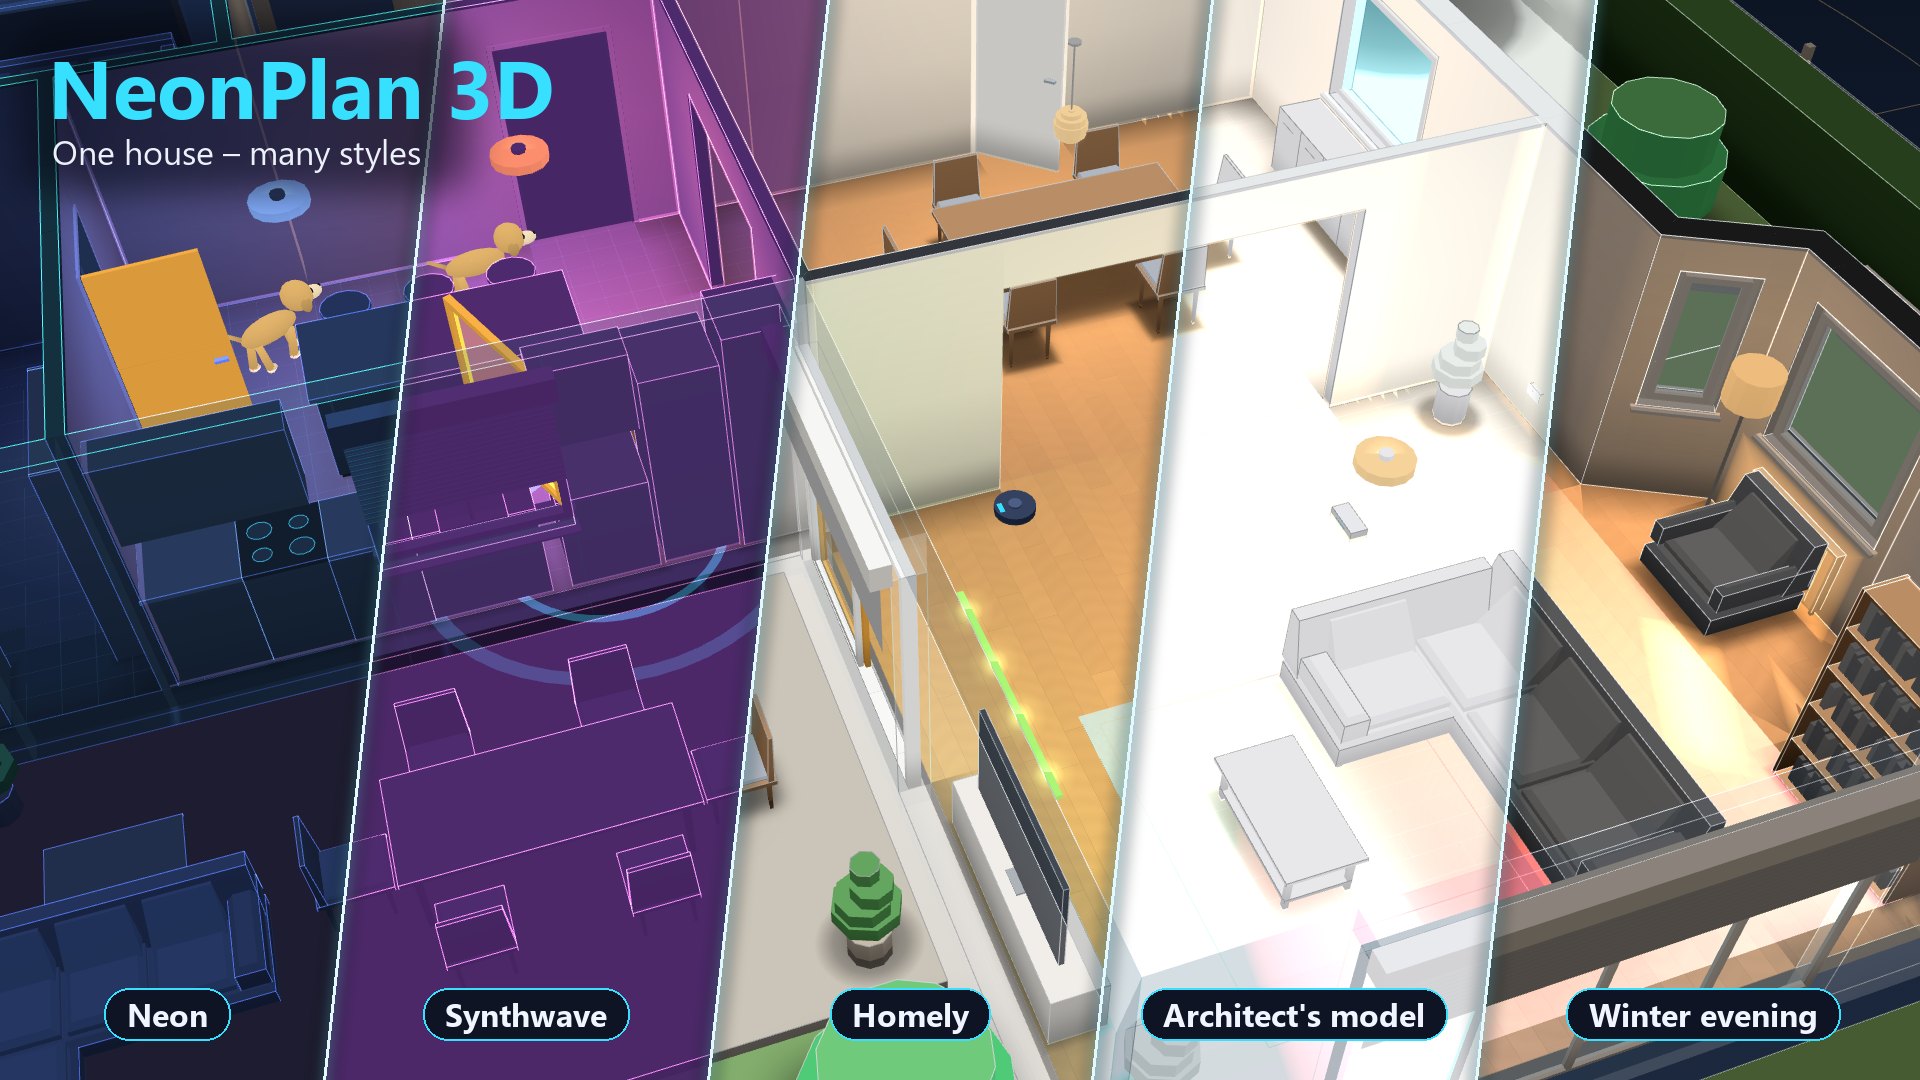
Choosing a style. In the 3D view: ⚙ (top, next to the version) → 🎨. Every device remembers its style. The list is grouped:
| Group | Styles |
|---|---|
| Automatic | Auto (Day while the sun is up, then Neon – as before) and House plan (day / evening / night), see below |
| Neon & classic | Neon (default), Blueprint, Day, Night / Focus |
| Homely – real materials | Homely, Homely evening, Winter evening: wooden floors, tiles, light walls with your wall colours, soft shadows under the furniture. The evening styles dim the house warmly |
| Designed | Synthwave, Architect's model, Pastel, Warm / Wood & paper |
| Own styles | What you made yourself (below) |
Lights, open windows and active devices keep their signal colour in every style, so you see at a glance what is going on. Only the homely styles show wall colours and the facade (see 4.4).
The styles in the editor. ⚙ Settings → 🎨 Styles shows the house large in the style chosen, with every style as a tile below. Show in "3D beside" takes it into the 3D view next to the plan; there is also a style list next to Effects for that. Facade sets the colour of the outer walls in the homely styles.
Own styles. + Make an own style from it copies any style with all its settings: name, Real materials or a colour palette of your own (lines, dark and light surfaces, amount of colour, base brightness, contrast), Dark style – lines glow, Evening mood, Floor texture, Light by direction, Room corners, Contact shadows under furniture, Active devices in colour and the background at the top and bottom. You see every change right away in the large picture. Own styles then appear in every style list (view, card, templates) and answer to their name in voice control.
Times of day (house plan). Under 🕒 Times of day (house plan) you set which style applies during the day, in the evening and at night, for example Homely, Homely evening and Night / Focus. Switch by the sun: day while the sun is up, then evening until Night from. By the clock: the three times Day from, Evening from and Night from. The plan applies to every screen whose style is House plan – above all the panel on the wall tablet.
When zooming in (since 3.2). Right below the style choice you pick a second style the house flows into as you zoom in – neon from afar, homely close up in a room, without reloading. The slider early … late sets when it begins (early: with a floor opened, late: only close in a room). All rooms or Only the room: with Only the room only the room you zoom into or tap turns homely; the rest of the house keeps the set look. It works while Neon, Blueprint or Day is chosen above. In a dashboard card it is in the card dialog, via YAML: zoom_style: cozy, zoom_late: 50, zoom_scope: room.
Dashboard card. In the card dialog you pick any style, Auto or House plan under Style. With a fixed style the card can also have a Style in the evening and a Style at night; it switches by the house plan (sun or clock). In YAML: theme, theme_evening, theme_night (see 8.2). Card templates take the style the same way.
By voice. "NeonPlan style homely", "House to synthwave", "Style winter evening" – the style applies at once on the screen you speak to. "Style back" (or "style normal") brings the set style back. Through Assist this works with the sentence starting "NeonPlan …" or "House …".
From automations. The action NeonPlan 3D: Set style (neonplan3d.set_style) switches the open NeonPlan screens:
action: neonplan3d.set_style
data:
  style: evening        # neon, blueprint, day, focus, synth, cozy, evening, winter, model, pastel, warm – or the name
  screens: [kitchen]    # optional: only these screen names; empty = all
  minutes: 60           # optional: for this long, then back; empty = until changed again
style: reset brings the set style back. Style from a helper entity: under 🕒 Times of day (for the whole house) or in the card (style_entity) you enter an input_select or input_text. While its state names a style (e.g. "Homely"), that style applies.
What wins? The newest setting. A style set by voice or an action applies until you reset it, its minutes run out, or you choose a style anew for the screen (device, card or template). After that comes the helper entity, then the style set.