4. The editor
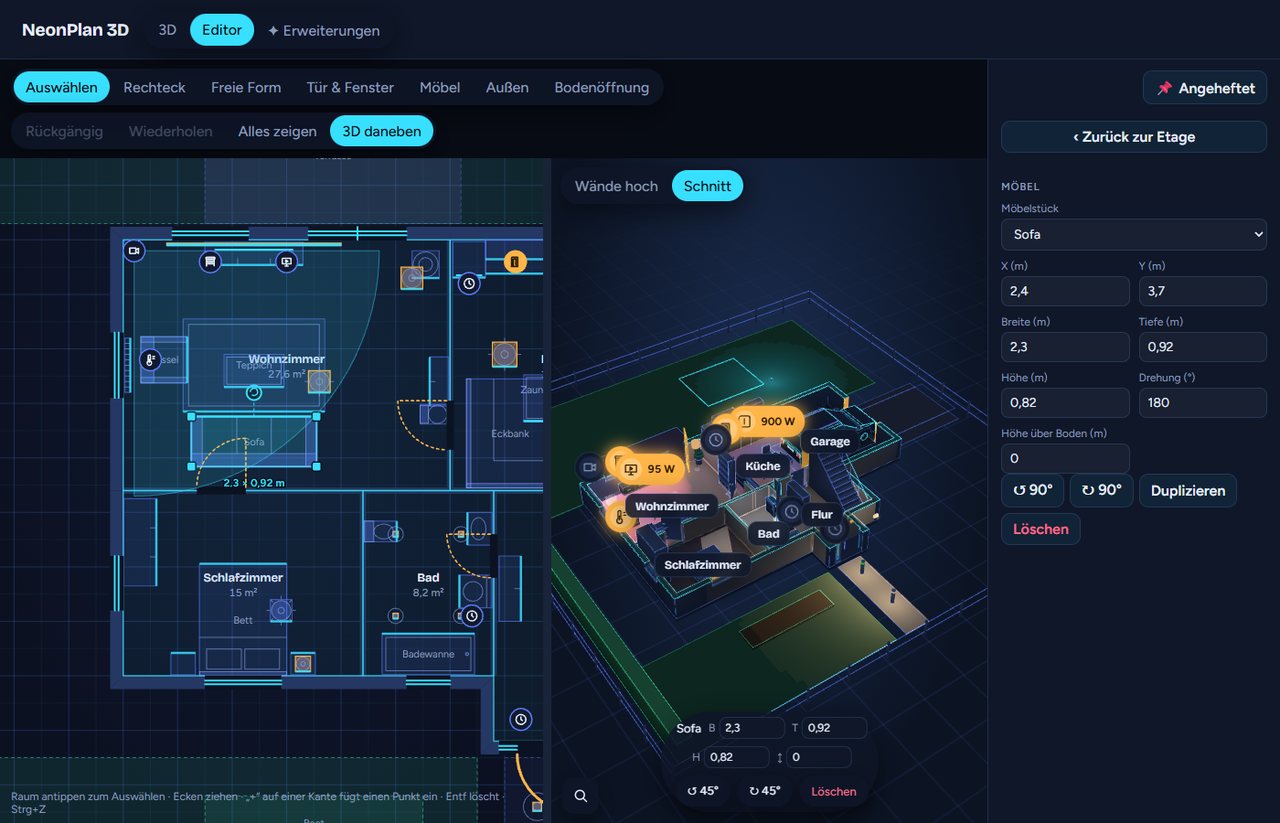
The editor has the floor plan in the middle, the toolbar at the top and the sidebar on the right. The sidebar always shows what is selected: the floor, a room, an item, a door or a device.
4.1 Tools
| Tool | What it does |
|---|---|
| Select | Tap rooms, furniture, doors, windows and devices, move them, drag corners |
| Rectangle | Draw a rectangular room |
| Free shape | Draw a room corner by corner |
| Wall | Draw a single free-standing wall, e.g. a partition |
| Doors & windows | Tap a wall to add an opening |
| Furniture | Open the furniture library |
| Outdoor | Draw outdoor areas such as lawn, terrace or pool |
| Floor opening | Draw a hole into the floor, e.g. above the staircase |
Next to them are Undo, Redo, Show all and 3D beside. A short hint for the active tool is always shown at the bottom of the plan.
Mouse and touch: Two fingers pan and zoom. With a mouse, the wheel zooms and dragging an empty spot pans. Ctrl+Z undoes, Ctrl+Y or Ctrl+Shift+Z redoes, Del deletes the selection, Esc cancels. The arrow keys nudge the selection (room, corner, furniture, device, wall, outdoor area) by one grid step, with Shift by 10 cm, with Alt by 1 cm; doors and windows slide along their wall.
Locking the floor plan and fixing: 🔒 Floor plan in the toolbar locks all rooms, walls, doors, windows and outdoor areas, newly drawn ones too; a selected room then shows "🔒 Floor plan locked", a click on it unlocks. Furniture and devices are fixed one by one once they are in place: with the lock 🔓 Fix at the top of the form, with the key L or by right-click (long press on a tablet). The right-click menu also offers Duplicate, Turn 90° and Delete. Locked items can be selected and edited in their form, but not dragged, not nudged with the arrow keys and only deleted after asking; dragging then moves the view. Fixed furniture and devices also stay put in the 3D half.
4.2 Floors
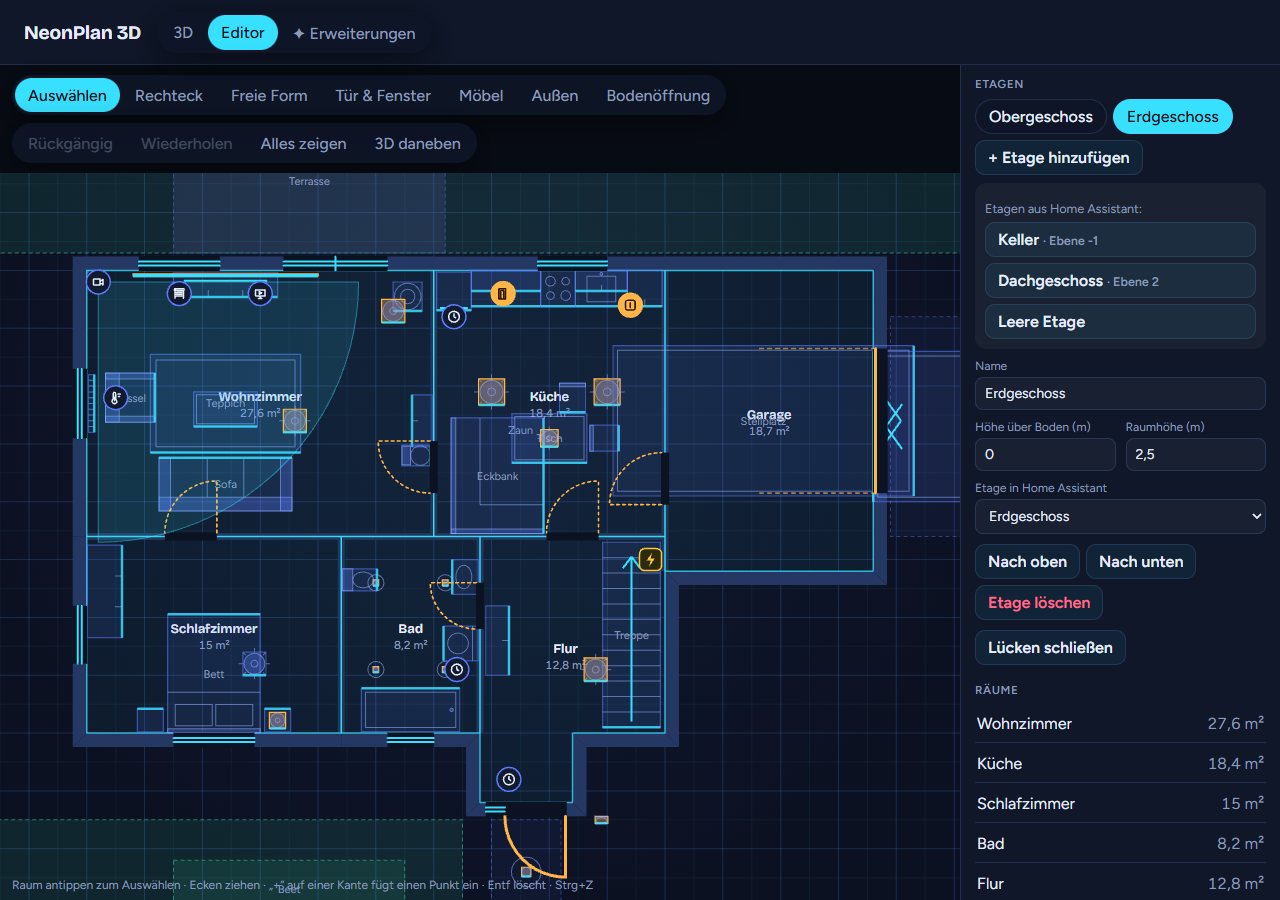
Without a selection, the sidebar shows the floors:
- Add floor creates a floor. Home Assistant floors that are still missing are offered.
- Name, height above the ground and ceiling height set where the floor sits in the 3D house and how tall its walls are.
- Floor in Home Assistant links the floor to an HA floor. Then "Add … rooms from HA areas" offers the areas of that floor as rooms.
- Move up and Move down change the order, Delete floor removes it with its rooms.
- Close gaps joins rooms that are up to 60 cm apart. This helps when you measured inside dimensions. The gap becomes the interior wall thickness.
4.3 Drawing rooms
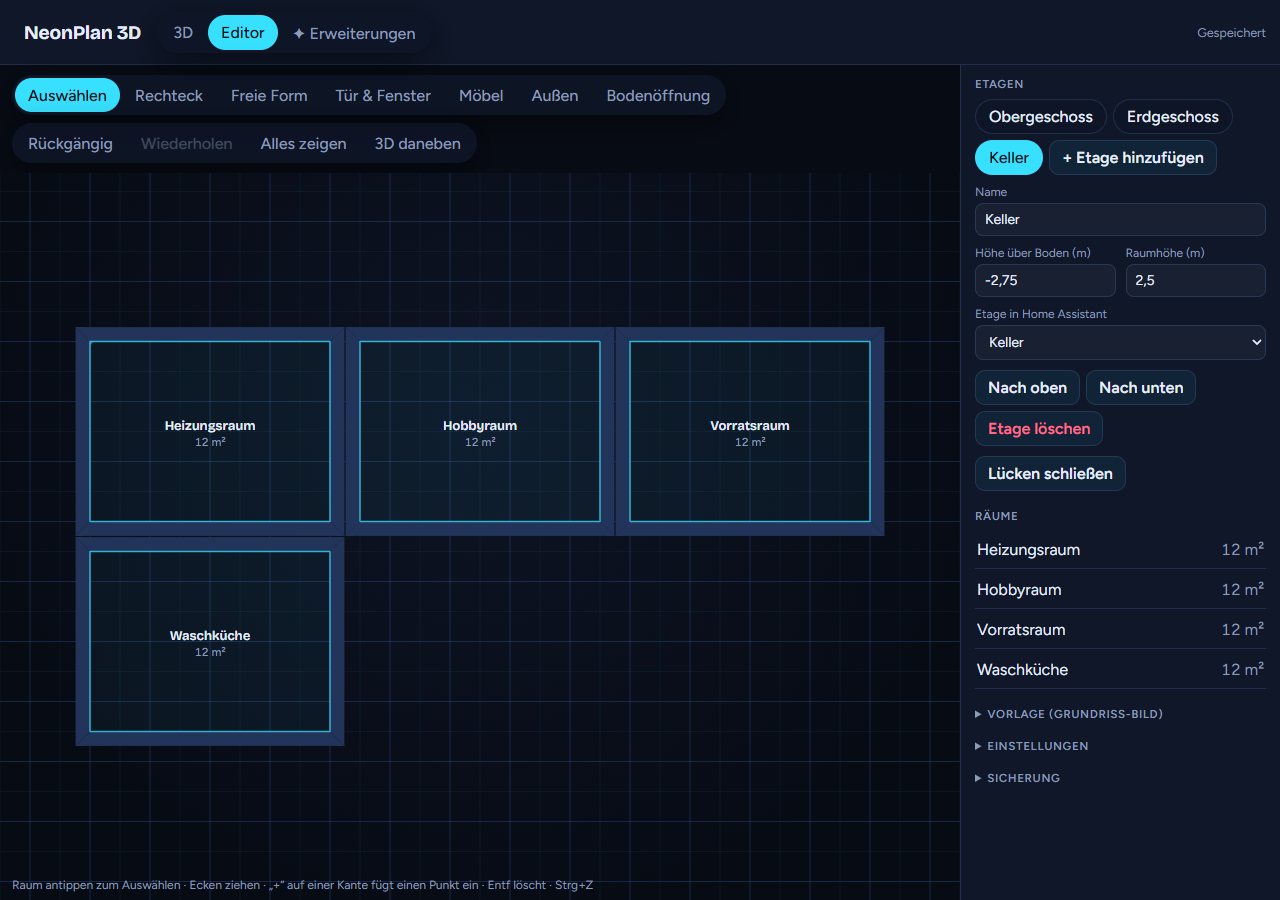
- Rectangle: Tap the plan and drag.
- Free shape: Set corner after corner. A tap on the first corner or Enter closes the room, Esc cancels.
- Moving corners: Tap a room with Select and drag its corners. The + on an edge inserts a corner.
- Snapping: Corners snap to the grid, to corners and edges of other rooms and to alignments. Hold Alt to move freely.
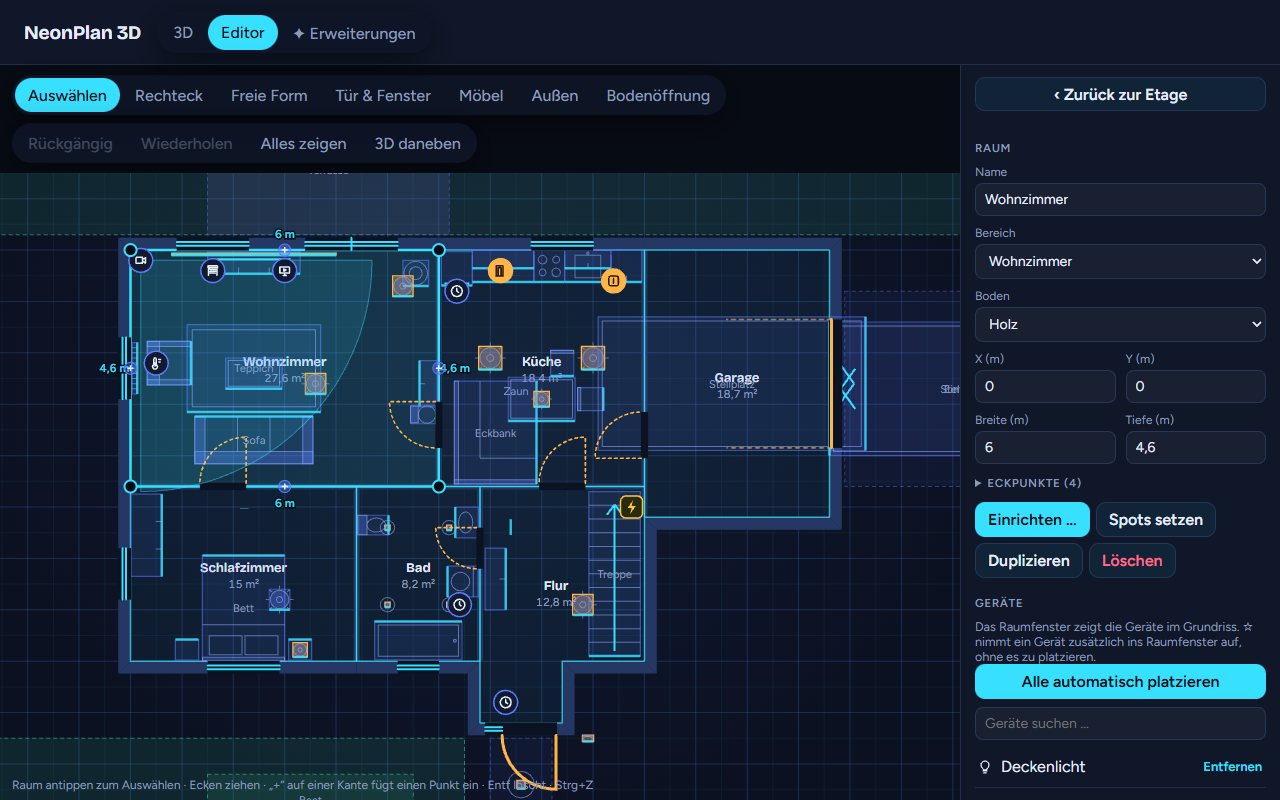
A selected room shows on the right:
- Name and Area: The link to a Home Assistant area matters most. Through it NeonPlan 3D finds the room's lights, covers, sensors and scenes.
- Floor: wood, oak, tiles, carpet, stone or concrete show as a subtle pattern in 3D.
- The Devices of the area, see 4.10.
- Furnish … for ready-made furniture sets, see 4.9.
- Duplicate and Delete.
4.4 Walls
Walls are created automatically: every shared edge of two rooms becomes an interior wall, every outer edge an exterior wall. Corners and T-junctions are mitred. You set the thicknesses under Settings.
Single walls: The Wall tool draws a free-standing wall, e.g. a partition that runs through half a room. Shift keeps it straight, Alt draws without snapping. Where it meets a room wall, the corner is mitred. When selected, drag the handles to move its ends or the line to move the whole wall. On the right you set Length, Wall thickness and Height. In 3D it behaves like any interior wall. You can put doors and windows into single walls too, with Doors & windows (see 4.7). Deleting the wall removes its doors and windows as well.
Wall height: Any wall can be lower than the room, e.g. a parapet or a counter. For a single wall you set its Height in the form. For rooms (rectangle and free shape) select the room; the form shows the Wall heights box with every wall of the room, named by its corners (e.g. "Wall 2–3", the numbers are shown at the corners in the plan) and with its length. Hovering a row or tapping its field lights the wall up in the plan. ↥ resets it to full room height. If two rooms share the wall, the lower setting applies. Windows and doors in a low wall end at the wall height. Low walls look lighter in the plan.
4.5 Settings
Settings unfolds at the bottom of the sidebar:
| Setting | Meaning |
|---|---|
| Exterior wall (m), Interior wall (m) | Wall thicknesses |
| Grid (m) | Drawing step |
| North | Degrees clockwise from up. Needed for sunlight |
| Roof | No roof, flat roof or gable roof, with pitch and overhang. For a gable roof, Ridge sets whether the ridge runs along the long or the short side (e.g. terraced house) |
| Weather entity | Which weather entity drives the weather outside, see 6.2 |
| Weather effects in 3D | Which effects are shown |
4.6 Floor plan image as a template
Under Template (floor plan image) you load a photo or scan of your floor plan under the drawing. Width in plan (m) brings it to scale, Opacity makes it subtler. Then simply trace the rooms.
4.7 Doors, windows and garage doors
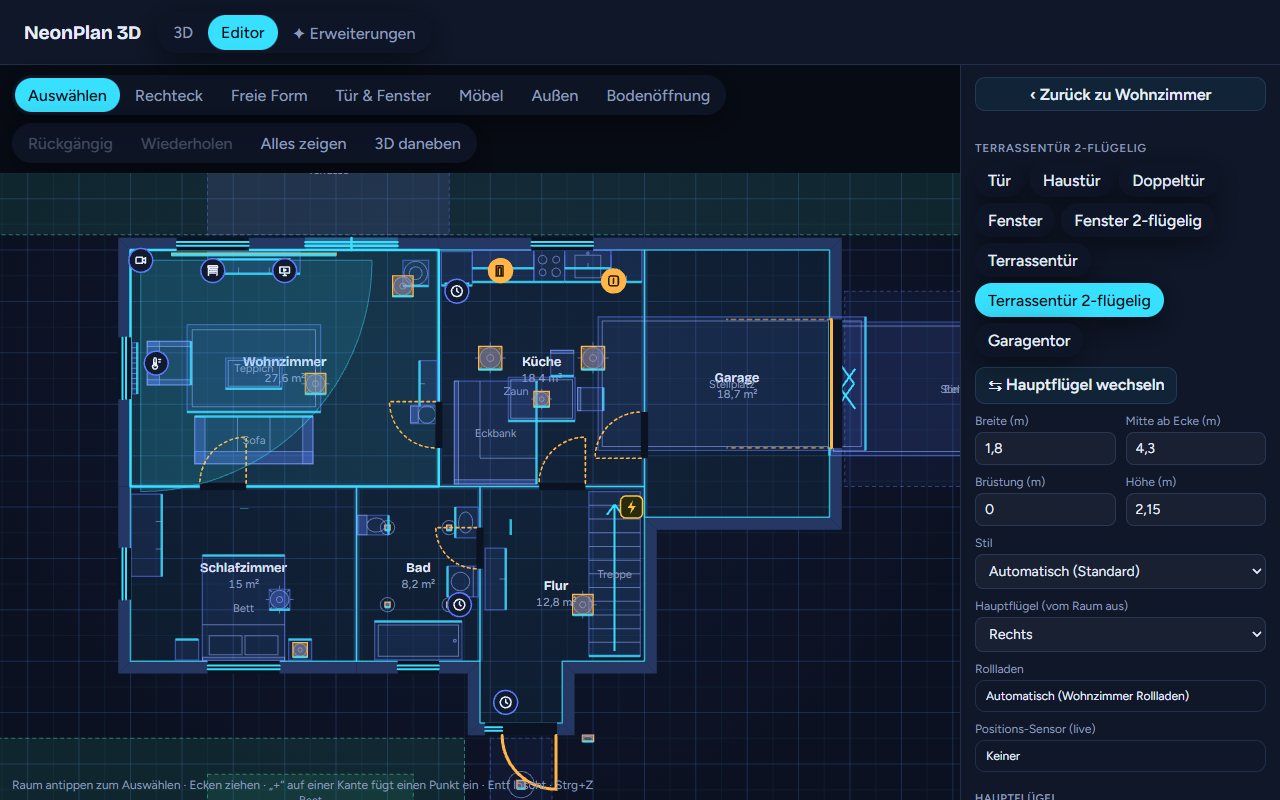
With Doors & windows you tap a wall, a room wall or a single wall. Then you choose the Type on the right: door, window or garage door. A window with a sill of 0 is a terrace door.
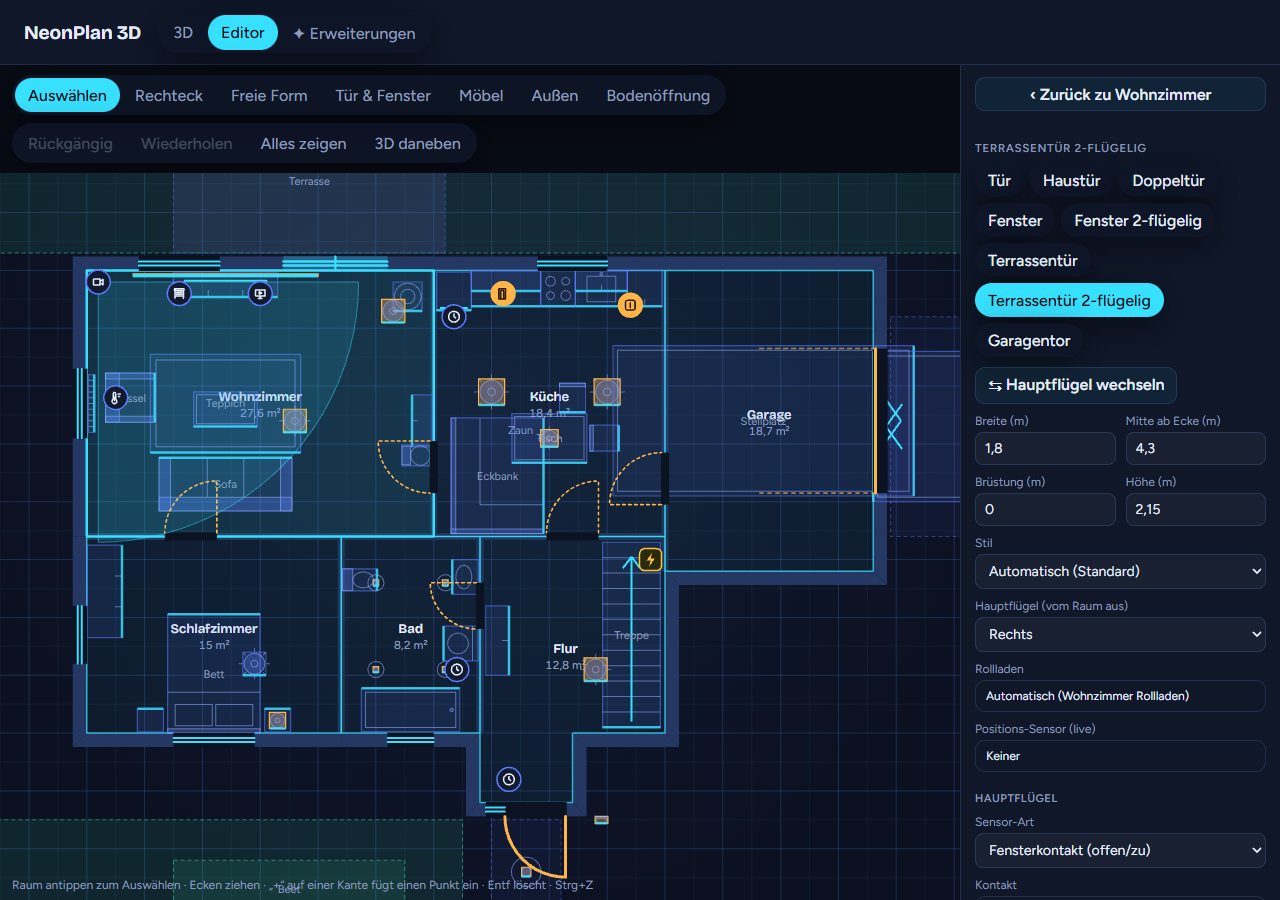
Every opening has:
- Width, sill and height, plus the hinge side. With Select you slide it along the wall.
- Style: room door, front door, front door with glass, with one or two sidelights, glass door, sliding door or Opening (no door). An opening is just a gap in the wall, without frame and leaf; light always passes through. Windows come as standard or with glazing bars. "Automatic" picks a front door for exterior doors.
- Leaves: single or double, with an own contact for the second leaf.
- Highlight in 3D: When open (default) makes open windows and doors glow warm. When closed turns this round, e.g. for the WC or a child's room door: it glows while it is shut. This needs a contact; without a sensor nothing is highlighted.
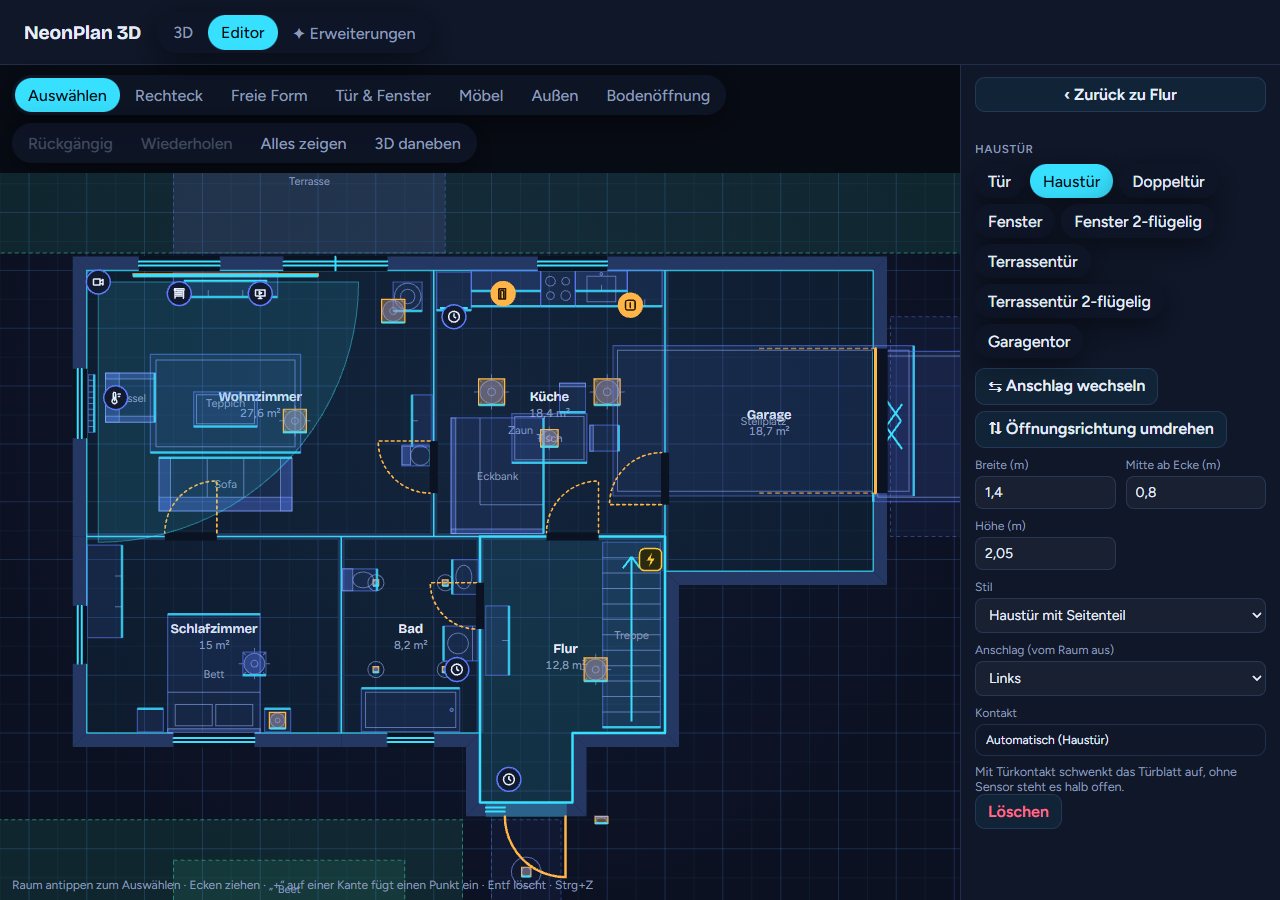
Sensors:
| Field | Effect in 3D |
|---|---|
| Cover | The blind moves in front of the window with the cover's position |
| Position sensor | For blinds whose position comes from a separate sensor, e.g. Homematic. Can be inverted |
| Contact | The door swings open, the window opens |
| Tilt contact | A second sensor that reports "tilted" |
| Contact second leaf | For double windows and doors |
| Garage door | A garage door follows a cover entity or a contact. Its open part lies under the ceiling |
NeonPlan 3D matches covers and contacts through the area automatically. You can change them by hand at any time.
4.8 Furniture

The Furniture tool opens the library with 40 built-in models in the sections Lights, Living, Dining, Kitchen, Sleeping, Bath & laundry and Work & other. Your installed furniture packs follow below. The search field filters all sections, sections fold open and closed. Hover over an entry for a small 3D preview.
Symbols on the entries:
- 💡 A lamp: it links to a light and switches in 3D.
- ⚡ An electric item: it takes an entity and a power sensor, e.g. a TV, a washing machine or a thermostat.
Placing and editing:
- Tap a room, then pick an entry. The item appears in the room.
- Drag to move it. Near a wall it turns its back to the wall and sits flush. Alt moves freely.
- The handle in front of the item turns it in 15° steps, the corners resize it.
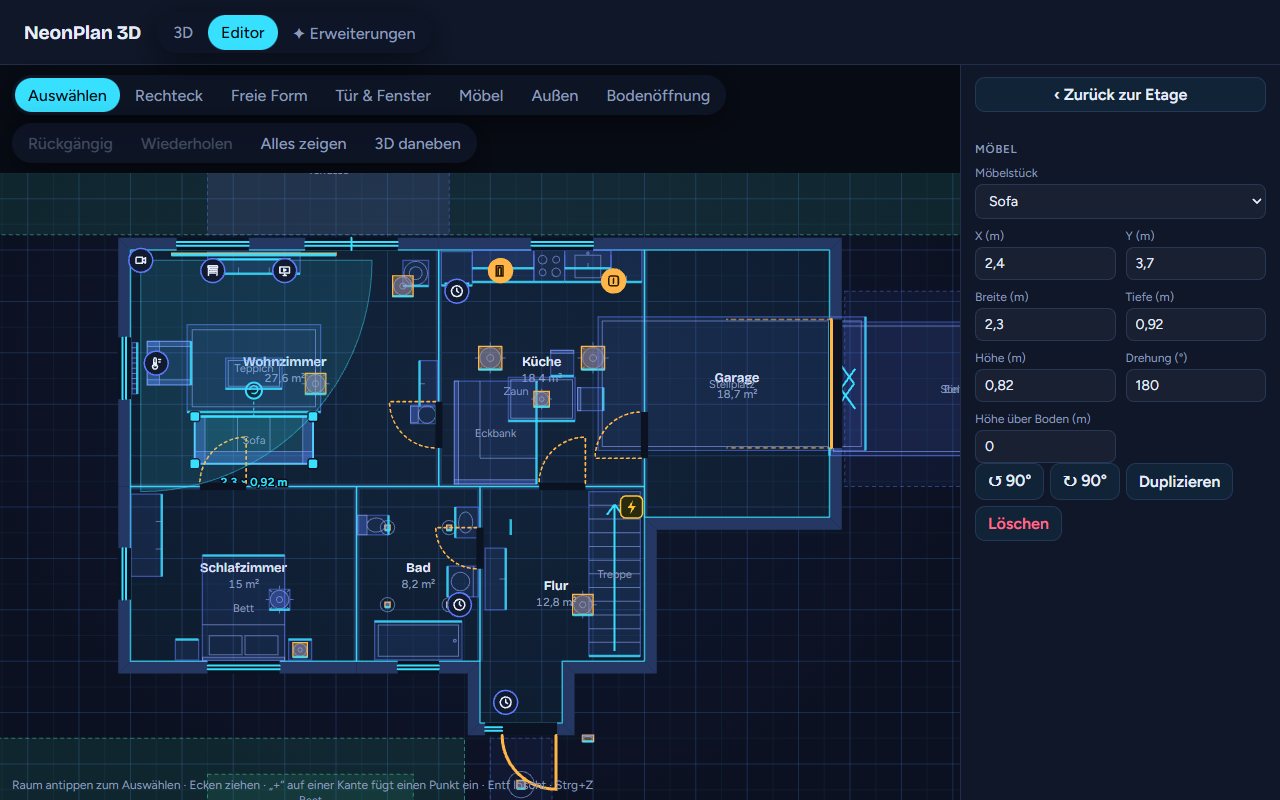
- On the right you set width, depth, height, rotation and Height above the floor. That is how a network cabinet or a shelf hangs on the wall. Automatic height resets it.
- Duplicate and Delete are there too.
4.9 Furnishing rooms
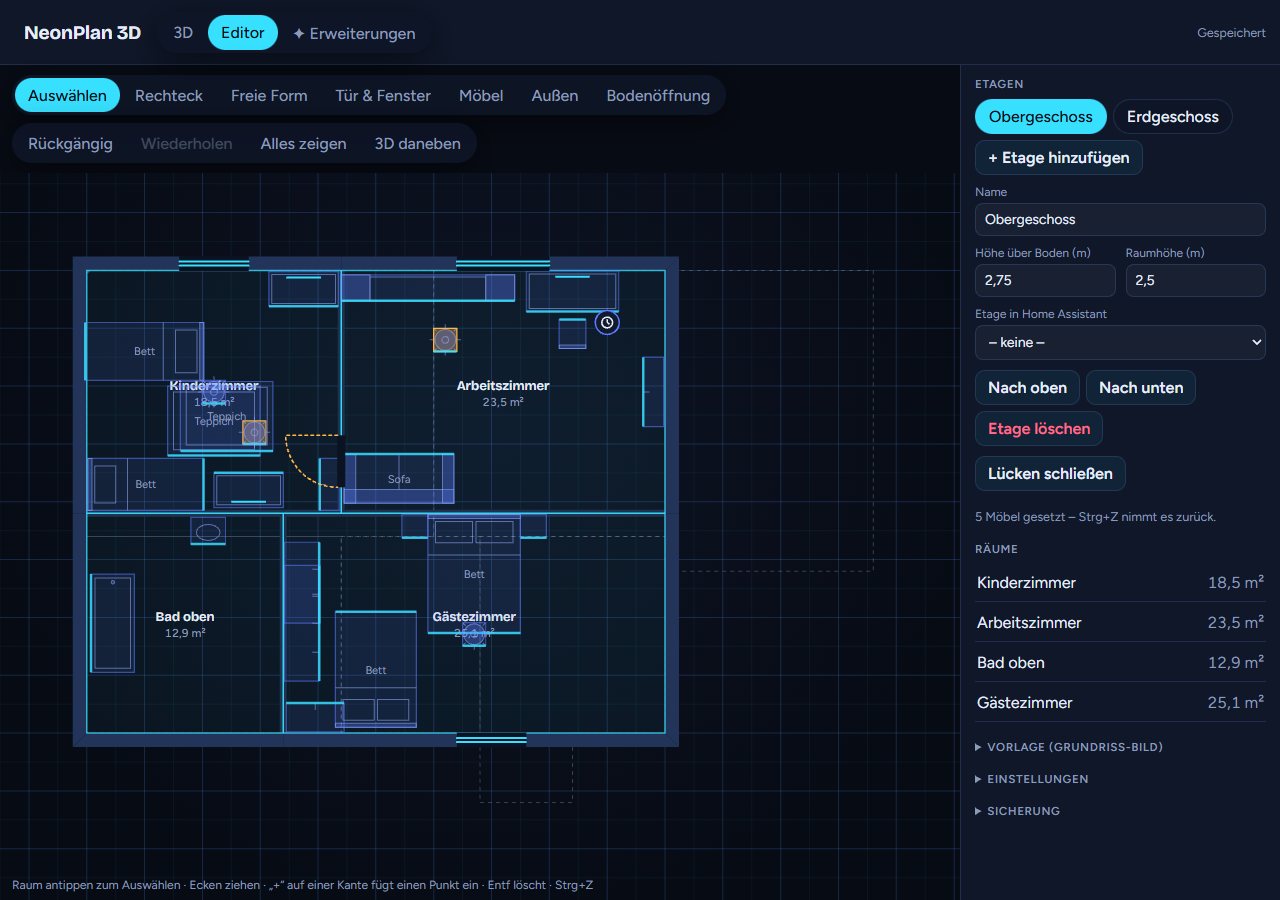
Furnish … on a room puts a whole set of furniture against the walls: kitchen row, L-shaped kitchen, bathroom, bedroom, living room, dining room, office, kids' room or hall. Lamps link to the area's lights. Adjust single items afterwards. Ctrl+Z takes the whole set back.
4.10 Devices
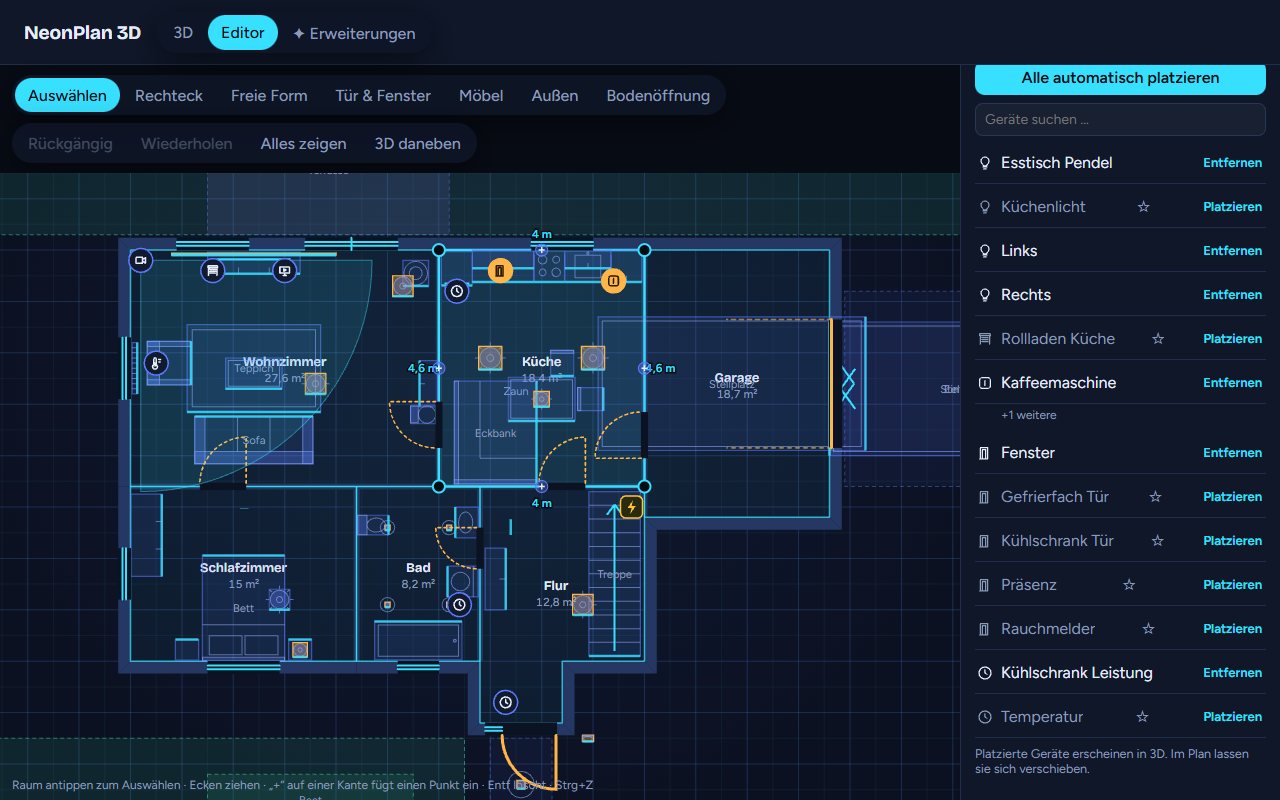
A room with an area lists all devices of that area on the right, grouped by device. The main entity comes first, further ones such as LED indicators or effects sit behind "+n more". A search field helps with big areas.
Sensors appear when they measure something for the room: temperature, humidity, CO₂ and air quality, power and energy, gas and water meters, illuminance and pressure. Meters without a device class count too when their unit fits (m³, l, kWh, lx). Battery and signal sensors stay out. The value shows the decimals set in Home Assistant. If a device is missing, check in Home Assistant that it is assigned to the room's area.
- Place puts a device into the room, Place all automatically places all main devices.
- Lights are placed as lamps from the library, so they glow in 3D.
- ☆ adds a device to the room panel of the 3D view without placing it.
- Drag a placed device to its spot in the plan.
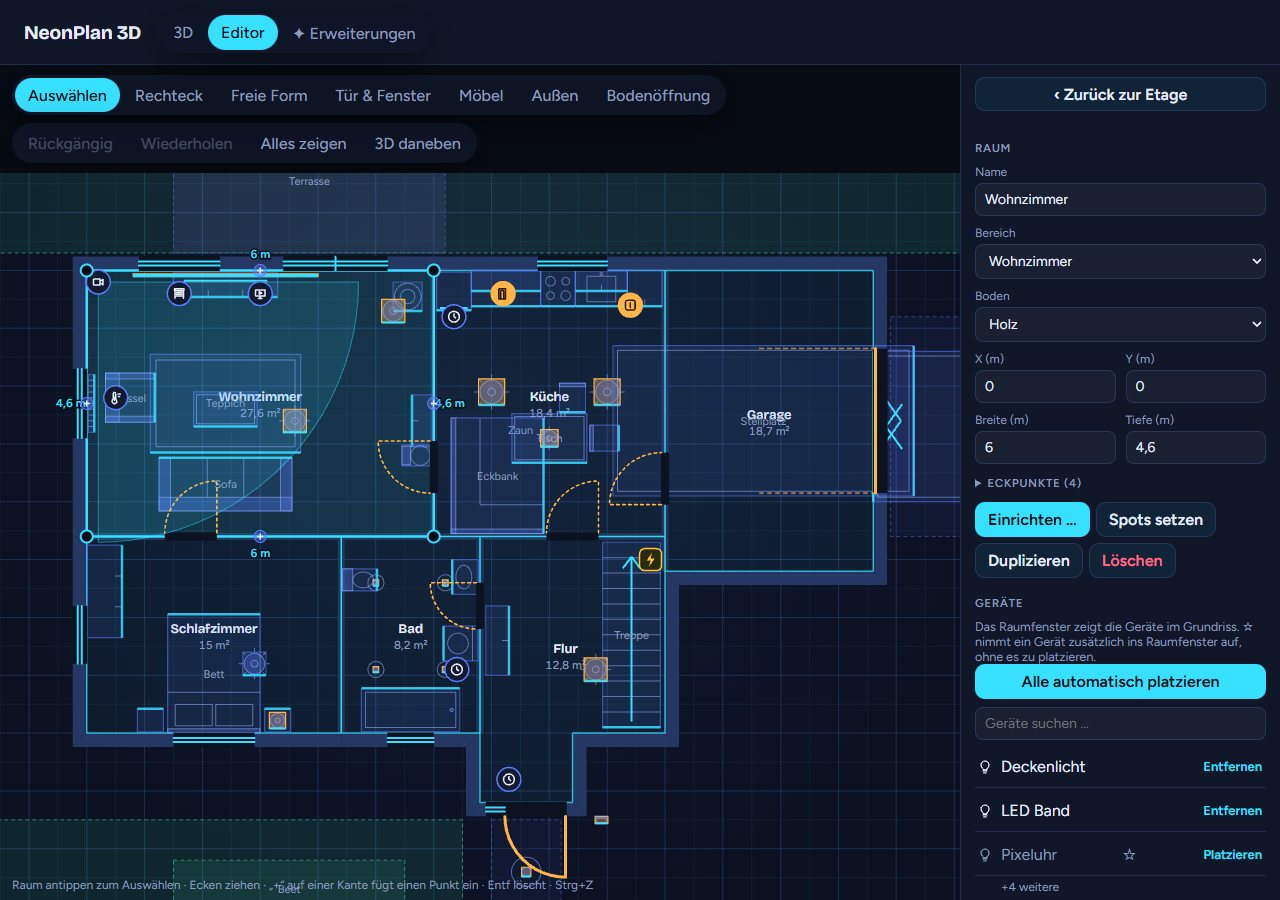
A selected device has:
- Marker height, rotation and, for lights, the mount: ceiling, floor, table or wall.
- Ask before switching: A tap in 3D, the quick menu and the room panel ask first. This protects, for example, a server switch from an accidental tap. A double tap on the room leaves this device out.
- Marker in 3D: Automatic follows the None / Important / All switch of the 3D view. Always show shows the marker with "Important" too, e.g. for a temperature sensor. Without watts leaves out the power, e.g. on a smart plug. Hide never shows a marker. With "None" all markers stay off.
- To room centre and Remove.
4.11 Lamps
Lamps are furniture with a linked light: ceiling light, downlight, surface spot, LED panel, pendant, floor lamp, uplight, table lamp, wall light, LED strip, path light and garden spot.
- The 3D model glows in the light's colour and brightness. The room's floor and walls are lit too, two coloured ceiling lights mix in between. Light reaches the next room only through doors.
- Colour effects such as a colour loop are animated in 3D.
- Table lamps stand on the item below, wall lights and LED strips snap to the wall, a pendant's height is how far it hangs below the ceiling.
- Height above floor: wall lights hang at 1.75 m by default, LED strips right under the ceiling. In the form you set a Height above floor of their own, e.g. for a strip under the wall cabinets or behind the TV unit. Automatic height resets it. A strip below 1 m (skirting board, behind a cabinet) shines up the wall, higher strips shine down. A strip below the cut height stays visible with cut walls.
- A switch works instead of a light too, e.g. a relay for the ceiling light.
- Several lamps may follow the same light.
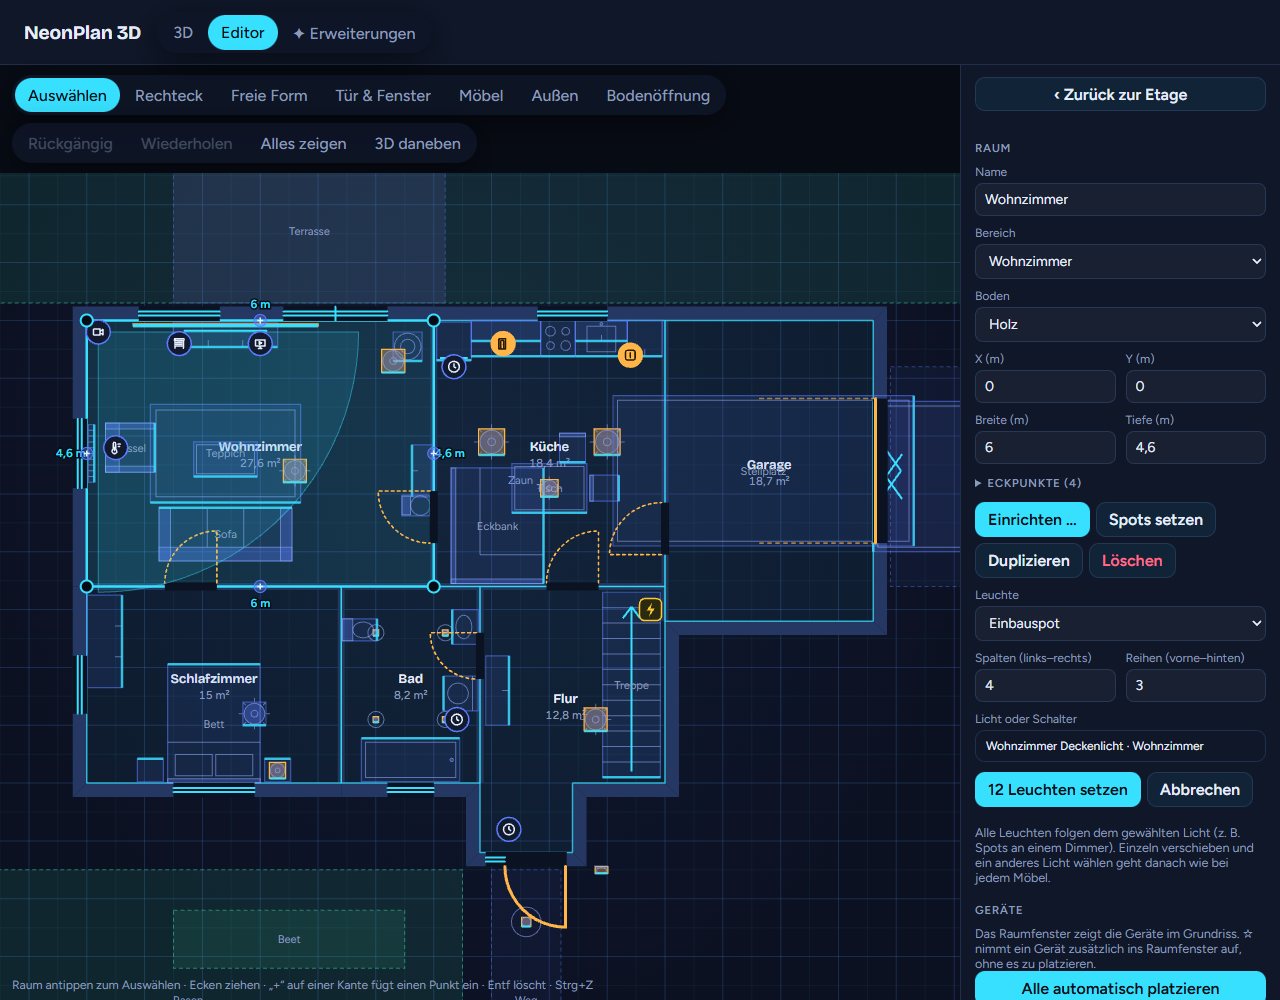
Place spots on a room lays out a grid of lamps that all follow one light, e.g. six downlights on one dimmer. Choose columns and rows first.
4.12 Electric furniture
TVs, media walls, desks with monitors, washing machines, dryers, dishwashers, radiators, robot vacuums and many pack items link to entities:
- Device or TV (media player or smart plug): A TV glows while it is on. An older TV on a smart plug simply takes the plug's switch; the screen glows while the plug is on, and a tap switches it. Washing machine, dryer and dishwasher glow while they run. A radiator with a thermostat glows while it heats.
- Power sensor (W): The item shows its watts.
- Ask before switching and Marker in 3D as with devices.
- Pictures by state on screens: a Pro add-on, see 6.3.
"Automatic" means NeonPlan 3D finds the matching entity in the area by itself.
4.13 Cameras
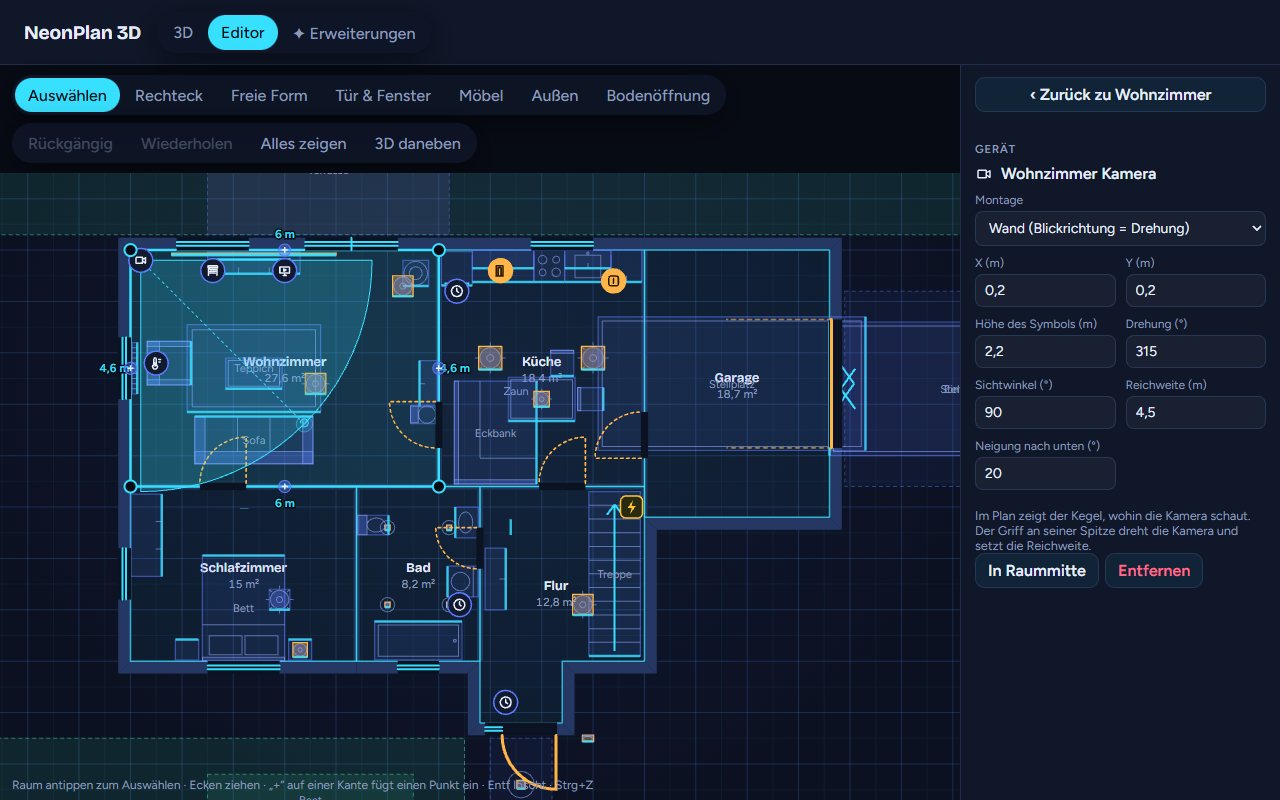
Place cameras like any device. Then:
- Mount: wall, looking along its rotation, or ceiling as a dome that sees all round.
- In the plan a wedge shows where the camera looks. The handle at its tip turns the camera and sets its reach at the same time.
- Field of view (°), Reach (m) and Tilt down (°) can be typed in as numbers.
In 3D the camera hangs as a small model on the wall or ceiling, its field of view lies on the floor as a wedge. When a motion or presence sensor of the camera reports motion, the wedge turns red.
4.14 Parking spots and vehicles
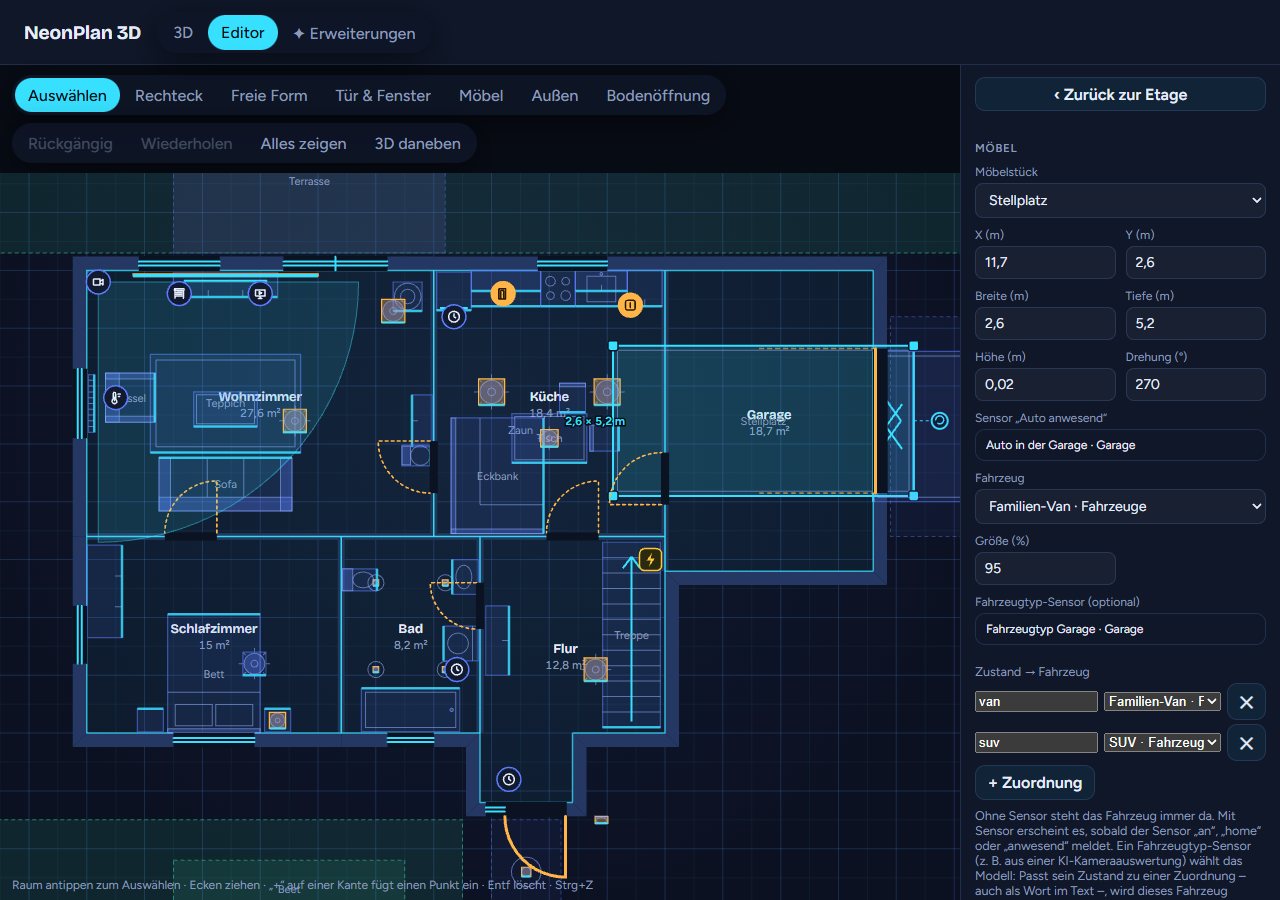
The item Parking spot in the Parking group marks where a car stands: in the garage, on the driveway or anywhere on the plot.
- Sensor "car present": a
binary_sensor,device_trackeror similar. While it reports a car, the vehicle is there. - Vehicle: the model from the "Vehicles" pack.
- Vehicle type sensor (optional): If a sensor reports which car is there, e.g. from an AI camera analysis, assign a model to each state.
- Size (%) fits the model to the spot. If the vehicle is taller than the room, the editor warns.
4.15 Robot vacuum
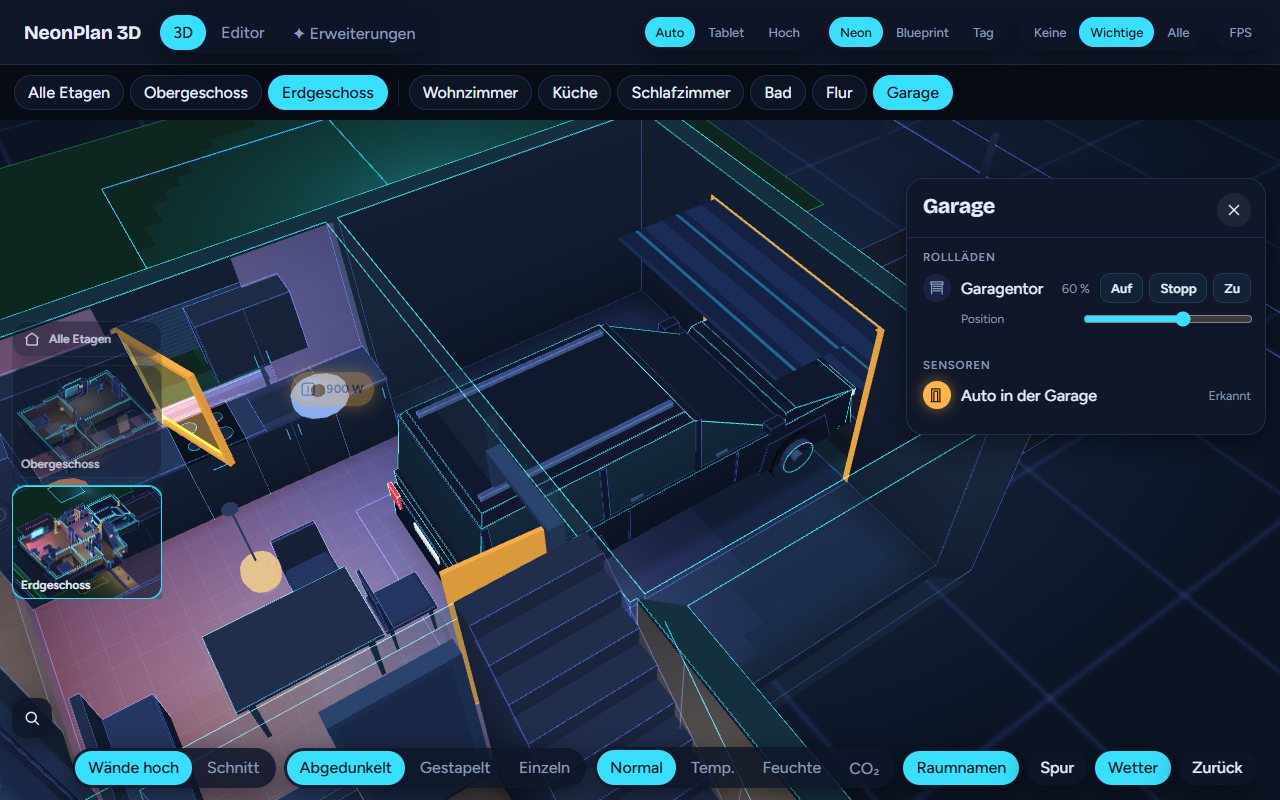
The robot vacuum item links to the vacuum entity. While the robot cleans, it drives lanes through the room of its dock in 3D and then returns. The lanes are simulated because Home Assistant usually does not know the real position.
4.16 Stairs and floor openings
- The Stairs from the library rise from the marked front edge towards the back. If they reach the floor above, they cut the stairwell into its floor.
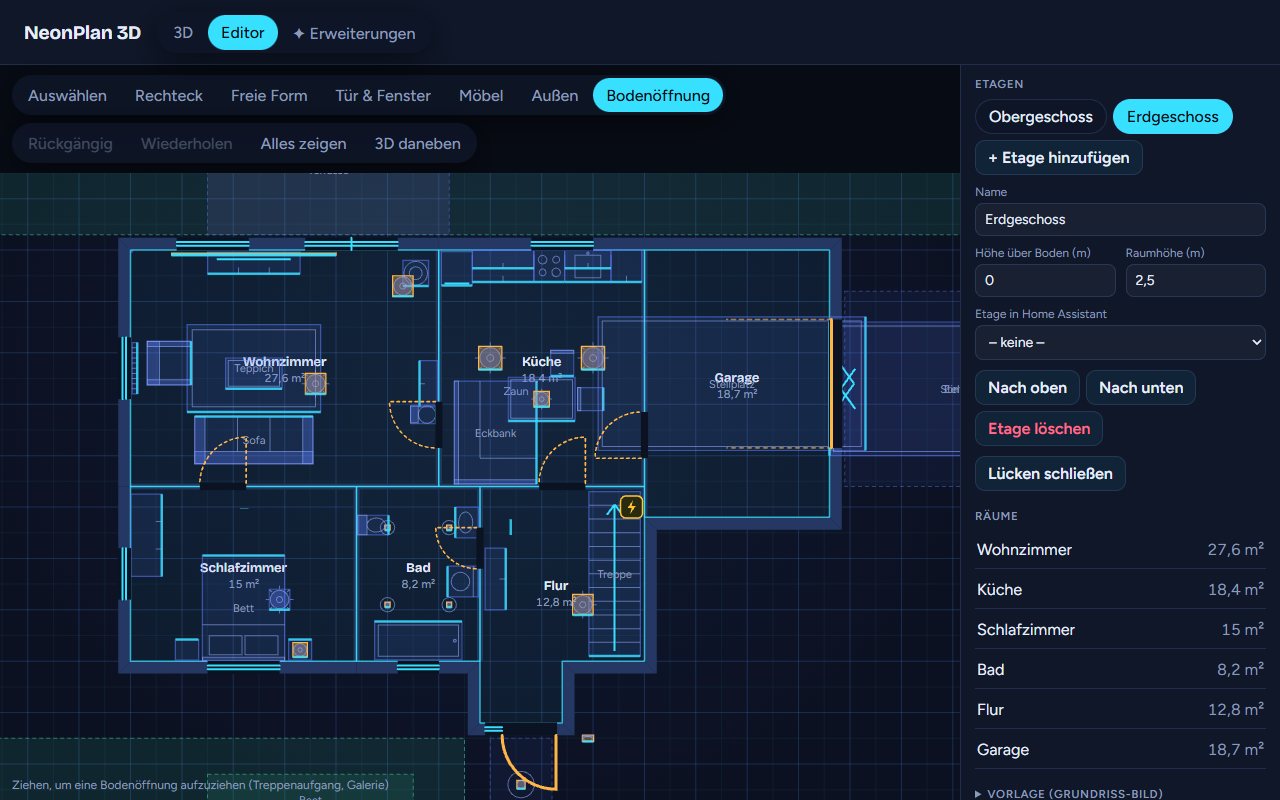
- The Floor opening tool draws a hole straight into a floor, e.g. above the staircase or for a gallery. From above you look through it. The opening must lie within one room.
- More stairs and railings come with the Stairs & railings pack.
4.17 Outdoor areas and outdoor lights
With Outdoor you draw lawn, terrace, path, driveway, pool, flower bed, hedge or fence. Path lights, garden spots and outdoor wall lights light the outdoor areas and the facade.
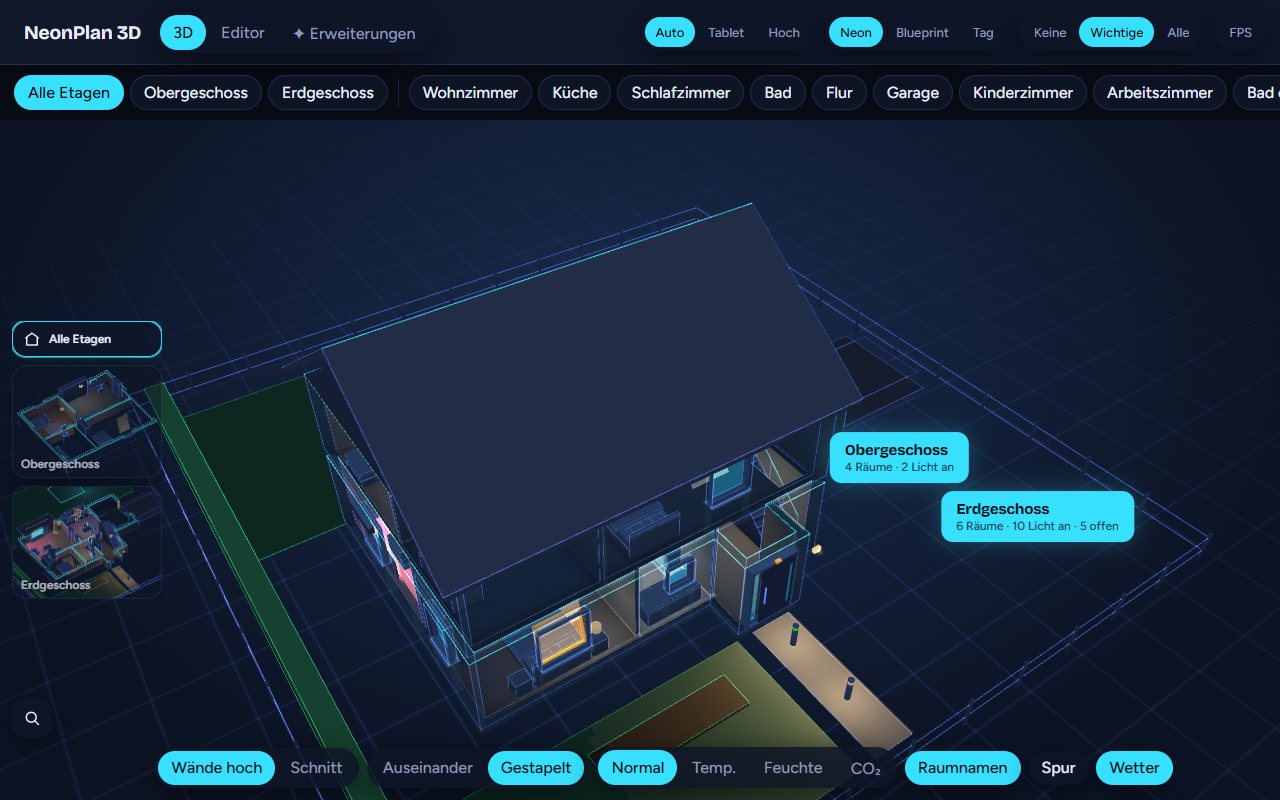
4.18 3D beside
3D beside shows the 3D view to the right of the plan. Every change appears there a moment later.
- Drag the divider between plan and 3D to change the ratio. The browser remembers it.
- At the top of the 3D half you switch between Tall walls and Cut.
- You can also tap and drag an item or device in the 3D half. A bar with width, depth, height, height above the floor, rotation and delete appears at the bottom.
- The sidebar folds away beside the 3D view. Small buttons at the right edge open it again, the pin keeps it open.